Tag: starter troubleshooting

  • Mold on Your Sourdough Starter vs Kahm Yeast: How to Tell and When to Toss It

    Mold on Your Sourdough Starter vs Kahm Yeast: How to Tell and When to Toss It

    You lift the lid on your sourdough starter and something looks off. A patch of fuzz. A strange skin across the top. A pool of dark liquid. Your stomach drops, because you’ve read enough kitchen horror stories to wonder whether the whole jar is now dangerous, or whether you just wasted weeks of feeding on something you have to pour down the drain.

    Take a breath, because most of the time what people panic about isn’t mold at all. Starters routinely grow harmless films and liquids that look alarming and are completely safe. But real mold does happen, and when it does the only correct move is to toss the jar. The whole skill is learning to tell the difference on sight and smell, and once you can, this stops being scary. Let’s diagnose exactly what you’re looking at.

    First, don’t panic, but do look closely

    Before you decide anything, get the jar into good light and really study the surface. Three very different things get lumped together under the word “mold,” and only one of them means the starter is done. What you’re trying to sort out is whether you’re seeing genuine mold (fuzzy, raised, colored spots), kahm yeast (a thin flat film), or plain hooch (a layer of liquid). Each looks distinct once you know the tells, and each has a completely different fix.

    Two starter jars side by side, one with fuzzy green and pink mold spots and one healthy and bubbly
    The difference at a glance: fuzzy raised colonies on the left mean toss it; a domed, bubbly, even surface on the right is a healthy starter.

    The single most useful question to ask is: is it flat, or is it fuzzy? Mold is three-dimensional. It grows up and out in fluffy, defined circles. The harmless look-alikes lie flat against the surface. That one distinction resolves the majority of panicked starter jars, so start there and then confirm with color and smell.

    What sourdough starter mold actually looks like

    Real mold is unmistakable once you’ve seen it clearly. It appears as fuzzy, raised colonies, usually in small round spots that spread outward, and it almost always carries color: shades of green, blue, black, or the especially unwelcome pink and orange. Those spots sit up off the surface like tiny bits of lint or cotton, and if you look closely you can often see the fuzzy texture that flat films never have.

    Close-up of fuzzy raised green, white and pink-orange mold colonies growing on a sourdough starter surface
    Real mold is fuzzy and raised, grows in defined round spots, and often shows color: green, black, pink, or orange. This is a toss-it sign.

    Mold typically takes hold on a starter that has been neglected, left too warm, exposed to open air for a long time, or contaminated by a dirty spoon or splashes of flour stuck high on the dry jar walls. Pink and orange growth in particular is a bacterial or mold contamination that is a hard stop. There is no scraping it off and carrying on. When you see fuzzy, colored, raised spots, the starter is compromised all the way through, even the paste that looks clean, because mold sends threads down into food you can’t see. That jar gets thrown out, which we’ll cover below.

    Kahm yeast: the harmless look-alike everyone fears

    Here is the growth that scares people the most and hurts them the least. Kahm yeast forms a thin, flat, wrinkly film across the surface, usually grayish-white or off-cream, sometimes with a faintly powdery or skin-like look. Crucially, it is flat. It does not fuzz up, it does not grow in raised circular colonies, and it does not show green, pink, or black color. It’s a wild yeast that thrives when a starter is a bit sluggish, sitting too warm, or going too long between feeds.

    A thin flat wrinkly white film of kahm yeast sitting flat on the surface of a sourdough starter
    Kahm yeast is the harmless look-alike: a thin, flat, wrinkly film with no fuzz and no color. It is unpleasant but not dangerous.

    Kahm is unpleasant and can throw a slightly funky, sometimes cheesy or nail-polish-adjacent smell, but it is not dangerous. You have two reasonable options. If the film is light, you can carefully skim it off the top, discard a generous portion of the starter beneath it, and begin feeding more frequently to outcompete it. If it keeps coming back, it’s usually a sign your starter is underfed or too warm, the same root cause behind a sluggish starter that won’t rise. Tightening up your feeding routine almost always clears it.

    Hooch and discoloration: usually just hunger

    The third thing people mistake for mold isn’t even solid. A layer of thin liquid pooling on top, clear, gray, amber, or occasionally darker, is hooch: alcohol and byproducts your starter produces when it has eaten through its food and gone hungry. It looks dramatic but it’s completely harmless. You simply stir it back in for a tangier result or pour it off for a milder one, then feed. We walk through exactly what the color of that liquid tells you in our guide to the hooch layer on your starter.

    A layer of clear amber hooch liquid sitting on top of a sourdough starter in a jar
    A layer of clear or gray liquid is hooch, not mold. It just means your starter is hungry, and you simply stir or pour it off.

    Discoloration on its own can also be benign. Hooch can tint the top of a starter gray or even brownish, and that darker paste underneath is usually fine once stirred. What you’re watching for is not a uniform color shift but those raised, fuzzy, spotty growths. A flat surface that’s simply gone a shade darker is a hungry starter, not a moldy one. When in doubt, this is where the nose earns its keep.

    The smell test, and when to just toss it

    Your nose is a genuinely reliable backup instrument. A healthy starter smells sharp, tangy, yeasty, sometimes beery or faintly like ripe fruit or vinegar. All of that is normal and good. What should stop you is a smell that reads as genuinely rotten, putrid, or foul in a garbage-y way, rather than sour. That kind of stench, especially paired with any pink or orange tint, means the jar has gone off. Trust it.

    So here’s the clean decision rule. Toss the entire starter and start over if you see any fuzzy raised mold, any green, black, pink, or orange growth, or if it smells truly rotten rather than sour. Don’t try to scoop mold off and save the rest; the contamination runs deeper than the visible spots, and a starter is cheap to rebuild while a foodborne illness is not. You can save it if what you have is flat kahm yeast, a layer of hooch, or simple discoloration on a starter that still smells sour. In those cases, discard down to a small amount of the cleanest paste, move it to a clean jar, and feed on a tight schedule. A neglected but mold-free starter is remarkably resilient, and our walkthrough on reviving a neglected starter covers exactly how to nurse a sad one back to strength.

    How to stop mold coming back

    Prevention is mostly hygiene and rhythm. Always feed with a clean spoon and wipe the inside walls of the jar so stray dried flour and paste up high can’t grow anything. Move your starter to a fresh, clean jar every week or so rather than letting crust build up around the rim. Keep the lid resting on or loosely closed, not screwed down airtight, so gases escape without inviting a long open-air exposure.

    A healthy freshly fed sourdough starter domed and bubbly in a clean glass jar by a window
    The goal after a clean restart: a fresh jar, a smooth even surface, and a vigorous rise with no film and no fuzz.

    Feed on a consistent schedule and don’t let the jar sit hungry and warm for days, which is exactly the condition kahm and mold love. If you’re going to be away or baking less often, the safest home for a starter is the fridge, where the cold dramatically slows everything down; our guide to storing your starter through breaks and vacations lays out how to park it safely and wake it back up. A well-fed starter kept clean and cool is a genuinely difficult place for mold to gain a foothold.

    The reassuring truth is that a fuzzy, colored, foul jar is rare, and nearly everything else you’ll see, films, liquids, funky sour smells, is normal starter behavior you can fix in a feed or two. Learn the flat-versus-fuzzy tell and you’ll never lose a good starter to a false alarm again.

    Want to see a moldy jar next to kahm yeast and hooch side by side so you’ll always recognize them? The full visual walkthrough lives on the LoafLovers YouTube channel, and our free sourdough troubleshooting guide covers the rest of the starter rescues for when you’re staring at a jar and need the answer right now. No hard sell, just the fix.

    Related Reading

  • Gluten-Free Sourdough Starter: How to Build One That Actually Rises

    Gluten-Free Sourdough Starter: How to Build One That Actually Rises

    A gluten-free sourdough starter will bubble, rise, and raise a loaf just like a wheat one — but it looks and behaves differently, and that difference is exactly what trips people up. It ferments faster, it doesn’t go stretchy and stringy, and it often separates into a watery layer that makes first-timers think they’ve killed it. They haven’t. If your gluten-free starter is sluggish, soupy, or just refusing to lift, the cause is almost always one of a handful of simple things — and every one of them is fixable. Here’s how to build a gluten-free starter from scratch that genuinely works, and how to read it when it stalls.

    A glass jar of bubbly, risen gluten-free brown rice sourdough starter with a rubber band marking its earlier level
    A healthy gluten-free starter: bubbly, domed, and clearly risen above the band — no gluten required.

    First, reset your expectations

    Most gluten-free starter “failures” aren’t failures at all — they’re a baker expecting a wheat starter and panicking when they don’t get one. So before anything else, know what normal looks like for gluten-free:

    • It ferments faster. Gluten-free flours are often more available to the yeast and bacteria, so a gluten-free starter can peak and fall sooner than a wheat one. What looks like “it collapsed, it’s dead” is usually just “you missed the peak.”
    • It’s not stretchy. There’s no gluten, so don’t look for that elastic, webby pull. A healthy gluten-free starter is more like a thick, bubbly batter than a stretchy dough.
    • It separates. A layer of greyish liquid on top — the same hooch you’d see on a wheat starter — is common and simply means it’s hungry. It is not mould and not the end.
    • It can smell sharp. Tangy, yeasty, a little sour or beery is all good. Only a truly foul, rotten, or pinkish/fuzzy jar is a problem.

    Hold those four things in mind and half the worry disappears. Now let’s build one.

    Choose the right flour — this is the biggest lever

    The single most important decision is your flour, because whole-grain gluten-free flours carry far more of the wild yeast and bacteria you’re trying to capture. Reach for whole-grain brown rice flour, sorghum, buckwheat, teff, or millet. These get a starter going reliably. Avoid trying to build a starter on refined starches alone — white rice flour, tapioca, potato starch, or a commercial cup-for-cup blend heavy in starches. Those blends are wonderful for baking the actual bread later, but as a starter base they’re stripped of the good stuff and tend to give you a slow, weak, watery jar.

    Three bowls of gluten-free flours — brown rice, sorghum, and buckwheat — with a wooden scoop
    Whole-grain gluten-free flours like brown rice, sorghum, and buckwheat carry the wild yeast that gets a starter going.

    Brown rice flour is the most forgiving starting point and the one I’d suggest for a first attempt. If you want a livelier, faster starter, blending in some buckwheat or sorghum adds real fermenting power. Pick one approach and stay consistent for the first week or two — a starter likes routine while it’s establishing itself.

    Build it, day by day

    Here’s a simple, robust method. You’ll need your whole-grain gluten-free flour, water, and a clean jar.

    Day 1. Mix roughly equal weights of flour and water — about 50g flour to 50g water — into a thick batter. Use filtered or dechlorinated water if your tap water is heavily chlorinated, since chlorine can slow the wild microbes you’re trying to encourage. Cover loosely (a lid resting on top, or a cloth) and leave it somewhere warm.

    Days 2–4. Once a day, discard about half and feed it fresh — another 50g flour and 50g water, stirred in well. You’ll likely see the first small bubbles somewhere around day 2 or 3. Don’t be alarmed if there’s an early burst of activity that then goes quiet; that first flush is often the wrong bacteria, and the jar frequently stalls for a day before the real yeast takes hold. Keep feeding.

    Days 5–7 and on. As it strengthens, move to feeding twice a day if it’s rising and falling quickly, and watch for a real pattern: it should predictably bubble up, dome, and then fall a few hours after each feed. That reliable rise-and-fall — not a calendar date — is how you know it’s ready. Many gluten-free starters are usable in about a week; some take ten days or two weeks. Warmth and good flour speed it up.

    How to know it’s actually ready

    Two signs together tell you a gluten-free starter is strong enough to bake with. First, it reliably doubles (or close to it) within a few hours of feeding — mark the level with a rubber band so you’re measuring, not guessing. Second, it’s full of bubbles throughout, not just a skin of foam on top. If you want the classic confirmation, the float test can work: drop a small spoonful into water, and a ripe, gas-filled starter will often float. It’s a little less reliable for gluten-free than for wheat, so trust the consistent rise most of all.

    A spoon lifting thick gluten-free starter showing a network of small and large bubbles throughout
    The texture to look for: an even network of bubbles all through the starter, not just a few on top.

    When it stalls: the quick diagnosis

    If your starter is being stubborn, run through these causes in order — it’s nearly always one of them.

    It’s too cold. This is the number-one culprit. Wild fermentation slows dramatically in a cool kitchen. Gluten-free starters are happiest somewhere around comfortable room temperature and warmer; a cold counter can stretch a 5-day build into a frustrating three weeks. Find a cozy spot — on top of the fridge, in an oven with just the light on, near a warm appliance — and you’ll often see it wake up within a day. Warmth is the fix people overlook most.

    It’s watery and separated. A soupy jar with liquid on top is a hungry, under-fed starter, not a dead one. Pour off the liquid (or stir it back in for extra tang), then thicken and revive it by feeding a touch more flour than water for a few feeds. If yours keeps going watery, your flour may be too starch-heavy — switch to a whole-grain like brown rice or buckwheat. This is the same story as hooch on any sourdough starter: liquid means feed me.

    It bubbled, then went flat and quiet. Usually you’re just past the early false start, or you’re missing the peak because it’s fermenting fast. Feed on a consistent schedule, and if it’s peaking and collapsing between feeds, feed it more often or use a slightly larger flour-to-starter ratio so it takes longer to run out of food.

    It smells like nail polish or alcohol. That acetone or boozy smell is a starved starter crying out for food — exactly the same signal you’d read on a wheat starter. Feed it more frequently and it’ll settle. Our full walkthrough on reviving a neglected starter that smells like nail polish applies just as well to a gluten-free jar.

    Left: a flat gluten-free starter with grey liquid on top. Right: the same starter thick and bubbling after a feed.
    Watery liquid on top is hunger, not failure. A feed turns the flat, separated jar on the left into the active one on the right.

    Nothing at all after a week. If it’s warm, whole-grain, and dechlorinated and you still have a dead-quiet jar past day seven to ten, the two usual suspects are chlorinated water or too-refined flour. Switch to filtered water and a fresh bag of whole-grain gluten-free flour, and essentially start the feeding cycle again. And if it’s genuinely refusing to rise at all, many of the underlying reasons overlap with any sluggish starter that won’t rise — work through those too.

    Keeping it alive once it works

    A mature gluten-free starter is easy to keep. If you bake often, leave it at room temperature and feed it once or twice a day. If you bake occasionally, keep it in the fridge and feed it about once a week — pull it out, give it a feed or two to wake up, and use it at its peak. Because gluten-free starters ferment quickly, they can get very sour if neglected; a fridge slows them down and keeps that in check. Always keep a little back after baking, and you’ll never have to build one from scratch again.

    One honest note: a gluten-free starter tends to be a bit more delicate and quicker to swing than a wheat one, so consistency — same flour, regular feeds, a warm home — matters more. Give it that, and it’ll reward you with a lively, dependable ferment that lifts a real gluten-free loaf.

    A jar of gluten-free starter kept warm on a shelf beside a linen towel and a small thermometer
    Warmth is the quiet ingredient — a cozy spot around room temperature keeps a gluten-free starter thriving.

    You’ve got this

    A gluten-free sourdough starter isn’t harder than a wheat one — it’s just different, and now you know how to read it. Use whole-grain flour, keep it warm, feed it on a rhythm, watch for a reliable rise, and treat watery or smelly stages as simple hunger rather than disaster. Do that, and in a week or so you’ll have a bubbling jar ready to bake with.

    If you’d rather see exactly what a healthy gluten-free starter looks like at each stage — the bubble texture, the peak, the feed — the full step-by-step is on the LoafLovers YouTube channel, where the visual cues are so much easier to catch on video than in words. And if you’d like it all in one place, grab our free sourdough troubleshooting guide and we’ll send the starter checklist straight to your inbox. Warm jar, good flour, a little patience — that’s the whole secret.

    Related Reading

  • Hooch on Your Sourdough Starter: What the Liquid Means and Exactly What to Do

    Hooch on Your Sourdough Starter: What the Liquid Means and Exactly What to Do

    You lift the lid, and there it is: a thin layer of grayish liquid sitting on top of your starter, sometimes with a smell somewhere between beer and nail polish. It looks like something has gone wrong. Your first instinct is to panic and assume the starter is dead or spoiled.

    It almost certainly is not. That liquid is called hooch, and it is one of the most common things a starter does. The good news: it is not a crisis, it is a message. Once you can read what it is telling you, you know exactly what to do – and how to stop it happening in the first place.

    A glass jar of sourdough starter with a thin layer of gray hooch liquid pooled on top
    Hooch is that thin liquid layer on top – a hungry starter’s way of telling you it is overdue for a feeding.

    What Hooch Actually Is

    Hooch is a layer of liquid that separates out and rises to the top of a starter (occasionally it sinks or pools in the middle instead). It is mostly water, along with a small amount of alcohol and acids produced by the yeast and bacteria in your starter as they ferment.

    Here is the plain-language version of what happened: your starter ran out of food. The wild yeast and bacteria ate through the available flour, kept fermenting, and as a byproduct released alcohol and acid. That is the sharp, boozy, sometimes acetone-like smell. The liquid is simply the visible sign that fermentation went long and hard without a fresh meal.

    So hooch is not mold. It is not rot. It is not a sign you did something unforgivable. It is a hungry starter telling you it is overdue.

    The One Thing Hooch Almost Always Means

    Ninety percent of the time, hooch means the same thing: your starter is underfed relative to how warm it is and how often you feed it.

    That can happen for a few reasons, and they usually overlap:

    • Too long between feedings. You fed it, life happened, and it sat for a day or three past its window.
    • It is warm. Heat speeds fermentation. A starter that is fine on a 68 degree counter can burn through its food and throw hooch in half the time during a hot week.
    • The feeding ratio is too small. If you feed a big jar of starter a tiny amount of flour, it eats through it fast and gets hungry again quickly.

    A starter kept in the fridge will also form hooch over a week or two – that is completely normal and expected. Cold slows the microbes down, but it does not stop them, so a fridge starter that has been resting for a while will often have a liquid layer when you pull it out. That is not neglect, that is just storage.

    Two jars compared: a healthy risen starter on the left and a flat starter with hooch on the right
    Healthy and hungry, side by side: the flat, liquid-topped jar on the right needs feeding, not rescuing.

    Read the Hooch Before You Act

    Before you decide what to do, look at two things: the color of the liquid and the smell. They tell you how hungry the starter got.

    Thin, light, and slightly tangy or beery. This is a mildly hungry starter. It is in good shape and just wants feeding. The hooch is often clear to pale.

    Darker – gray, brown, or almost black – with a sharp alcohol or acetone smell. This is a very hungry starter that has been left much too long. The starter is still almost always fine and revivable, but the flavor has gone extremely acidic and boozy, and you do not want all of that back in your dough.

    The color is a fuel gauge, not a spoilage alarm. Darker just means hungrier and more acidic. As long as you see no fuzzy mold (pink, orange, or green fuzz) and no truly foul, rotting smell, the starter itself is healthy underneath.

    Pour It Off, or Stir It In?

    This is the question everyone actually wants answered, and the honest answer is: it depends on the hooch you just read.

    Stir it in when the hooch is thin, light-colored, and smells normally tangy. It is mostly water plus a little acid and alcohol, and stirring it back adds a touch of extra sourness and hydration. Many bakers who like a tangier loaf do this on purpose.

    Pour it off when the hooch is dark and smells sharply of alcohol or acetone. In that case you do not want to fold all that harsh acidity back into the culture – pour off the liquid, then feed. You will lose a little sourness and gain a cleaner, more balanced starter.

    Either way, the pour-off-or-stir-in decision changes flavor at the margins. It does not save or kill the starter. The feeding that comes next is what actually matters.

    A hand pouring the hooch liquid off the top of a sourdough starter jar
    Dark hooch and a sharp smell? Pour it off before feeding rather than stirring it back in.

    The Fix: Feed It Back to Health

    Whether you stirred or poured, the recovery is the same simple sequence. If the starter has been badly neglected, you may need to repeat it once or twice.

    1. Discard down to a small amount. Keep only a spoonful or two (roughly 20 to 50 grams). Feeding a smaller amount with a generous ratio is what pulls a hungry starter back fast.
    2. Feed it a strong ratio. A 1:5:5 feeding – one part starter to five parts flour to five parts water by weight – gives it plenty of fresh food. For a very hungry, dark-hooch starter, this generous ratio is exactly what it needs.
    3. Keep it warm. Somewhere around 75 to 80 degrees helps it wake up and rise predictably.
    4. Watch for the rise, then feed again. Once it roughly doubles and looks bubbly and domed, feed it again. Two or three feedings on this rhythm will bring even a sad, hooch-covered starter back to a healthy, reliable rise.
    A spoon stirring a light layer of hooch back into a pale sourdough starter
    A thin, light hooch with a normal tang can simply be stirred back in – it is extra flavor and hydration.

    How to Stop Hooch Coming Back

    Hooch is not something you fix once – it is something you prevent with a rhythm. A few small habits and it stops showing up uninvited:

    • Feed on a schedule that matches your temperature. On a warm counter, that may mean twice a day; cooler, once a day. If you are not baking often, keep the starter in the fridge and feed it roughly once a week.
    • Feed a bigger ratio if you keep forgetting. A 1:5:5 feeding buys the starter far more time before it gets hungry than a 1:1:1 does.
    • Store it cold when you are not baking. The fridge dramatically slows fermentation, so a well-fed starter can rest for a week or two with only mild hooch.
    • Mark the level. A rubber band around the jar at feeding height tells you at a glance whether it rose and fell – so you learn your starter’s real timing instead of guessing.

    Do that, and a liquid layer becomes a rare, no-big-deal event rather than a recurring scare.

    When Hooch Is Not the Whole Story

    Hooch itself is harmless. The only time to actually worry is if you see something else alongside it: fuzzy mold in pink, orange, or green, or a pink or orange streaky slime. Real mold means it is time to throw that starter out and begin again (or fall back to a dried backup).

    Plain hooch, even dark and stinky hooch, is not that. It is a hungry starter with a story to tell, and now you can read it: pour off or stir in based on the smell, feed it strong and warm, and set a rhythm so it does not happen again.

    Because this is genuinely easier to see than to read, the full feeding-and-reviving routine lives on the LoafLovers YouTube channel – and you can grab our free sourdough troubleshooting guide to keep the whole starter-rescue checklist on hand for the next time you lift the lid to a surprise. Feed it, and let it come back to life.

    Related Reading

  • How to Revive a Neglected Sourdough Starter (Even If It Smells Like Nail Polish)

    How to Revive a Neglected Sourdough Starter (Even If It Smells Like Nail Polish)

    We need to talk about the jar in the back of your fridge. You know the one. It was a bubbling, happy starter once, and then life happened – a busy month, a holiday, a stretch where baking bread was the last thing on your mind. Now it is a sullen grey mass under a layer of dark liquid, and every time you open the fridge it stares at you with quiet reproach.

    Here is the good news, and it is genuinely good: you almost certainly have not killed it. Sourdough starters are far tougher than the internet’s fussy feeding schedules make them sound. A neglected starter is not dead – it is dormant and hungry. Unless something has gone truly wrong (and we will cover how to tell), a few days of patient feeding will bring it roaring back. Do not throw it out yet.

    A neglected sourdough starter jar with a layer of dark grey hooch on top

    First, the smell test – and what nail polish means

    Pull the jar out and take a breath. If it smells sharp and boozy, or specifically like nail polish remover – that acetone tang – do not panic. That is one of the most common and most misread signs of a neglected starter, and it means exactly one thing: your starter is starving. The yeast and bacteria have eaten all the available flour and, in their hunger, produced alcohol and acetone-like compounds as byproducts. It is not a death smell. It is a “feed me” smell.

    A sharp, sour, vinegary, or beery smell is all in the normal range for a hungry starter. What you are listening for as a warning is a genuinely rotten, putrid, or off smell paired with visible mold – but we will get to the true red lines below. For now, if it just smells strong and boozy, breathe easy: this one comes back.

    Deal with the hooch

    That dark liquid on top has a name: hooch. It is alcohol the starter produced when it ran out of food, and its color – from pale grey to nearly black – is normal and harmless. Hooch is simply another sign your starter has been hungry for a while.

    Pouring the grey hooch liquid off the top of a starter jar

    You have two choices. You can pour it off for a slightly milder, less sour result, or stir it back in for a tangier one. When you are reviving a neglected starter, pouring it off is usually the cleaner move – it takes some of the accumulated sharpness with it. Tip off the liquid, then look at what is underneath. A grey, unappetizing paste is completely expected. Scrape off any hardened, dried crust around the rim and get down to the softer starter beneath.

    The revival: small, frequent feedings

    Reviving a starter is not about one dramatic rescue feeding – it is about consistency. Here is the routine that works on almost any dormant starter:

    Feeding a small amount of old starter with fresh flour and water in a clean jar

    • Take only a little. Scoop a small spoonful – about a tablespoon – of the old starter into a clean jar. Discard the rest. This matters: a small amount of tired starter fed with a lot of fresh flour recovers far faster than trying to resuscitate the whole sad mass at once. You are diluting the acidity and giving the surviving microbes a fresh, uncrowded buffet.
    • Feed it generously. Add equal weights of fresh flour and lukewarm water – a common ratio is 1 part starter to 5 parts each of flour and water by weight for a neglected jar. Stir to a thick-batter consistency. Cover loosely and leave it somewhere warm, ideally around room temperature or a little warmer.
    • Feed it twice a day. Roughly every 12 hours, repeat: keep a small amount, discard the rest, feed with fresh flour and water. Warmth and regular meals are the whole secret.

    For the first day or two you may see almost nothing – maybe a few shy bubbles. Do not lose faith. Somewhere around day two or three, you will notice it start to dome, bubble, and smell less like acetone and more like pleasant, yeasty bread. That is the turn. Keep feeding.

    How to know it is truly back

    A revived starter is ready to bake with when it does one thing reliably: it doubles in size within about 4 to 8 hours of a feeding, and does it again the next day. Bubbly and risen, then predictably risen again – that consistency is the real test, not a single lucky rise.

    A revived bubbly sourdough starter risen to a rubber band marker on the jar

    A quick confidence check is the float test: drop a small spoonful of active starter into water. If it floats, it is full of gas and ready to leaven a loaf. If it sinks, give it another feeding or two – it is close, just not quite there.

    When to actually let it go

    Almost every neglected starter comes back. There is really only one situation where you should give up on it: visible mold. Fuzzy spots – pink, orange, black, or green fuzz – or streaks of pink or orange on the surface mean it is time to throw the whole thing out, jar and all, and start fresh. That is not hunger; that is contamination, and no amount of feeding fixes it safely.

    Hooch, grey color, a boozy or acetone smell, a hard dried crust, weeks of neglect – none of those are death sentences. Only genuine mold is. If in doubt between “strong smell” and “rotten,” trust that a starving starter smells sharp but not foul.

    A golden round sourdough loaf cooling beside a healthy starter jar

    So go rescue the jar in the back of your fridge. Pour off the hooch, take a spoonful, feed it small and often, and give it a warm spot and a few days of patience. Sourdough has survived world wars, migrations, and countless forgetful bakers – yours can survive a busy month. Before long it will be bubbling over the rim again, and you will be back to the far happier problem of what to do with all that discard.

    Related Reading

  • Sourdough Starter Not Rising? 7 Reasons It’s Sluggish (and How to Fix Each One)

    Sourdough Starter Not Rising? 7 Reasons It’s Sluggish (and How to Fix Each One)

    You stir the jar, screw the lid down loose, and set it on the counter with real hope this time. Hours later it looks exactly the same: flat, dense, maybe a few sad bubbles clinging to the glass. No dome. No doubling. Just a pale paste that refuses to do the one thing sourdough starters are supposed to do. Before you tip it down the drain and mutter that you are simply not a bread person, take a breath. A starter that will not rise is almost never dead. It is sluggish, and sluggish has causes you can fix, usually within a day or two. Here are the seven real reasons your starter is stalling, and exactly what to do about each one.

    First, though: your starter is almost certainly not dead. Wild yeast and the lactic bacteria that make sourdough work are astonishingly hardy. They survive weeks of neglect, cold fridges, and being ignored under a layer of grey liquid. What looks like death is nearly always dormancy – the organisms are there, they just do not have the warmth, the food, or the time to show off. This is also where the famous float test leads people astray. Dropping a spoonful in water and hoping it floats is a rough gas check, not a life-or-death verdict; a healthy starter past its peak will sink, and a gassy but weak one can float. Ignore it as a pass-fail exam. The real signal of a thriving starter is simpler: it reliably doubles in volume and smells pleasantly tangy within a set window after feeding. If it is not doing that yet, work through the reasons below rather than starting over.
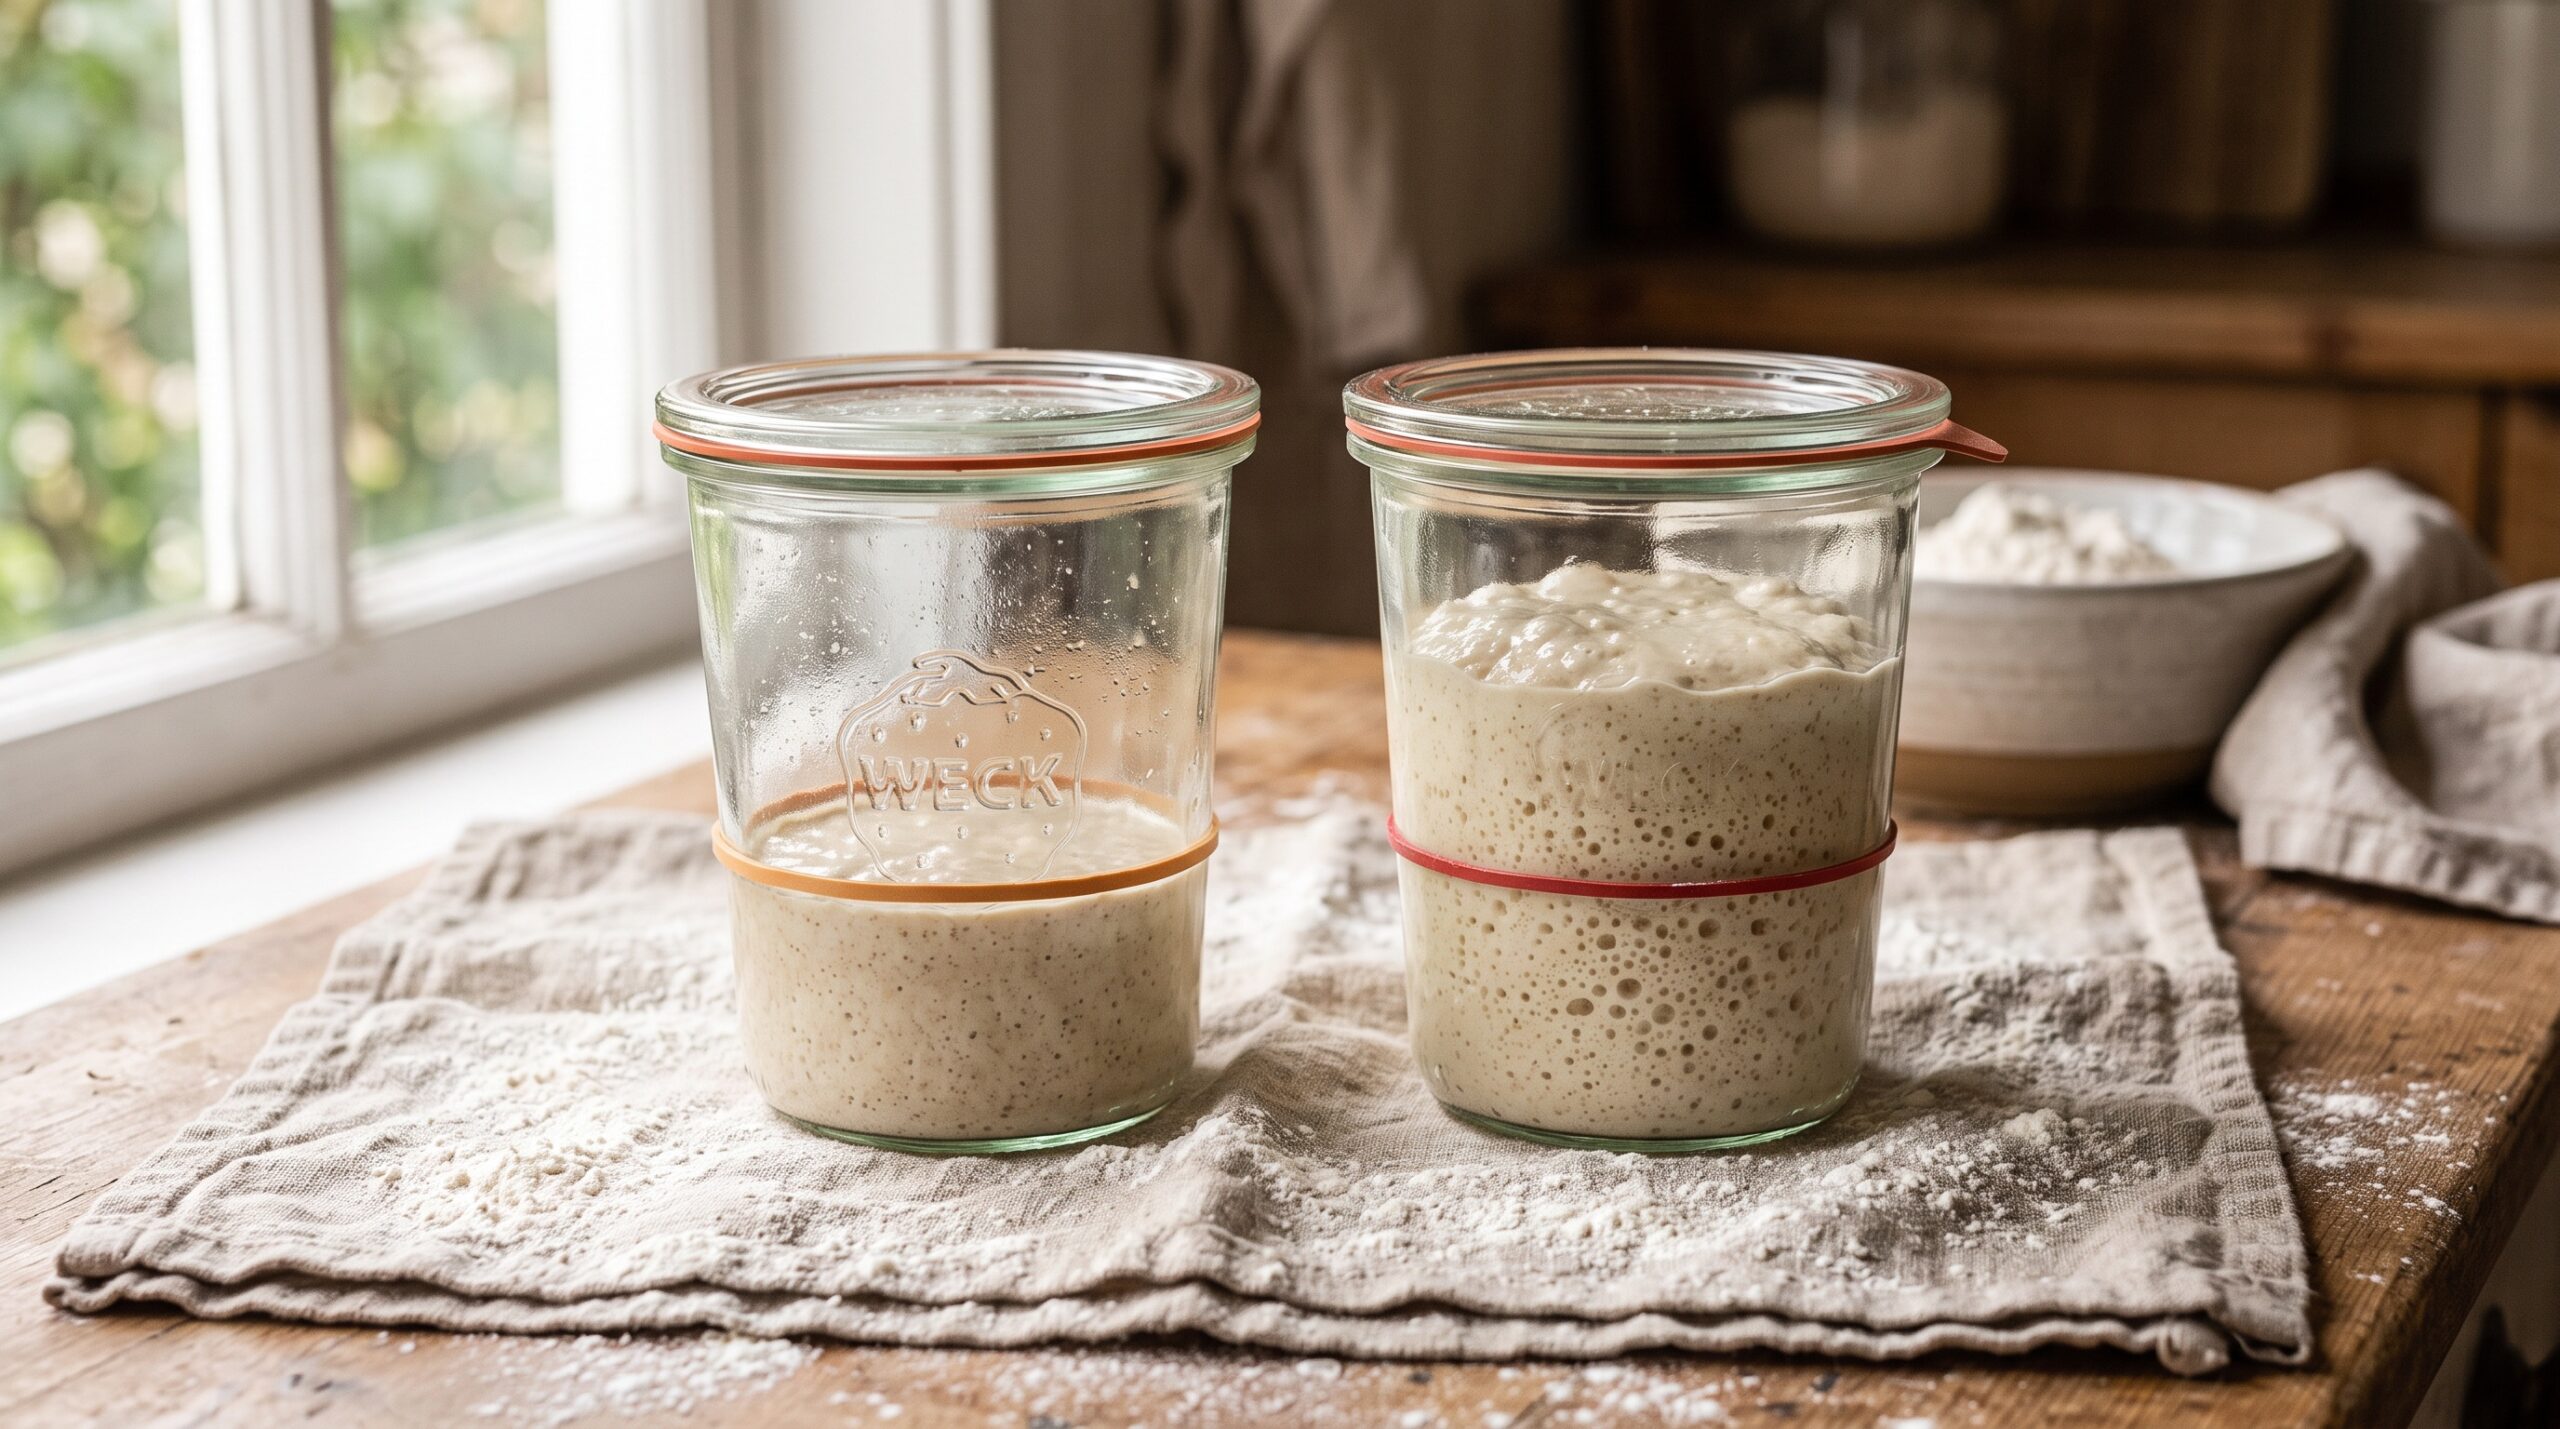
    Two starter jars compared: a flat sluggish starter on the left and a bubbly doubled starter on the right
    Sluggish versus alive: a flat jar that never moved on the left, a starter risen to the rubber band on the right.

    Reason 1: Your kitchen is too cold

    This is the single most common culprit, and the most overlooked. Wild yeast is temperature-driven. In a 65F (18C) kitchen a starter might crawl to a rise over 12 hours; at 78F (25-26C) the same starter can double in four to six. If your loaves stall in a cold season, your starter stalls first.

    The fix is to find a warm nook. A turned-off oven with only the interior light on often holds a gentle 75 to 80F. So does the top of the fridge, a shelf near a warm appliance, or a cupboard with a mug of just-boiled water tucked beside the jar. A cheap probe thermometer takes the guessing out of it. Do not cook the starter, though; anything above about 90F starts to stress the culture. You are aiming for cozy, not hot.
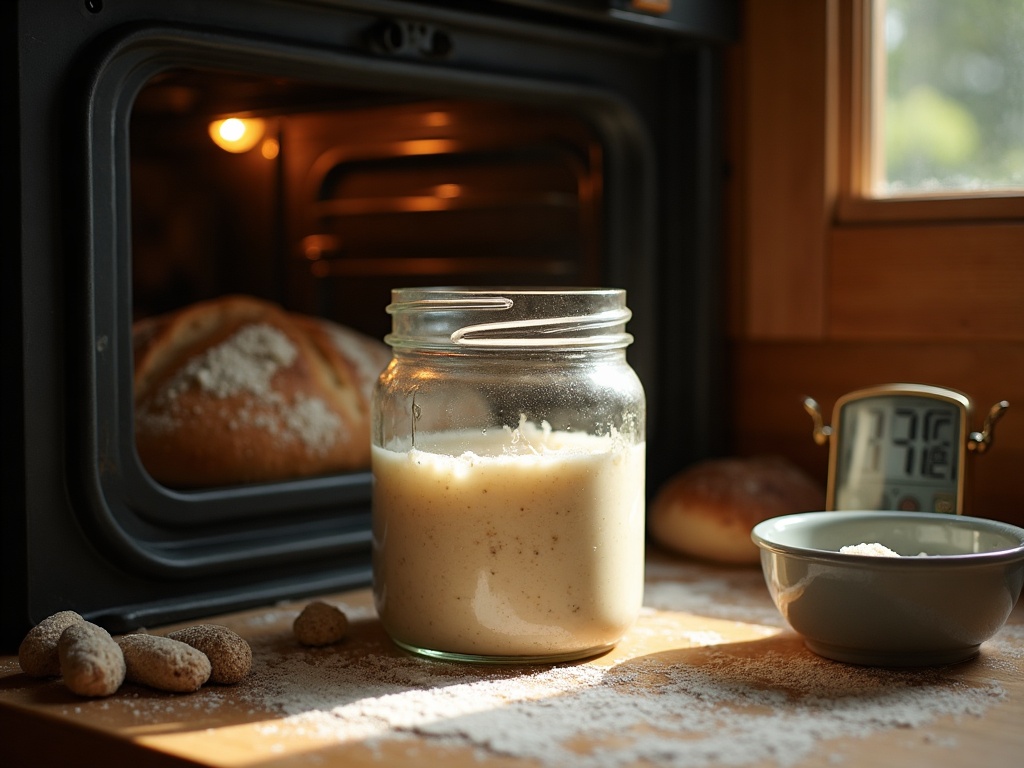
    A starter jar warming inside an oven next to a bowl of warm water and a thermometer showing about 78 degrees
    A cool kitchen is the number one cause of a stalled starter. A turned-off oven with the light on makes a perfect warm nook.

    Reason 2: You are not feeding it enough

    A starter is a colony that eats flour. If you feed a big jar of mature starter a tiny pinch of fresh flour, the population burns through it in an hour and then sits hungry and acidic for the rest of the day, going nowhere. People often mistake this for weakness when it is really starvation.

    Feed by weight, and give it more food than you think. A reliable ratio for waking a slow starter is 1:5:5 – one part starter to five parts flour to five parts water. In practice, keep a small amount, say 20 grams, and feed it 100 grams of flour and 100 grams of water. Discarding down to that small amount is not waste; it is the whole point. A little starter with a lot of fresh food rises higher, faster, and more predictably than a big jar you keep topping up.

    Reason 3: Your flour and water are working against you

    Two ingredients quietly sabotage more starters than any technique problem. The first is water. Heavily chlorinated tap water can suppress the very microbes you are trying to grow. If your tap is strongly chlorinated, leave the water out uncovered overnight so the chlorine dissipates, or use filtered water. It is a small change that sometimes flips a stubborn starter overnight.

    The second is the flour itself. Plain bleached white flour is clean and low in the wild yeast and minerals a young culture craves. Whole grain flours – whole wheat, and especially rye – are packed with them. If your starter is dragging, swap in 25 to 50 percent whole wheat or rye at the next feeding. Rye in particular is rocket fuel for a tired starter; many bakers keep a bag purely as a revival tool. Once it is lively again you can taper back to mostly white flour if you prefer a milder loaf.
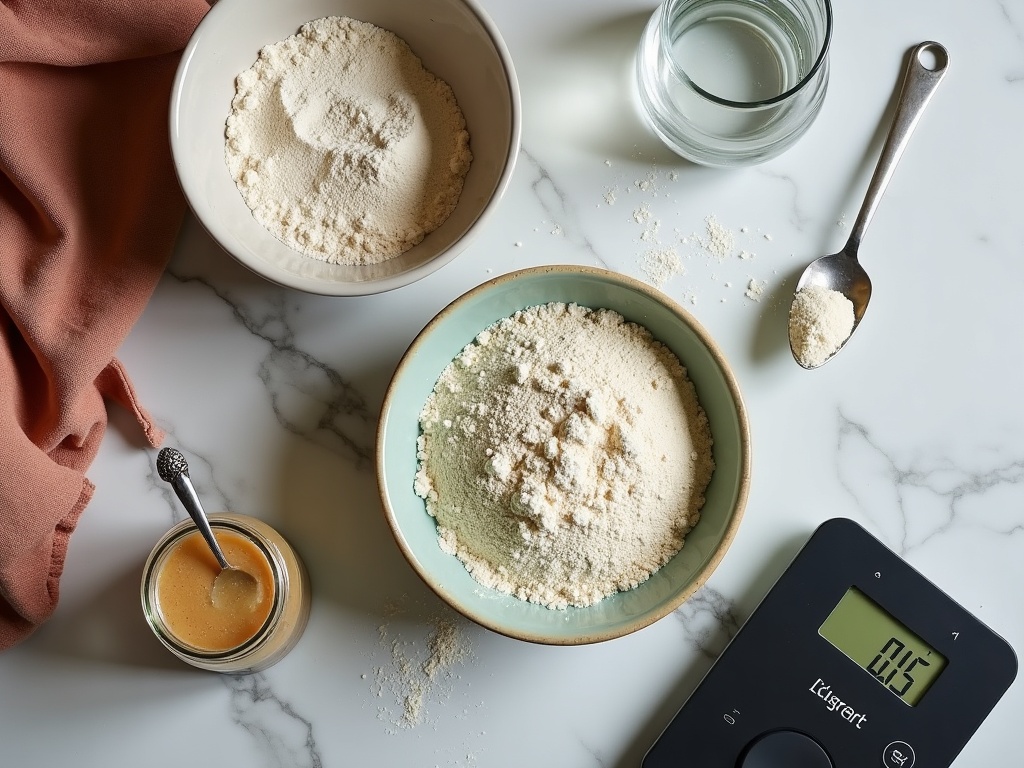
    Overhead view of starter feeding tools: a jar of starter, bowls of flour, filtered water and a digital scale
    Feed by weight, not by eye. A bigger flour ratio and a spoonful of whole grain wakes a slow starter fast.

    Reason 4: You are judging it on the wrong timeline

    Two timing mistakes masquerade as a dead starter. The first is impatience with a young culture. Building a starter from scratch takes time, and days three through five are notoriously flat – often the culture surges early on the wrong bacteria, then goes quiet and seemingly lifeless before the real yeast establishes. If your starter is under two weeks old and stalling mid-week, that is normal. Keep feeding on schedule and wait it out; the rise usually returns around day seven to ten.

    The second mistake is checking at the wrong moment. A mature starter might peak four hours after feeding in a warm kitchen, then quietly deflate back down. If you only ever look 12 hours later, you will swear it never rose at all – you simply missed the party. Mark the jar’s start level with a rubber band or a dry-erase line, then check every hour or two through the first several hours after a feed. You may find it is doubling beautifully and you were just late to the show.

    A sourdough starter at its bubbly domed peak, risen well above the rubber band marking its start line
    Peak is a moving target. Watch for the domed, bubble-packed high point rather than checking at a fixed time.

    Reason 5: Hooch, sour smells, and over-acidity

    Sometimes the starter is not underfed but over-fermented. A dark or grey liquid on top – hooch – is alcohol the yeast produced when it ran out of food. A sharp acetone, nail-polish, or vinegary smell tells the same story: the culture has gone too acidic, and high acidity slows the yeast down until it can barely lift the batter.

    The fix is to reset the balance with fresh food and less waiting. Pour off or stir in the hooch (pouring off gives a milder starter), discard most of what is in the jar, and feed the small remainder generously with that 1:5:5 ratio. Then feed more often – every 12 hours, or even every 8 in a warm kitchen – so the yeast never sits starving in its own acid long enough to sour. Within a couple of days the smell mellows to something tangy and clean, and the rise comes back.

    Reason 6: It has been neglected – and the 3-day reset

    If your starter has languished in the fridge for weeks or months, it is not dead; it is deeply asleep and probably very acidic. The revival routine is the same in spirit as above, just with patience baked in. Pour off any hooch, then run three days of consistent care. Take a small spoonful into a clean jar, feed it 1:5:5 with warm filtered water and a whole-grain boost, and keep it in a warm spot. Repeat every 12 hours. Discard down to a spoonful each time – this is what dilutes the built-up acidity and concentrates the fresh food.

    Expect little on day one, small bubbles by day two, and a genuine rise by day three. If a stubborn culture is still lagging after that, keep going; some just need a fourth or fifth day of the same rhythm. Consistency and warmth do the work. When it reliably doubles within four to eight hours of a feeding, smells pleasantly tangy, and looks domed and bubbly, it is ready to bake with again.
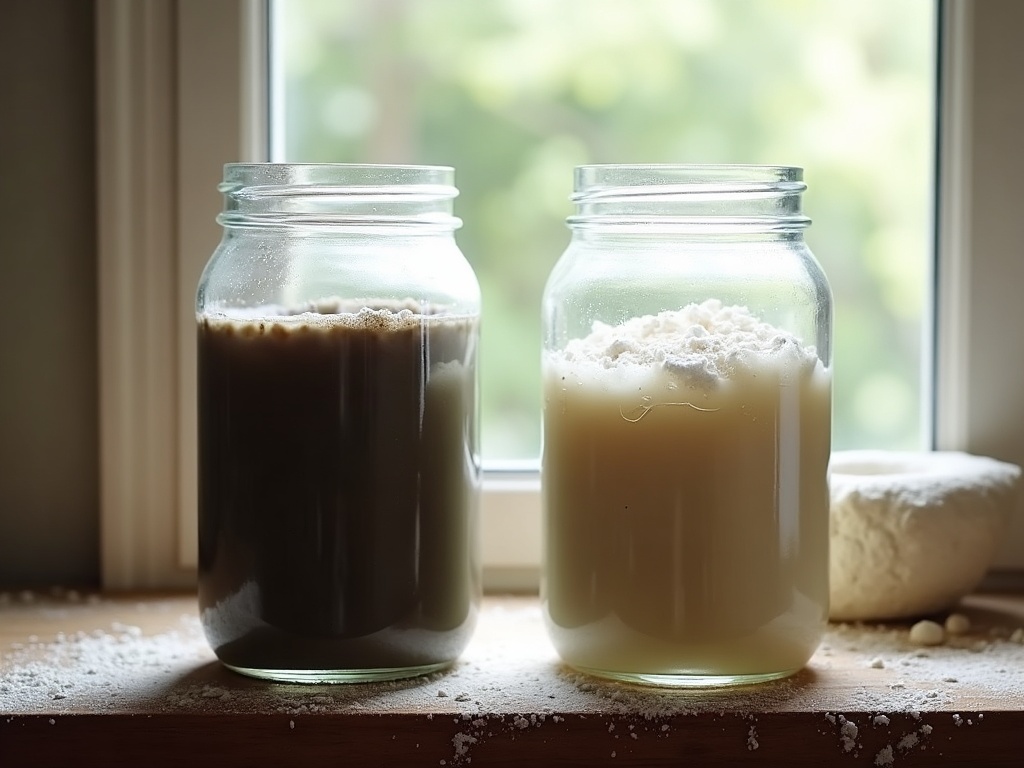
    A neglected starter with grey hooch on top beside a refreshed, clean, bubbling revived starter
    Even a stinky, hooch-topped starter usually comes back. Pour off the liquid and start the reset routine.

    Reason 7: You are asking too much of a small, young starter

    Last, a mindset fix. A brand-new or freshly revived starter is not yet strong enough to raise a big, heavy loaf, and when the bread flops, people blame the starter and start feeding it frantically. Give a young culture a week or two of steady doubling before you build a full levain, and when you do bake, use it at its peak – domed, bubbly, at its high point – not on the way down. A starter that doubles on the counter but seems to fail in bread is often just being used too early or past its window, not a starter that cannot rise.

    Work through these one at a time – warmth first, then a bigger feed, then better flour and water, then timing – and the vast majority of stalled starters come roaring back to life. The full step-by-step revival, with the daily photos of what a recovering starter should look like, lives over on the LoafLovers YouTube channel, and you can grab our free sourdough troubleshooting guide to keep the whole diagnostic checklist by your jar. Your starter is not broken. It is just waiting for the right conditions – and now you know how to give them.


    Sources & further reading:

    Related Reading