You’ve seen them on the bakery loaves and the ones that go viral: a sourdough crust freckled all over with tiny, glassy bubbles, so crisp it looks like it would shatter if you tapped it. Then you pull your own loaf from the oven and the crust is fine — good color, decent crackle — but smooth. No blisters. It’s one of the most-asked questions from home bakers who’ve already got the basics down: my bread tastes great, so why doesn’t it look like that?
Here’s the honest answer, and it’s more reassuring than you’d think. Blisters aren’t a sign of some secret technique or a professional oven you can’t afford. They’re the visible fingerprint of one specific thing happening to your dough: a long, cold fermentation. Once you understand what’s actually forming those bubbles, you can reproduce them on purpose. Let’s walk through what causes blisters and exactly how to get them on your next bake.
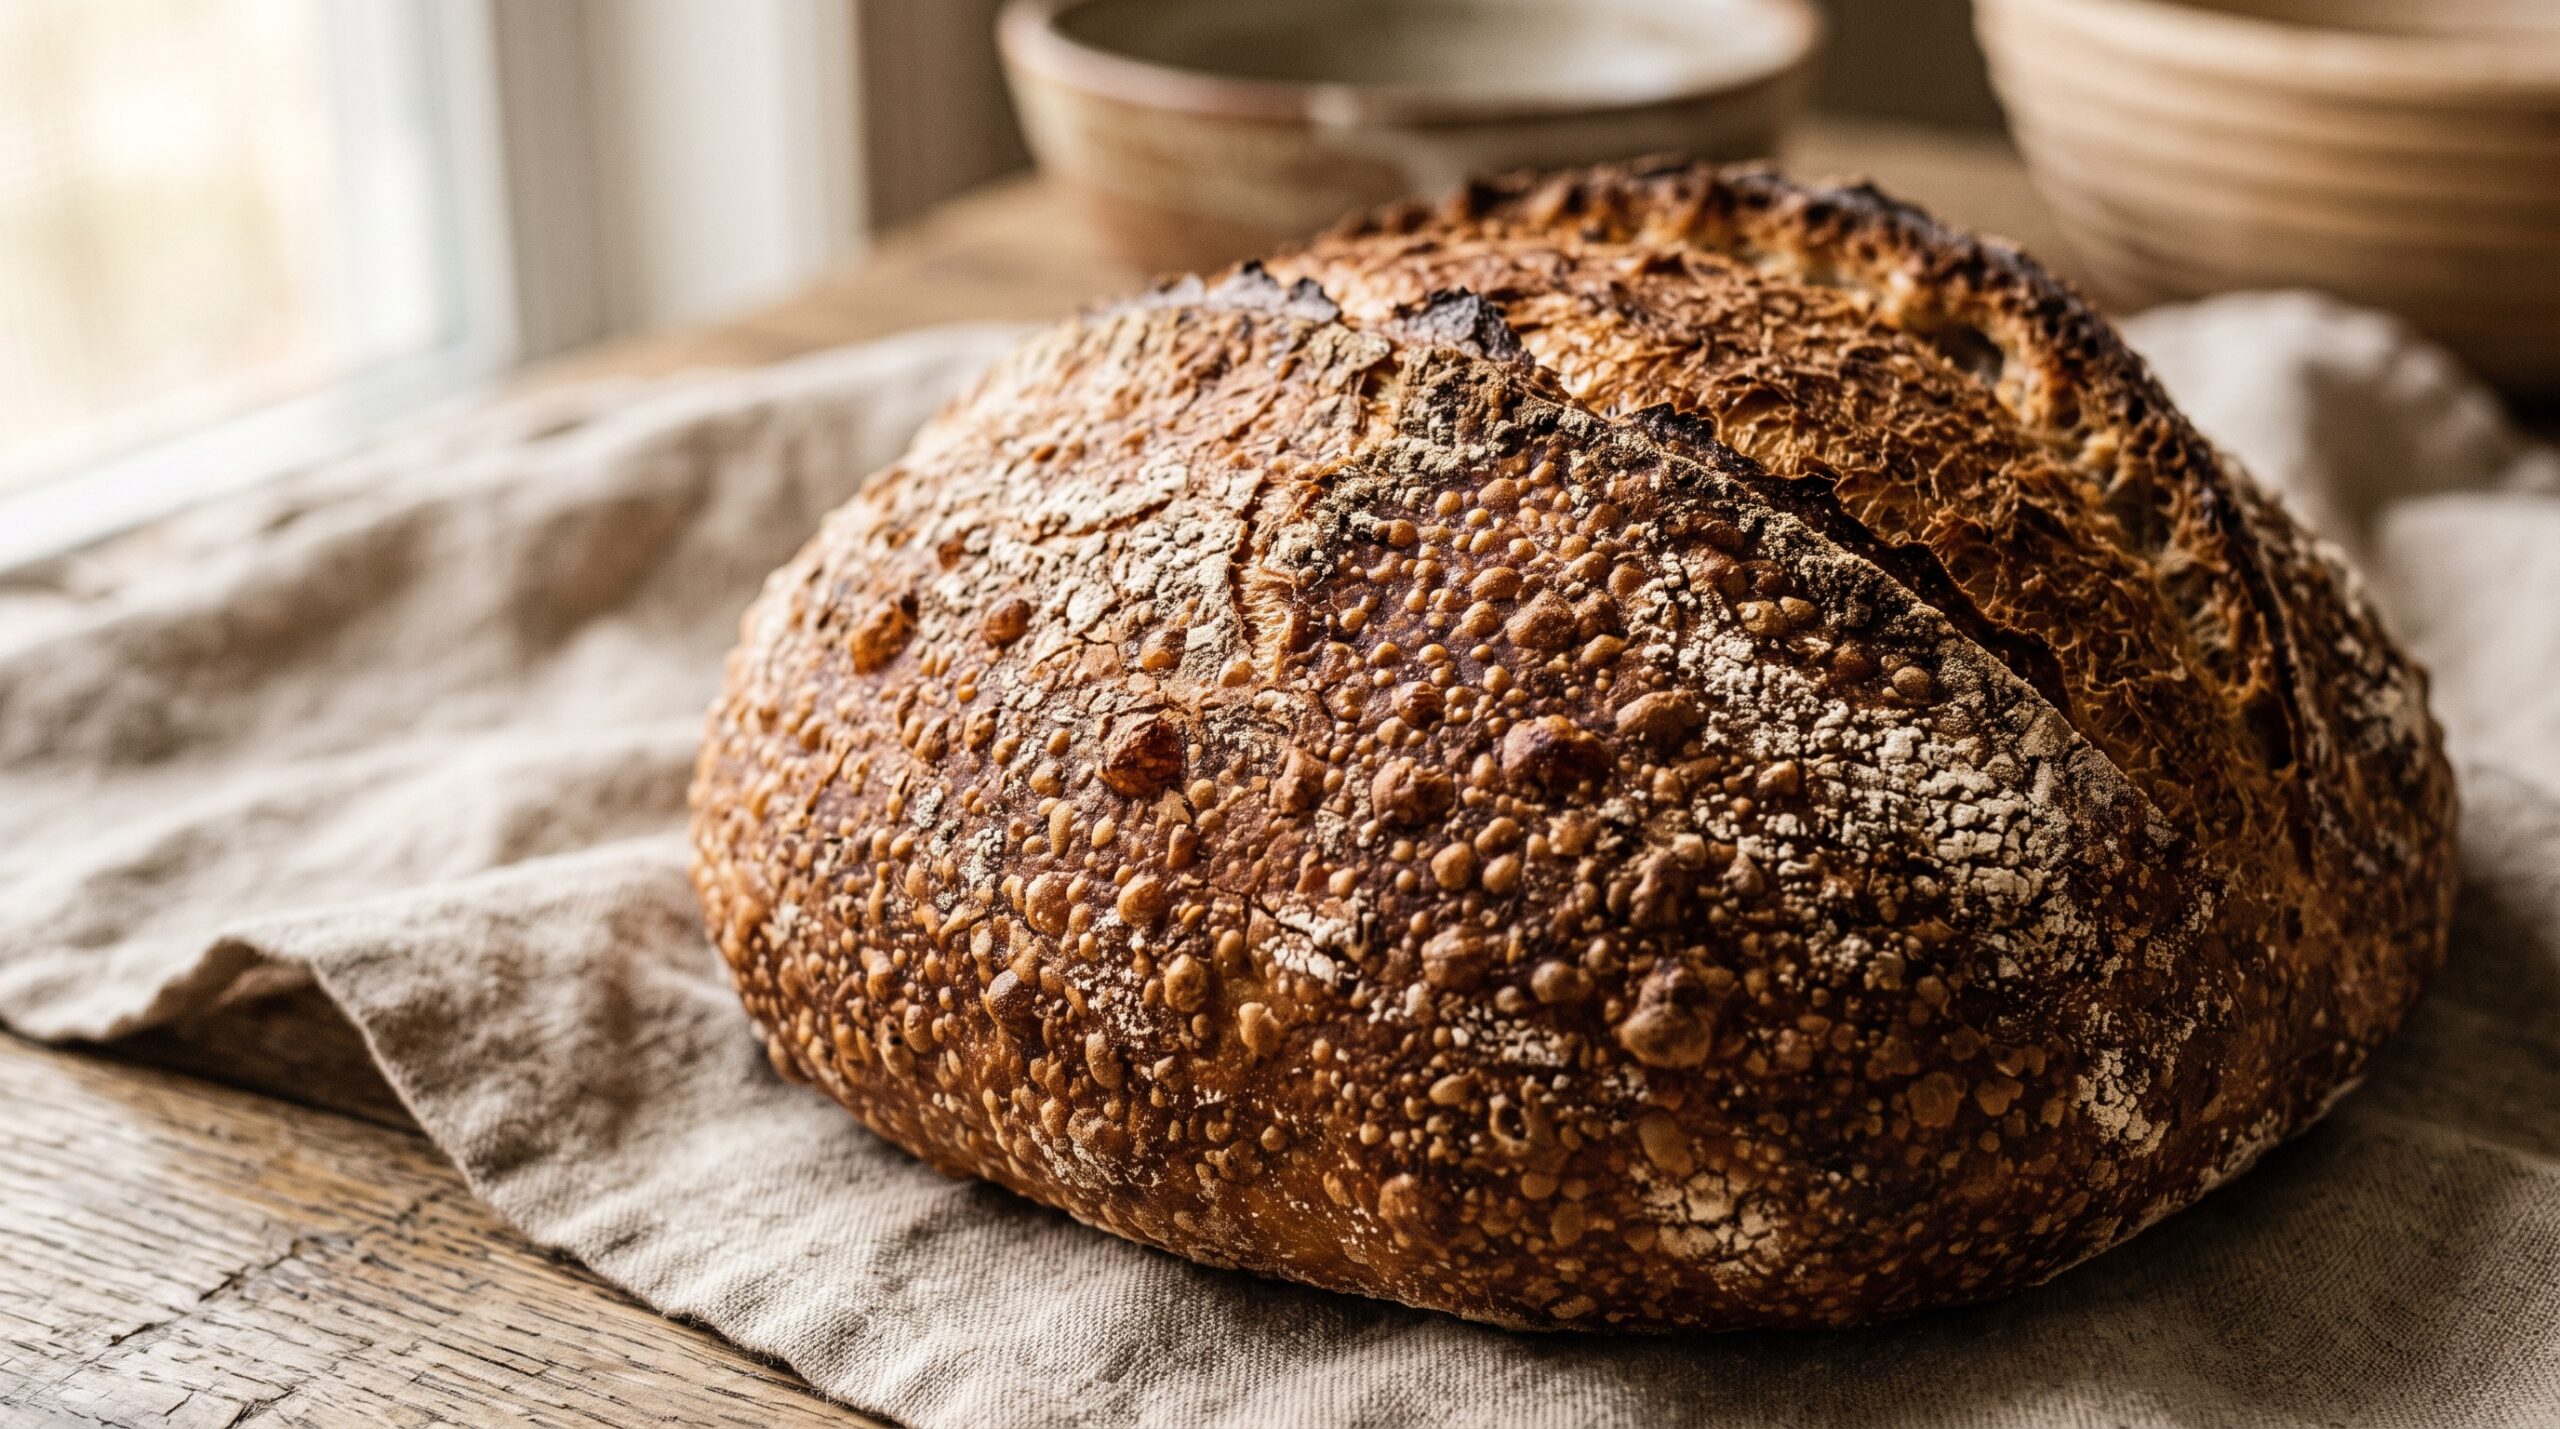
What a blister actually is
A blister is a small pocket of gas trapped just beneath the surface skin of your dough that expands in the heat of the oven and pushes up before the crust fully sets. Picture the dough’s outer surface as a thin, slightly dried skin stretched over a mass of fermenting dough that’s still producing carbon dioxide. As that gas migrates toward the surface, it collects in tiny pockets right under the skin. When the loaf hits the oven’s heat, those pockets balloon outward faster than the surface can bake solid — and each one sets into a crisp little dome. Multiply that across the whole loaf and you get that beautifully blistered, crackly crust.
So blisters need two things at once: plenty of small gas pockets sitting near the surface, and a surface skin that’s the right texture to let them dome up rather than collapse or tear. The single technique that reliably produces both is a cold retard.
The real cause: a long, cold fridge proof
If you take one thing from this article, take this: blisters come from cold-proofing your shaped loaf in the fridge, uncovered or loosely covered, overnight. This is the cold retard, and it does two jobs at the same time.
First, the cold slows fermentation to a crawl but doesn’t stop it. Over eight to forty-eight hours in the fridge, yeast keeps producing gas, slowly, and that gas has time to accumulate in countless tiny bubbles right up near the surface of the dough — exactly where you want them for blistering. A warm, fast proof rushes this and gives you fewer, larger, deeper bubbles. The slow cold proof gives you many fine ones near the skin.
Second, the dry air of the fridge lightly dries the very surface of the dough, forming a thin, taut skin. That skin is what holds the bubble shapes and lets them dome up crisply in the oven instead of smoothing out. A wet, slack surface just bakes flat. A slightly dried, tight one blisters. This is why bakers who cold-proof consistently get blisters and those who proof warm and bake same-day usually don’t — regardless of how good the loaf tastes.

How to force blisters, step by step
Here’s the practical playbook. None of this changes your recipe — it changes your timing and handling at the end.
1. Proof cold, and proof long. After shaping, put your loaf in its banneton straight into the fridge for a minimum of 8 hours, and ideally 12 to 24. Longer generally means more blistering, up to a point. This overnight retard is doing the real work.
2. Let the surface dry a little. Don’t seal the dough in an airtight bag or a tightly wrapped, wet-covered container. You want the fridge’s dry air to gently firm up the surface. A loose cover, a container with a bit of airflow, or an uncovered banneton (if your fridge isn’t full of strong smells) all encourage that thin skin to form. This is the step most no-blister bakers are missing — they wrap the dough airtight and keep the surface wet.
3. Bake it cold, straight from the fridge. Don’t let the loaf warm up on the counter first. Score it while it’s cold and taut and get it into the hot oven immediately. A cold, firm surface blisters far better than a room-temperature slack one, and cold dough scores more cleanly too.
4. Steam early, then dry out. Bake with strong steam for the first portion (a preheated Dutch oven with the lid on is the easiest way, or a tray of boiling water and a cloche). The steam keeps the surface flexible just long enough for the bubbles to expand and dome before setting. Then remove the lid or steam for the back half so the crust can dry, crisp, and lock those blisters in place.
Dialing it in when blisters still won’t show
If you’re cold-proofing and still not getting blisters, run down this short list:
Your proof is too short or too warm. A 3-hour fridge stint won’t do it. Give it a full overnight. And check your fridge isn’t running warm — a fridge on the warmer side ferments too fast to build fine surface bubbles.
Your surface is staying too wet. If you’re bagging the dough airtight or your banneton liner is holding moisture against the skin, you’re preventing the taut skin blisters need. Loosen up the cover and let it breathe.
You’re warming the loaf before baking. Letting it come to room temperature undoes the cold, firm surface. Bake it straight from the fridge.
Not enough steam, or steam for too long. Too little steam and the crust sets before bubbles can dome; too much for the whole bake and they never crisp. Strong steam early, dry heat late.
Hydration and flour play a role too. Very stiff, low-hydration doughs blister less readily; a moderately high hydration dough with a well-developed gluten structure holds those near-surface bubbles best. If everything else is right and you want more, a touch more hydration and a longer cold proof usually pushes it.

A quick reality check on blisters
One honest note, because trust is what matters more than glamour here: blisters are a cosmetic bonus, not a measure of a good loaf. A blistered crust tells you the bread had a nice long cold fermentation, which does tend to come with better flavor and a crisper crust — but a smooth-crusted loaf with an open, tender crumb and great taste is not a failure. Plenty of superb bread never blisters. Chase blisters because you like how they look and eat, not because a bread without them is somehow wrong.
That said, once you know the lever — cold, long, slightly dry surface, bake cold with early steam — you can turn blisters on almost at will. It’s one of the most satisfying little upgrades in sourdough, because it costs you nothing but a night in the fridge.

Try it on your next loaf
Bake your usual recipe right up through shaping. Then, instead of proofing on the counter and baking same-day, put the shaped loaf in the fridge overnight with a loose cover so the surface can firm up. In the morning, score it cold and bake it straight from the fridge with strong steam for the first half, dry heat for the second. Pull it out and look at the crust — odds are very good you’ll see your first proper field of blisters.
If you want to watch the whole cold-retard-to-blister process in real time, the full step-by-step is on the LoafLovers YouTube channel, and our free sourdough troubleshooting guide walks through the timing so you can slot it into a normal week. Bake it cold, steam it early, and let that crust crackle.

Leave a Reply