Category: Starter

  • Pink or Orange Streaks on Your Sourdough Starter: The One Sign You Must Throw It Out

    Pink or Orange Streaks on Your Sourdough Starter: The One Sign You Must Throw It Out

    Sourdough starter is theatrical. It bubbles over, it smells like paint thinner one day and sweet beer the next, it grows a film and weeps a dark liquid, and ninety-nine times out of a hundred all of that drama is completely harmless. That is exactly why the one genuinely dangerous sign is so easy to miss: by the time most bakers have learned that hooch is fine and a sour smell is fine and a grey skin is fine, they have trained themselves to shrug off everything. So let’s be unusually blunt about the single exception. If you see pink or orange streaks in your starter, you do not troubleshoot it, you do not scrape it, you do not feed it back to health. You throw it out.

    This is the rare starter problem with no rescue step, and it is worth knowing cold — not to make you nervous about a hobby that is almost impossible to get dangerously wrong, but so that the one time it matters, you react instantly instead of talking yourself into saving a jar you should bin.
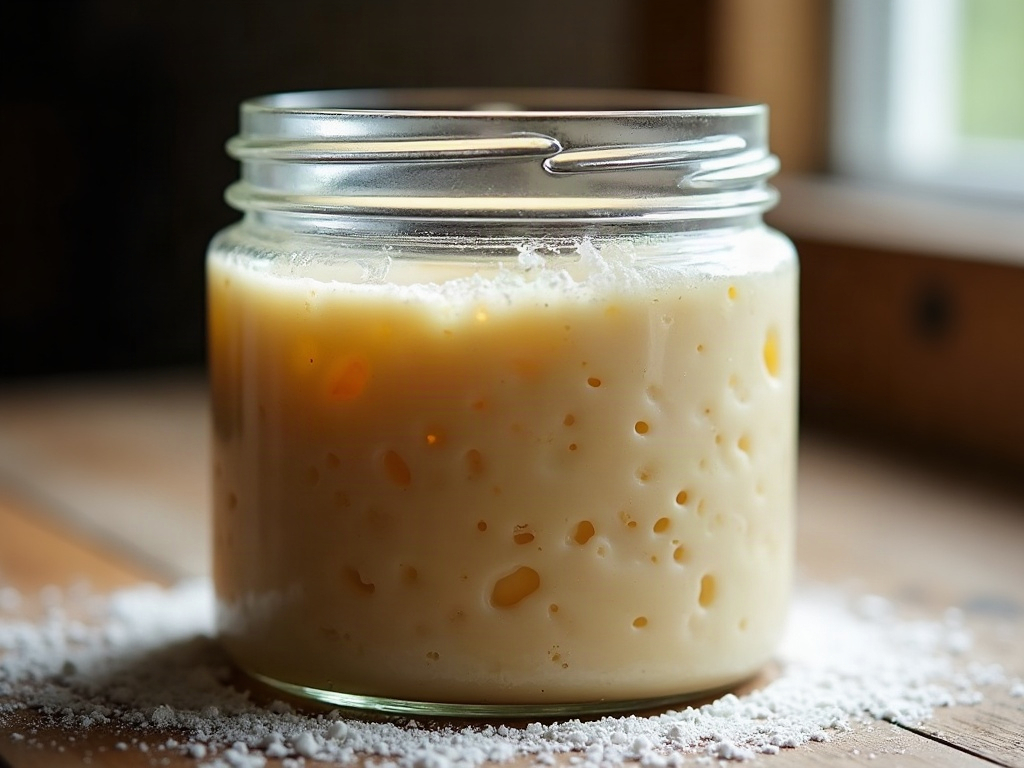
    A glass jar of sourdough starter showing faint pink and orange streaks on the surface
    Pink or orange streaks are not a cosmetic quirk. They are the one discoloration that means the jar goes in the bin.

    Why pink or orange means stop

    The living culture in a healthy starter is a stable partnership between wild yeast and lactic-acid bacteria. Those bacteria do something clever: they make the environment acidic, and that acidity is a wall that keeps unwelcome microbes out. A well-fed starter is, in effect, chemically defending itself all day long. That is why you can leave flour and water on a counter and end up with something safe to eat — the acidity wins.

    A pink or orange tinge is a sign that wall has been breached. Those colors are the classic signature of spoilage bacteria and certain molds that produce pigment — the kind of pink streaking you might recognize from the ring that forms in a neglected shower or around a drain. When that color shows up in your starter, it means the acidic environment that should have kept such organisms out has failed, and the culture has been colonized by something you have no way to identify at home and no business eating. There is no feeding schedule that fixes a contamination like this, because the problem is not that your starter is weak or hungry. The problem is that it is no longer only your starter.

    Unlike almost every other starter question, this one is not a judgment call. You cannot “scrape off the pink part” the way you might cut mold off a block of cheese, because what you can see is not the whole of what is there. Discard the entire thing.

    What this is NOT: the harmless signs that scare people

    Here is the reassuring half, and it is the larger half by far. Most of the alarming things a starter does are normal, and confusing them with real contamination is how people throw out perfectly good cultures. Learning the difference is most of the battle.

    Hooch — a layer of liquid on top, anywhere from clear to grey to brownish, sometimes almost black — is just a hungry starter telling you it has run out of food. It is alcohol and water, completely harmless; you can pour it off or stir it in and then feed. It is never pink. If you have been startled by it before, our explainer on what the liquid on your starter means and exactly what to do walks through it in full.

    A sharp, boozy, acetone or nail-polish smell is the same message in a different language: an underfed, over-hungry starter. It smells aggressive but it is not spoiled, and a few regular feedings bring it right back. We cover the full recovery in our guide to reviving a neglected starter even when it smells like nail polish.

    Discoloration that is grey, tan, or beige on the surface is usually just oxidation or a dried skin, especially on a starter that has sat a while. Grey is not pink. A white or greyish filmy layer can be kahm yeast — unsightly, not dangerous — which is a different situation again from true fuzzy mold.

    The one that looks closest: mold and kahm yeast

    The genuine lookalikes for dangerous contamination are fuzzy mold and kahm yeast, and the two get mixed up constantly. Kahm is a flat, filmy, sometimes wrinkled white-to-grey layer that sits on the surface; mold is fuzzy and three-dimensional, growing in spots of white, blue-green, grey, or — relevant here — pink and orange. The quick rule: if it is flat and filmy it is probably harmless kahm, and if it is fuzzy, raised, or colored, it goes in the bin. Because that single distinction decides whether you keep baking or start over, it is worth reading our full side-by-side on telling mold from kahm yeast and knowing when to toss so you can call it confidently at a glance.

    Pink and orange belong firmly on the “toss it” side of that line whether the texture reads as fuzzy mold or as a strange slick streak. The color alone is enough. You do not need to identify the exact organism — you need to recognize that this is not one of the harmless signs, and act.
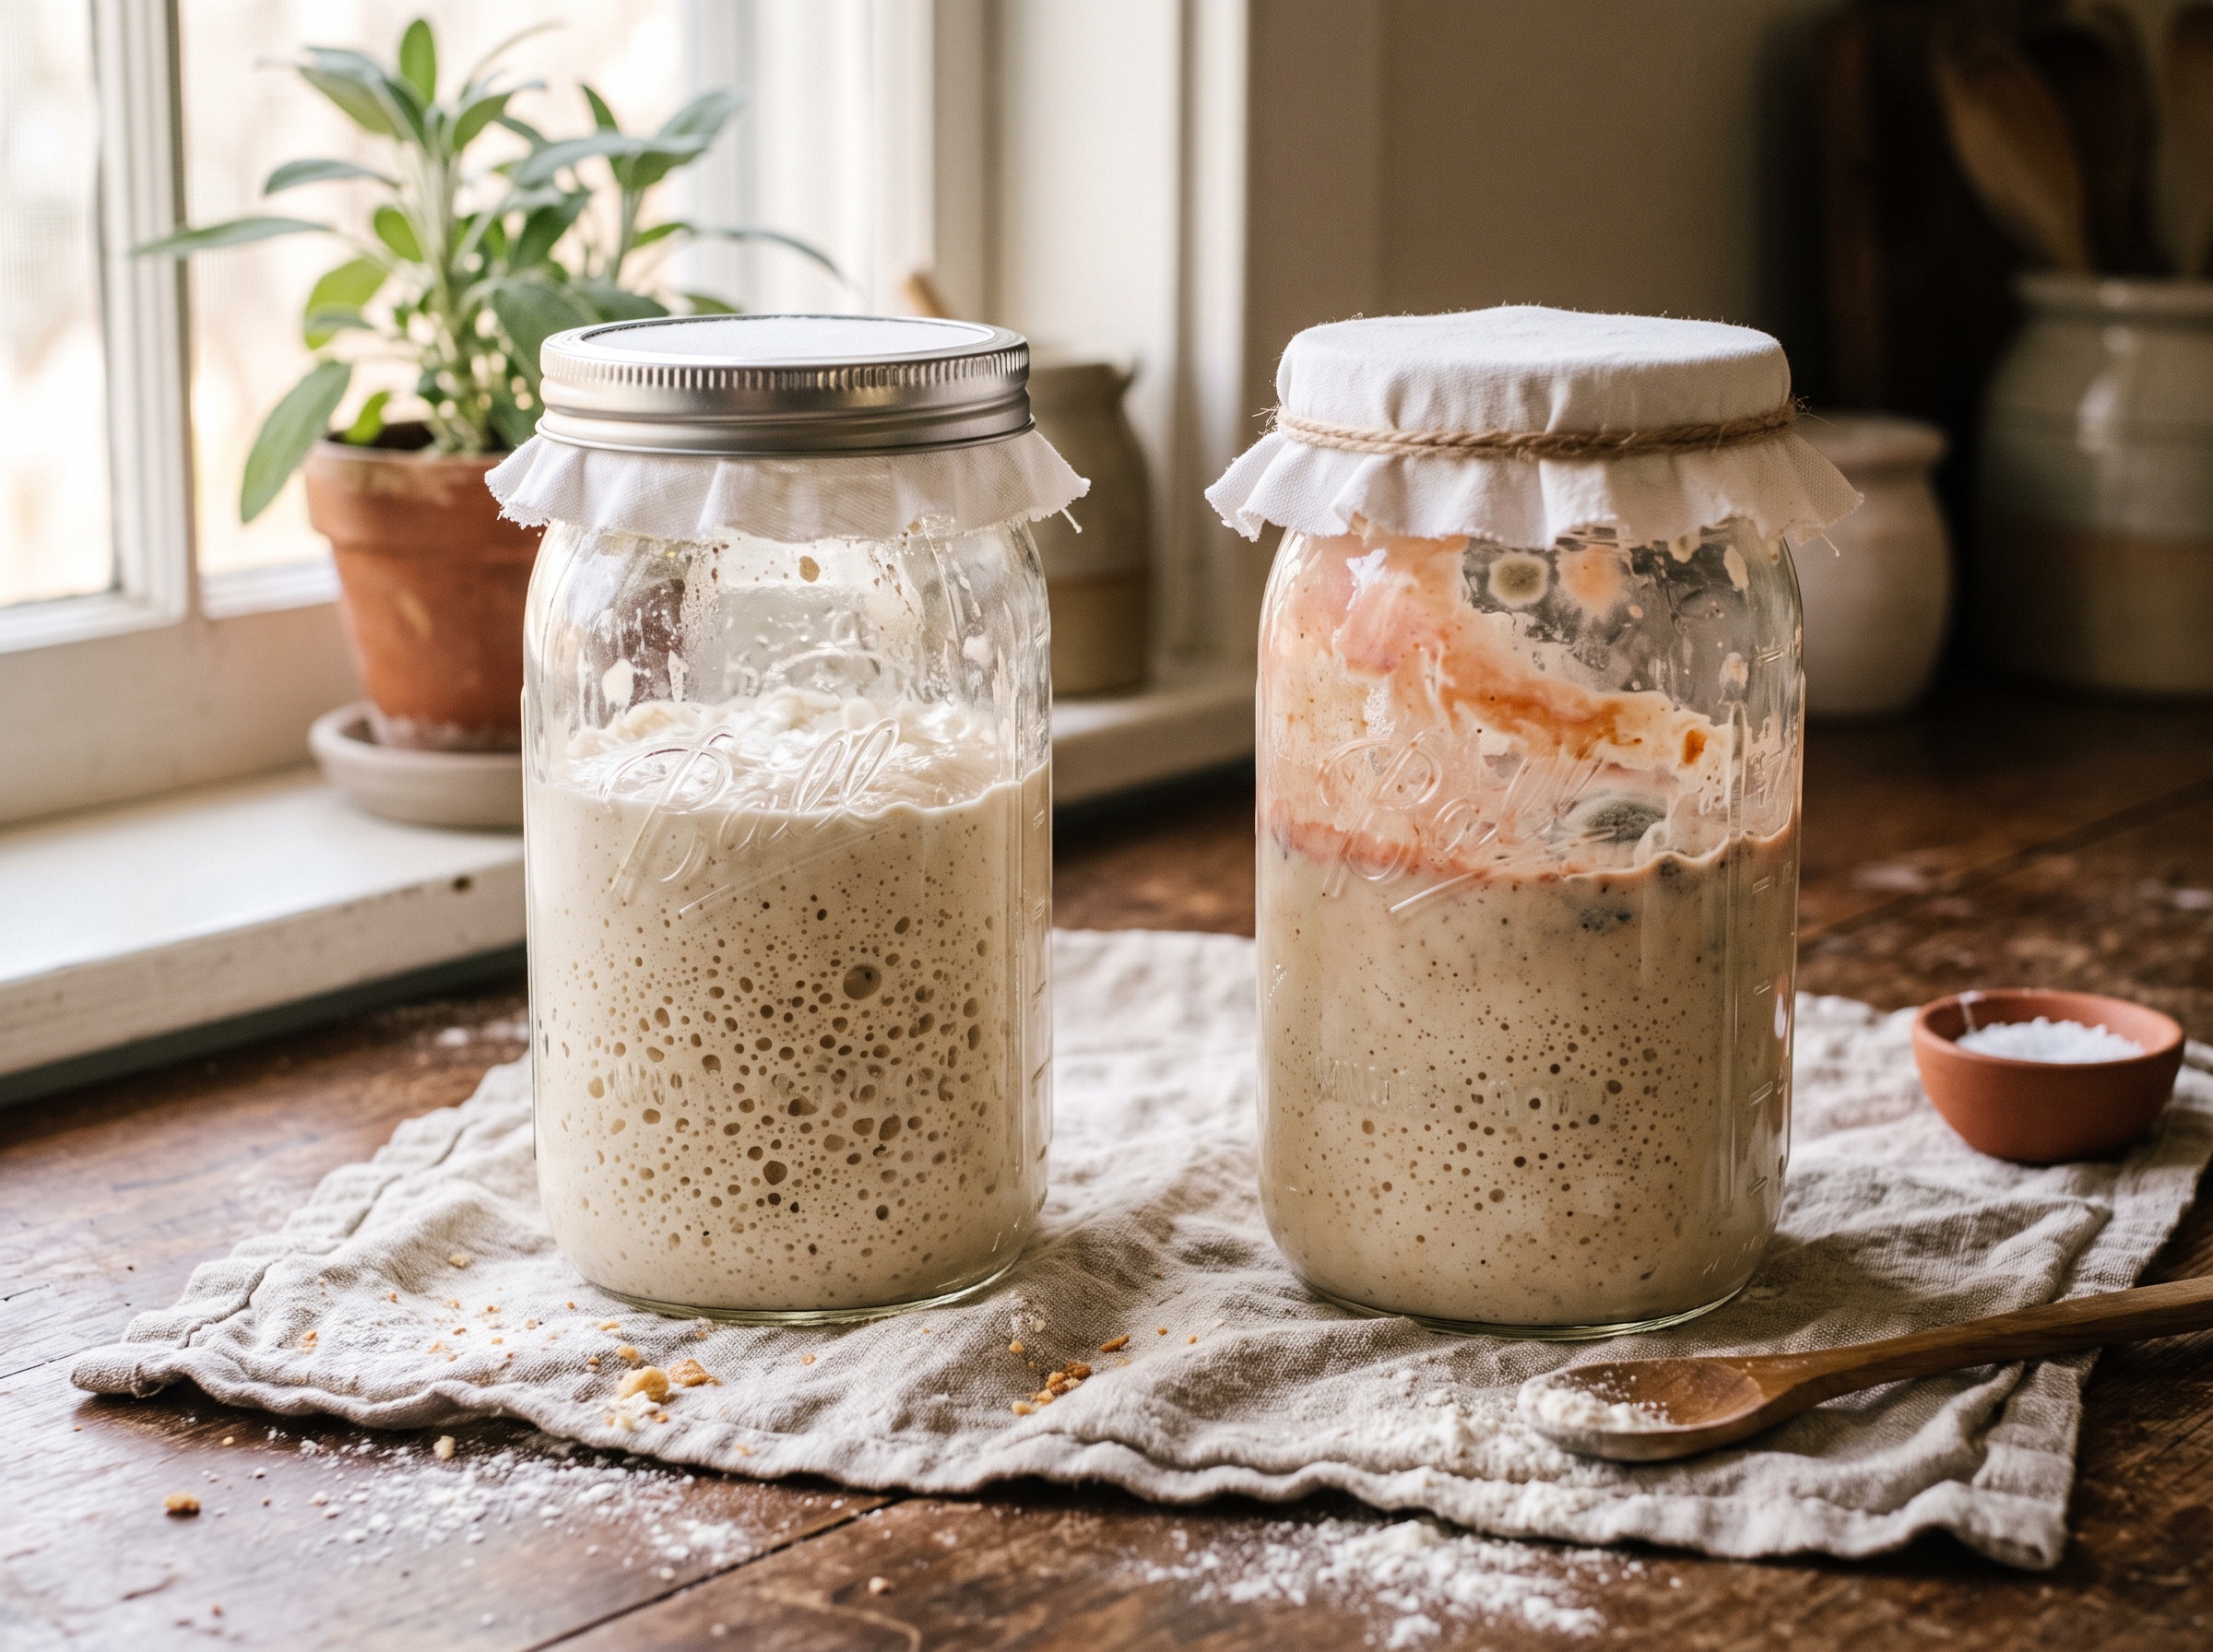
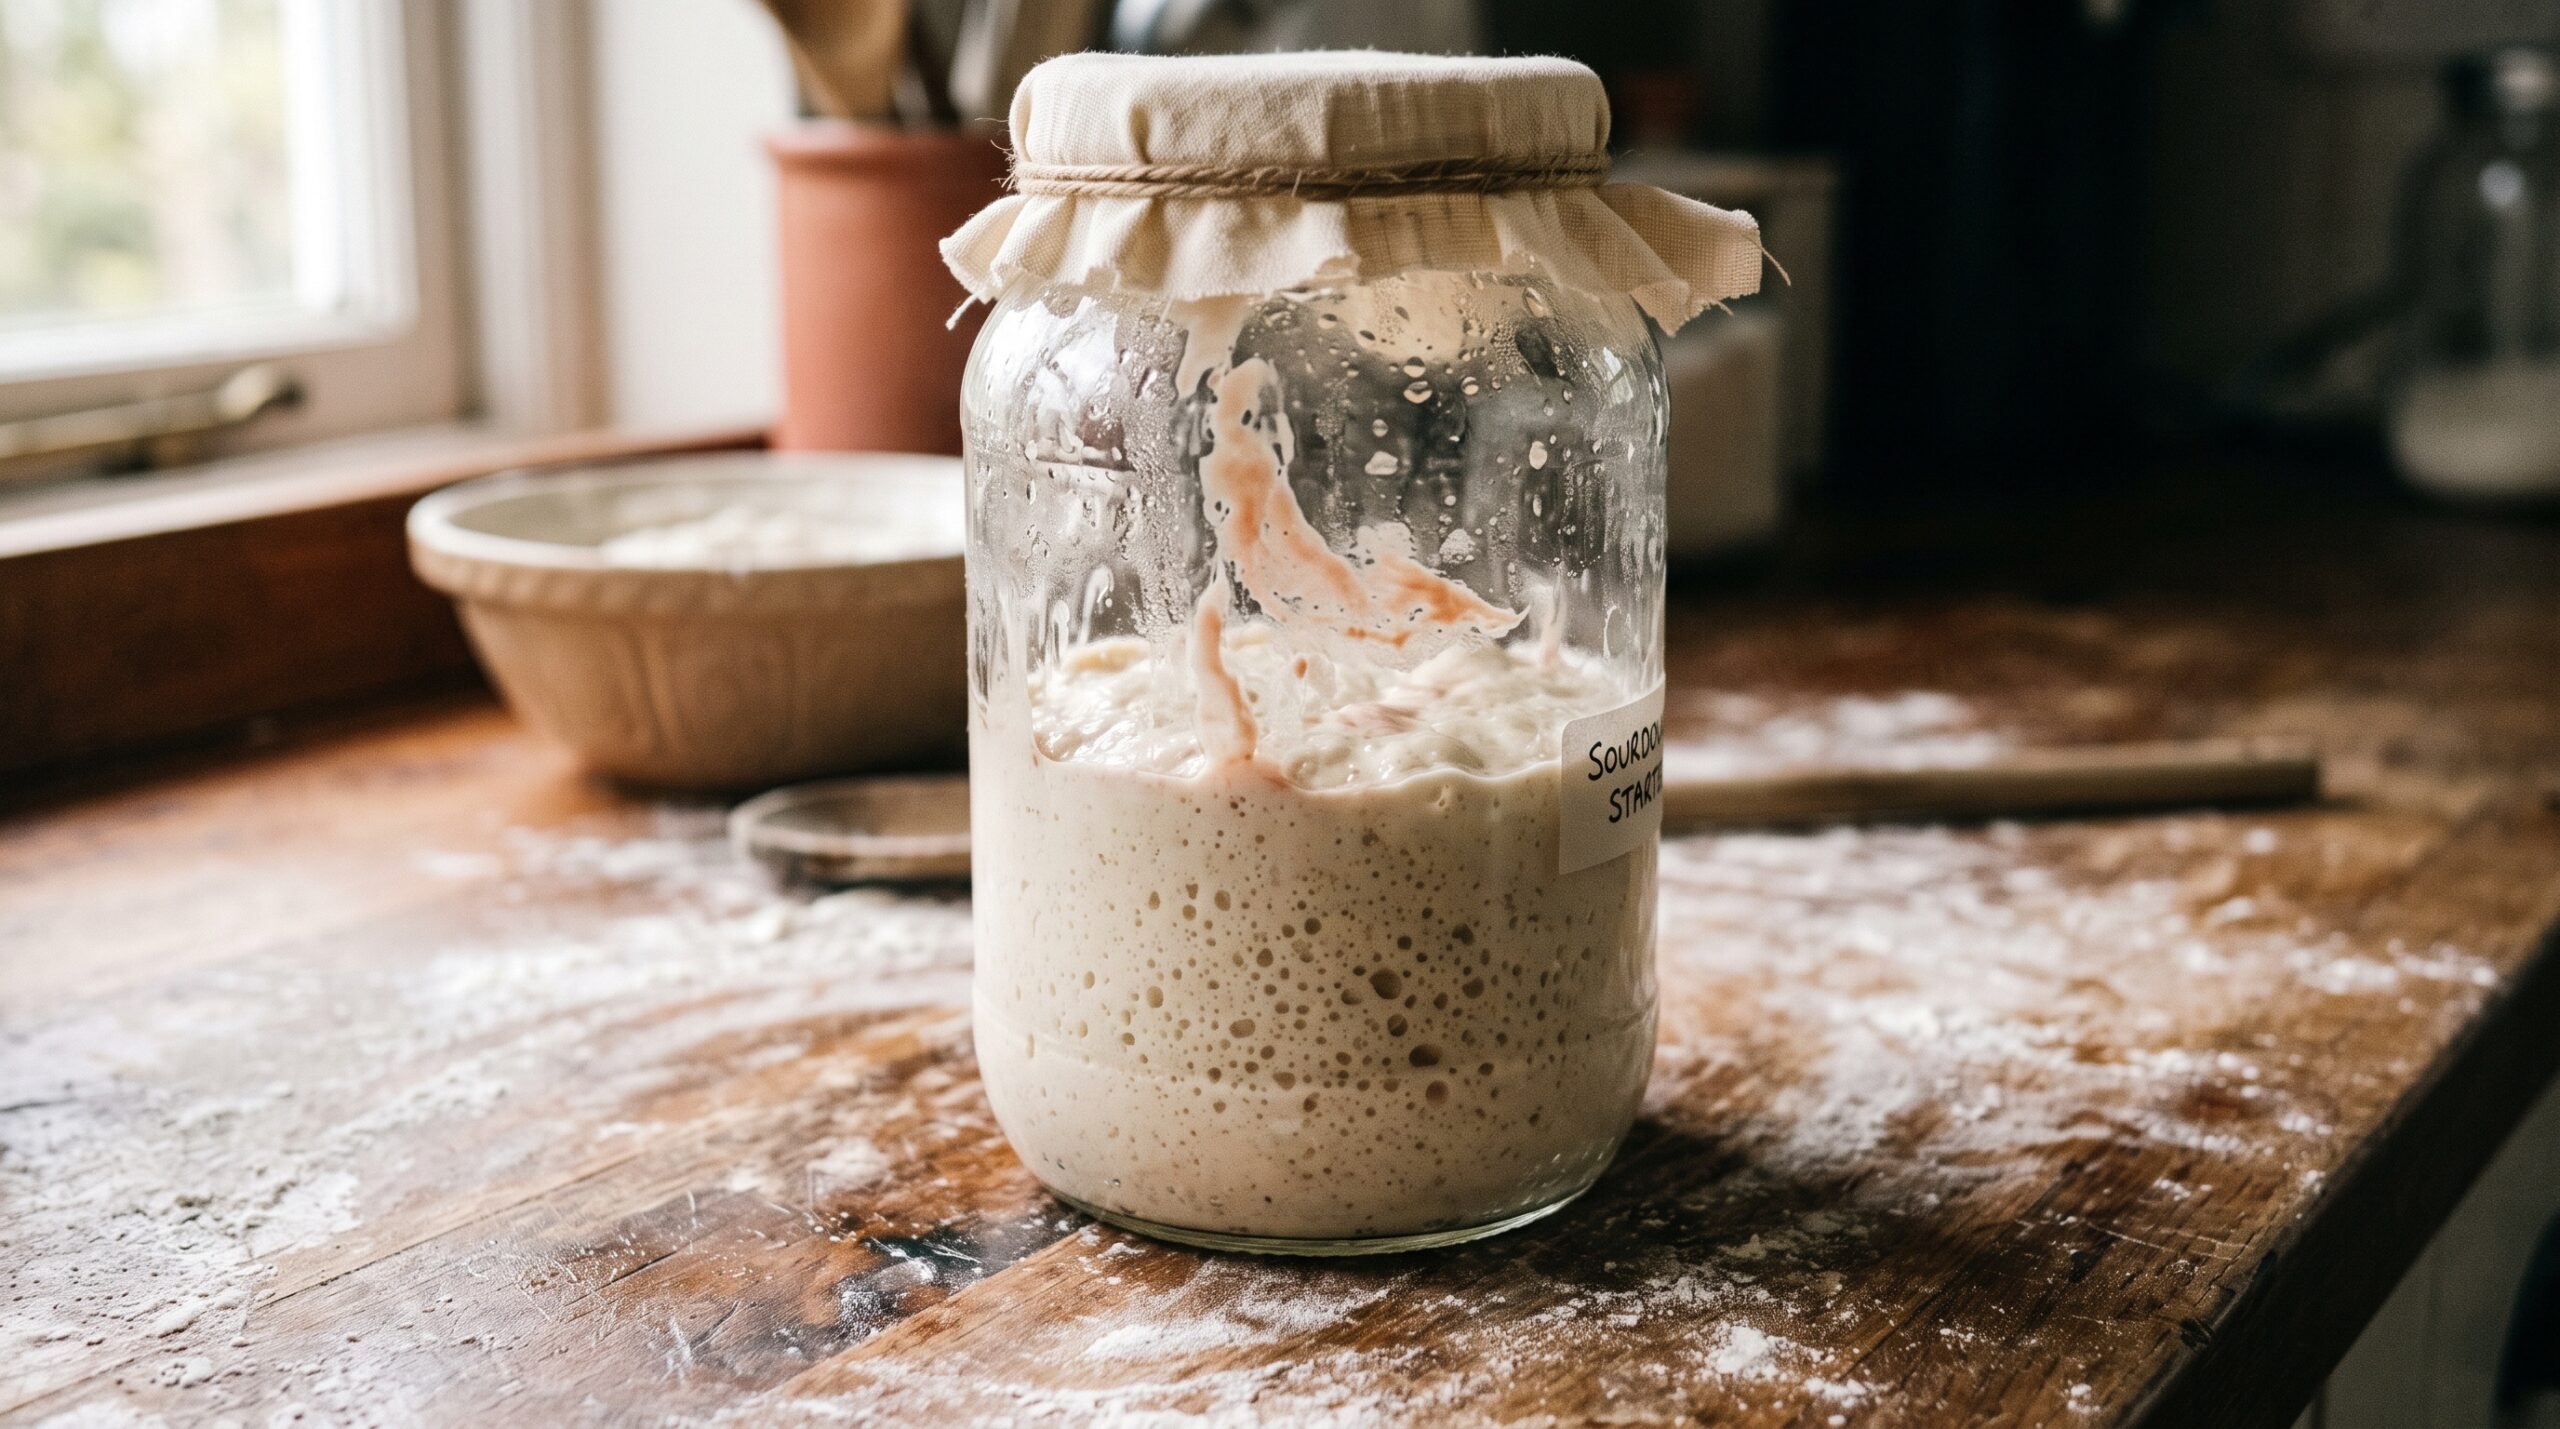
    Two jars of starter side by side, one healthy and cream colored, one tinged pink and orange
    Healthy on the left, contaminated on the right. Color is the fastest tell once you know what you are looking at.

    A thirty-second safety check for any suspicious jar

    When something looks off and you want a fast, honest read, run through four things in order. First, color: any pink, orange, or red — anywhere, in any amount — is an automatic discard, full stop. Second, texture: fuzzy, furry, or raised growth of any color means mold, so discard. Third, the liquid: a clear-to-dark liquid layer is just hooch and is fine; a pink or slimy liquid is not. Fourth, smell: tangy, sour, boozy, and yeasty are all normal, but genuinely rotten, putrid, or foul — a smell that makes you recoil rather than wince — is a reason to walk away.

    Notice that three of the four tests are reassuring most of the time. A starter that is merely sour-smelling, hooch-topped, and cream-colored passes easily, even if it looked frightening at first glance. It is really only that first test — color — that carries the hard stop.

    A healthy sourdough starter with a harmless layer of grey-brown hooch liquid on top
    This is fine: hooch is just a hungry starter’s clear-to-grey liquid, nothing like the pink warning color.

    Exactly what to do when you see pink or orange

    Move decisively and do not try to salvage any portion of it. Scrape the entire starter into the trash — not the sink, where it can linger in the drain. Wash the jar and any utensils that touched it in hot, soapy water, and if you want the extra reassurance, run the jar through a dishwasher’s hot cycle or wash it and let it air-dry completely before it ever holds a starter again. Give the surrounding counter a wipe too, since pigment-producing organisms are happy to set up shop on a damp surface.

    Do not bake with any dough you had already mixed using that starter, and do not keep a “backup” scoop of it in the fridge hoping it is somehow cleaner. The whole culture is compromised. The good news — and it genuinely is good news — is that a sourdough starter is one of the cheapest things in your kitchen to replace. It is flour and water and a week of patience, nothing more.
    Hands emptying a contaminated starter jar into the bin before washing the jar in hot soapy water
    When it is pink or orange, there is no rescue step. Discard the starter, then wash everything it touched in hot soapy water.

    Rebuilding, and keeping the pink away for good

    Starting over feels like a loss, but it is a short one. You can grow a brand-new culture from scratch in about a week with nothing but flour, water, and a clean jar; our day-by-day walkthrough of making a sourdough starter from scratch shows exactly what healthy progress looks like at each stage, so you will know the rebuild is on track.

    Prevention, happily, is mostly just good hygiene and regular feeding — the same habits that make a starter strong also make it defend itself. Use a clean jar and clean utensils, and give the jar a proper wash every week or two rather than endlessly topping up a crusty one. Feed on a consistent schedule so the culture stays acidic and dominant instead of weak and hungry, since a vigorous, well-acidified starter is exactly what crowds out the organisms that turn things pink. Keep the lid loose or vented, not sealed airtight. And if you bake only occasionally, consider drying a portion of a healthy starter as an insurance policy — a dried starter backup that lasts for years means that even a total loss is a minor inconvenience rather than a week-long setback.

    The takeaway is simple enough to keep in your back pocket: starter is dramatic, and almost none of that drama is dangerous — but pink and orange are the exception, and they are non-negotiable. Learn to shrug off hooch, sour smells, grey skins, and the rest, and you will save plenty of good cultures you might otherwise have binned. Learn to act instantly on that one warning color, and you will never once put something unsafe into your bread.

    We show what healthy, thriving, and genuinely off starters look like up close on the LoafLovers YouTube channel, and our free sourdough troubleshooting guide keeps this safety check and our other starter fixes in one place for the next time a jar makes you second-guess it. Drop your email and we will send it over, so you always know the difference between the signs that scare you and the one that should.
    Related Reading

  • Baker’s Percentage Made Simple: What Those Hydration Numbers Really Mean for Your Loaf

    Baker’s Percentage Made Simple: What Those Hydration Numbers Really Mean for Your Loaf

    You find a sourdough recipe that looks promising, and somewhere near the top it says something like “this is a 75% hydration dough.” Maybe it lists the flour and water in grams, maybe it lists percentages, maybe both. And if no one has ever explained it, that number floats there meaning nothing — is 75% a lot? A little? Will it help you, or is it just baker jargon showing off?

    It is one of the most useful ideas in all of bread baking, and it is far simpler than it sounds. Once it clicks, you can read any recipe, compare two recipes that look nothing alike, scale a loaf up or down without guessing, and — most importantly for a frustrated baker — make a deliberate change to your dough and know exactly what you did. Let us take the mystery out of it, one step at a time.

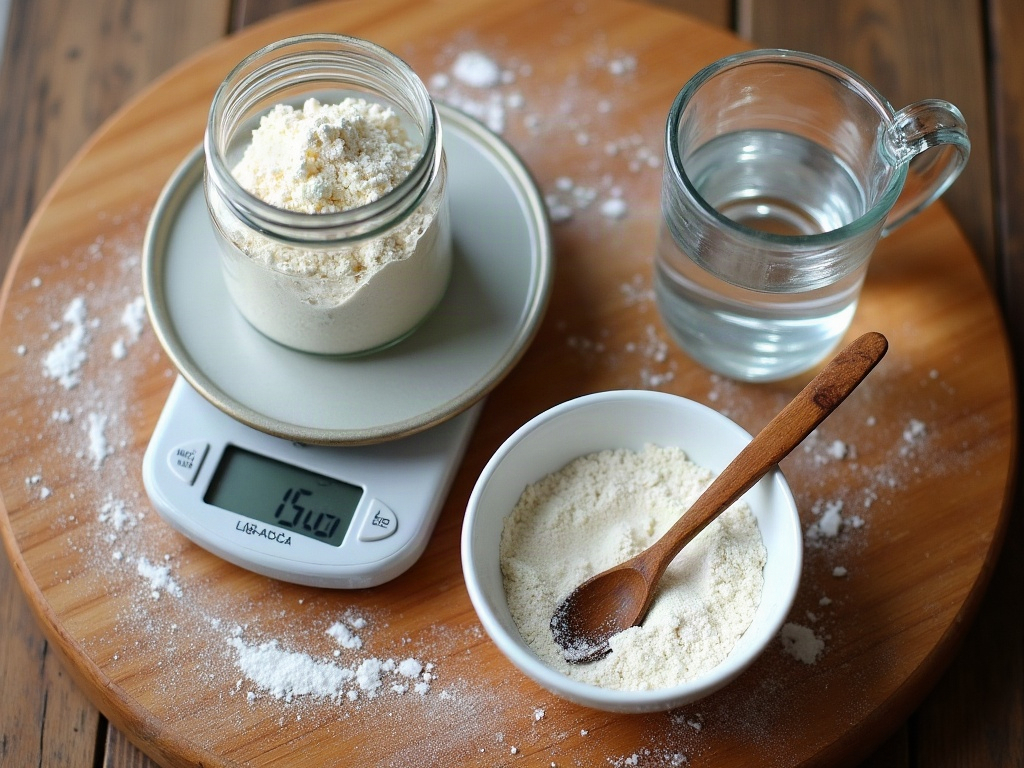
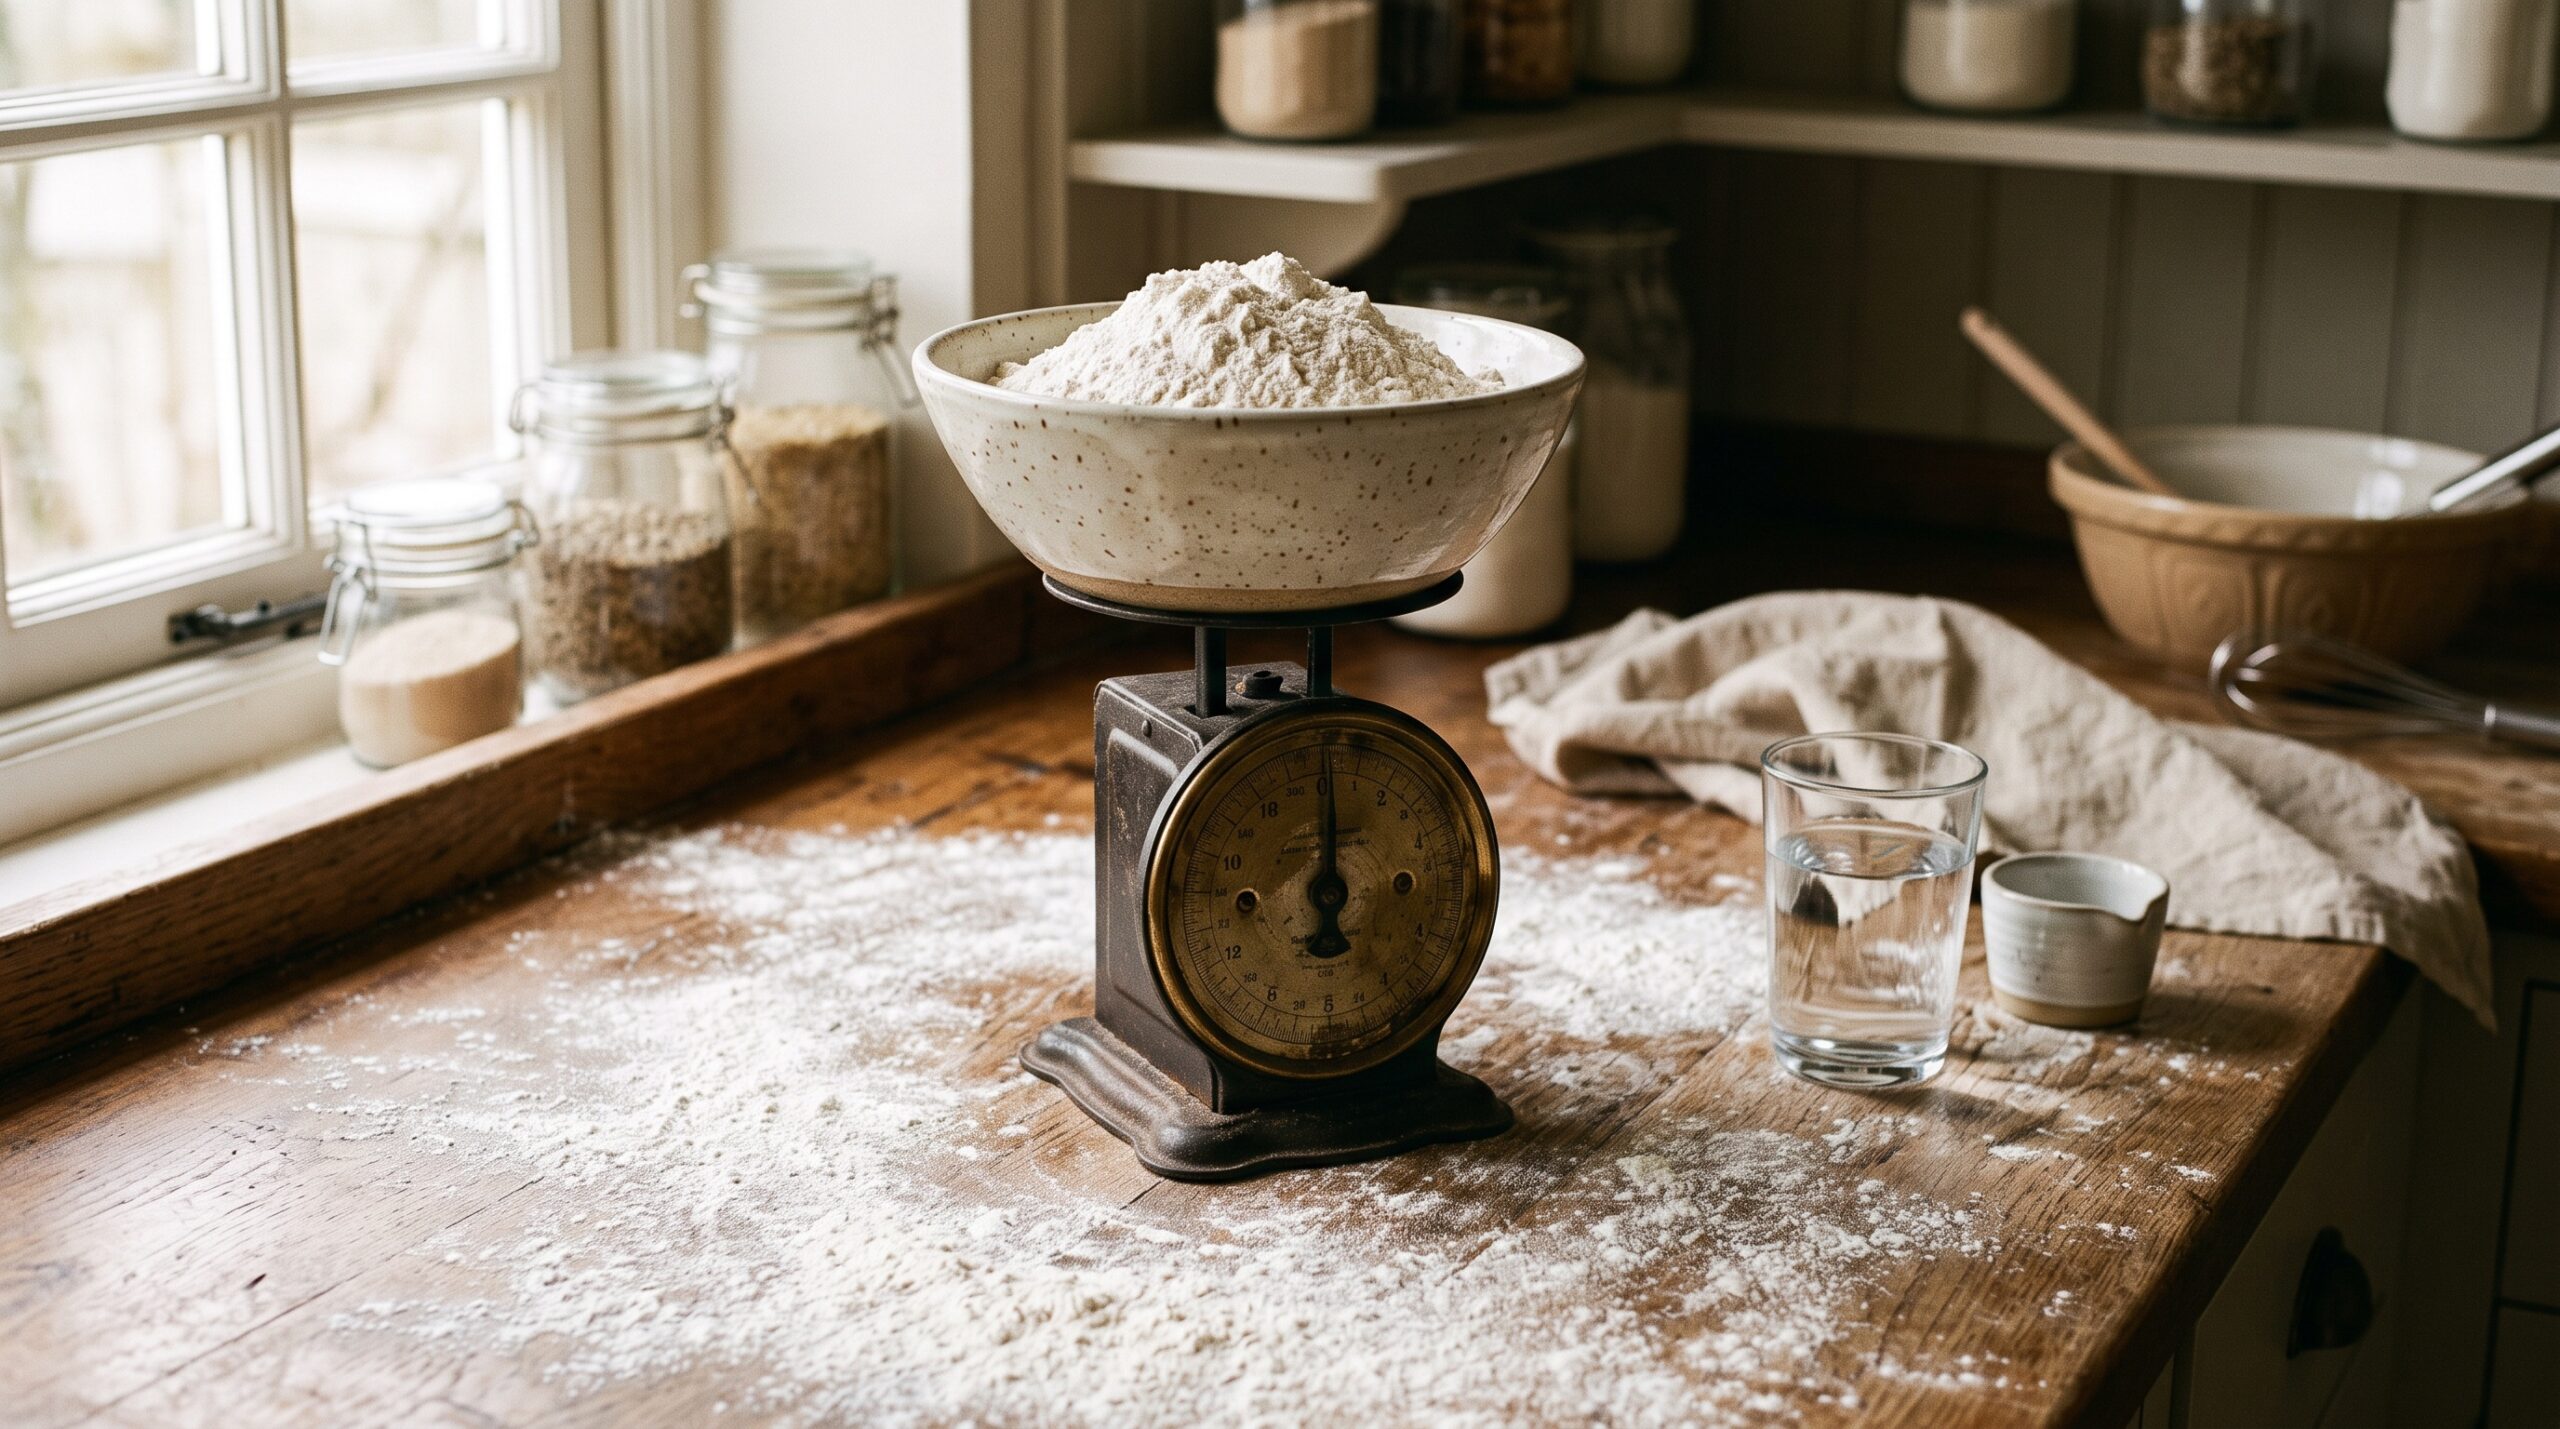
    A kitchen scale holding a bowl of flour next to a glass of water on a flour-dusted wooden counter
    Baker’s percentage starts here: everything is measured against the weight of the flour.

    The one idea behind all of it: flour is always 100%

    Baker’s percentage looks like normal percentages but it follows one rule that trips everyone up at first. Every ingredient is expressed as a percentage of the total flour weight, not as a percentage of the whole dough. The flour itself is always, by definition, 100%. Everything else is measured against it.

    So when a recipe says 75% hydration, it means the water weighs 75% of what the flour weighs. If you have 1,000 grams of flour, then 75% hydration means 750 grams of water. Salt at 2% means 20 grams of salt. If you used two kinds of flour — say 800 grams bread flour and 200 grams whole wheat — they still add up to 1,000 grams, and that combined 1,000 grams is your 100%.

    That is the whole concept. Flour is the anchor at 100%, and every other ingredient is sized relative to it. This is why percentages can add up to well over 100% — a dough might be 100% flour, 75% water, 2% salt, and 20% starter, which totals 197%, and that is completely normal. You are not measuring parts of a whole; you are measuring everything against the flour.

    Why bakers bother with it at all

    You might reasonably ask why not just use grams and be done with it. The answer is that percentages let you see the shape of a recipe instantly, independent of how big the batch is. A one-loaf recipe and a ten-loaf bakery formula can look wildly different in grams but be identical doughs in percentages. The percentage is the recipe’s fingerprint; the grams are just today’s batch size.

    That unlocks three things home bakers quietly struggle with. First, comparison: two recipes written in grams can be impossible to compare at a glance, but convert them to percentages and you can see in a second that one is a wetter, more open-crumbed dough and the other is a tighter sandwich loaf. Second, scaling: want to make half a loaf or three loaves? Keep the percentages, change the flour weight, and recalculate — the dough behaves the same. Third, and best of all, deliberate change: when you think in percentages you can nudge one variable, like bumping hydration from 70% to 75%, and know precisely what you altered when the next loaf turns out different.

    How to actually calculate it

    The math is a single division, and you can do it on any phone. To find any ingredient’s baker’s percentage, divide its weight by the total flour weight, then multiply by 100.

    Say your recipe uses 500 grams of flour and 350 grams of water. Hydration is 350 divided by 500, which is 0.70, times 100 — so 70% hydration. If you add 10 grams of salt, that is 10 divided by 500, or 2% salt. Going the other direction is just as easy: if you want a 500-gram-flour dough at 78% hydration, you multiply 500 by 0.78 to get 390 grams of water. That is the entire toolkit. Divide to read a recipe, multiply to build one.

    A small but important note: your sourdough starter contains both flour and water, and strict baker’s math folds those into the totals. For everyday home baking you can keep it simple and treat the recipe’s listed flour and water as your base — but if you are chasing precision, know that a 100%-hydration starter adds equal parts flour and water to the mix, which nudges your true hydration up a little. It is the same principle at work: if you want to go deeper on how much starter changes things, the idea of inoculation percentage and how it shifts your timeline is the companion concept to hydration.

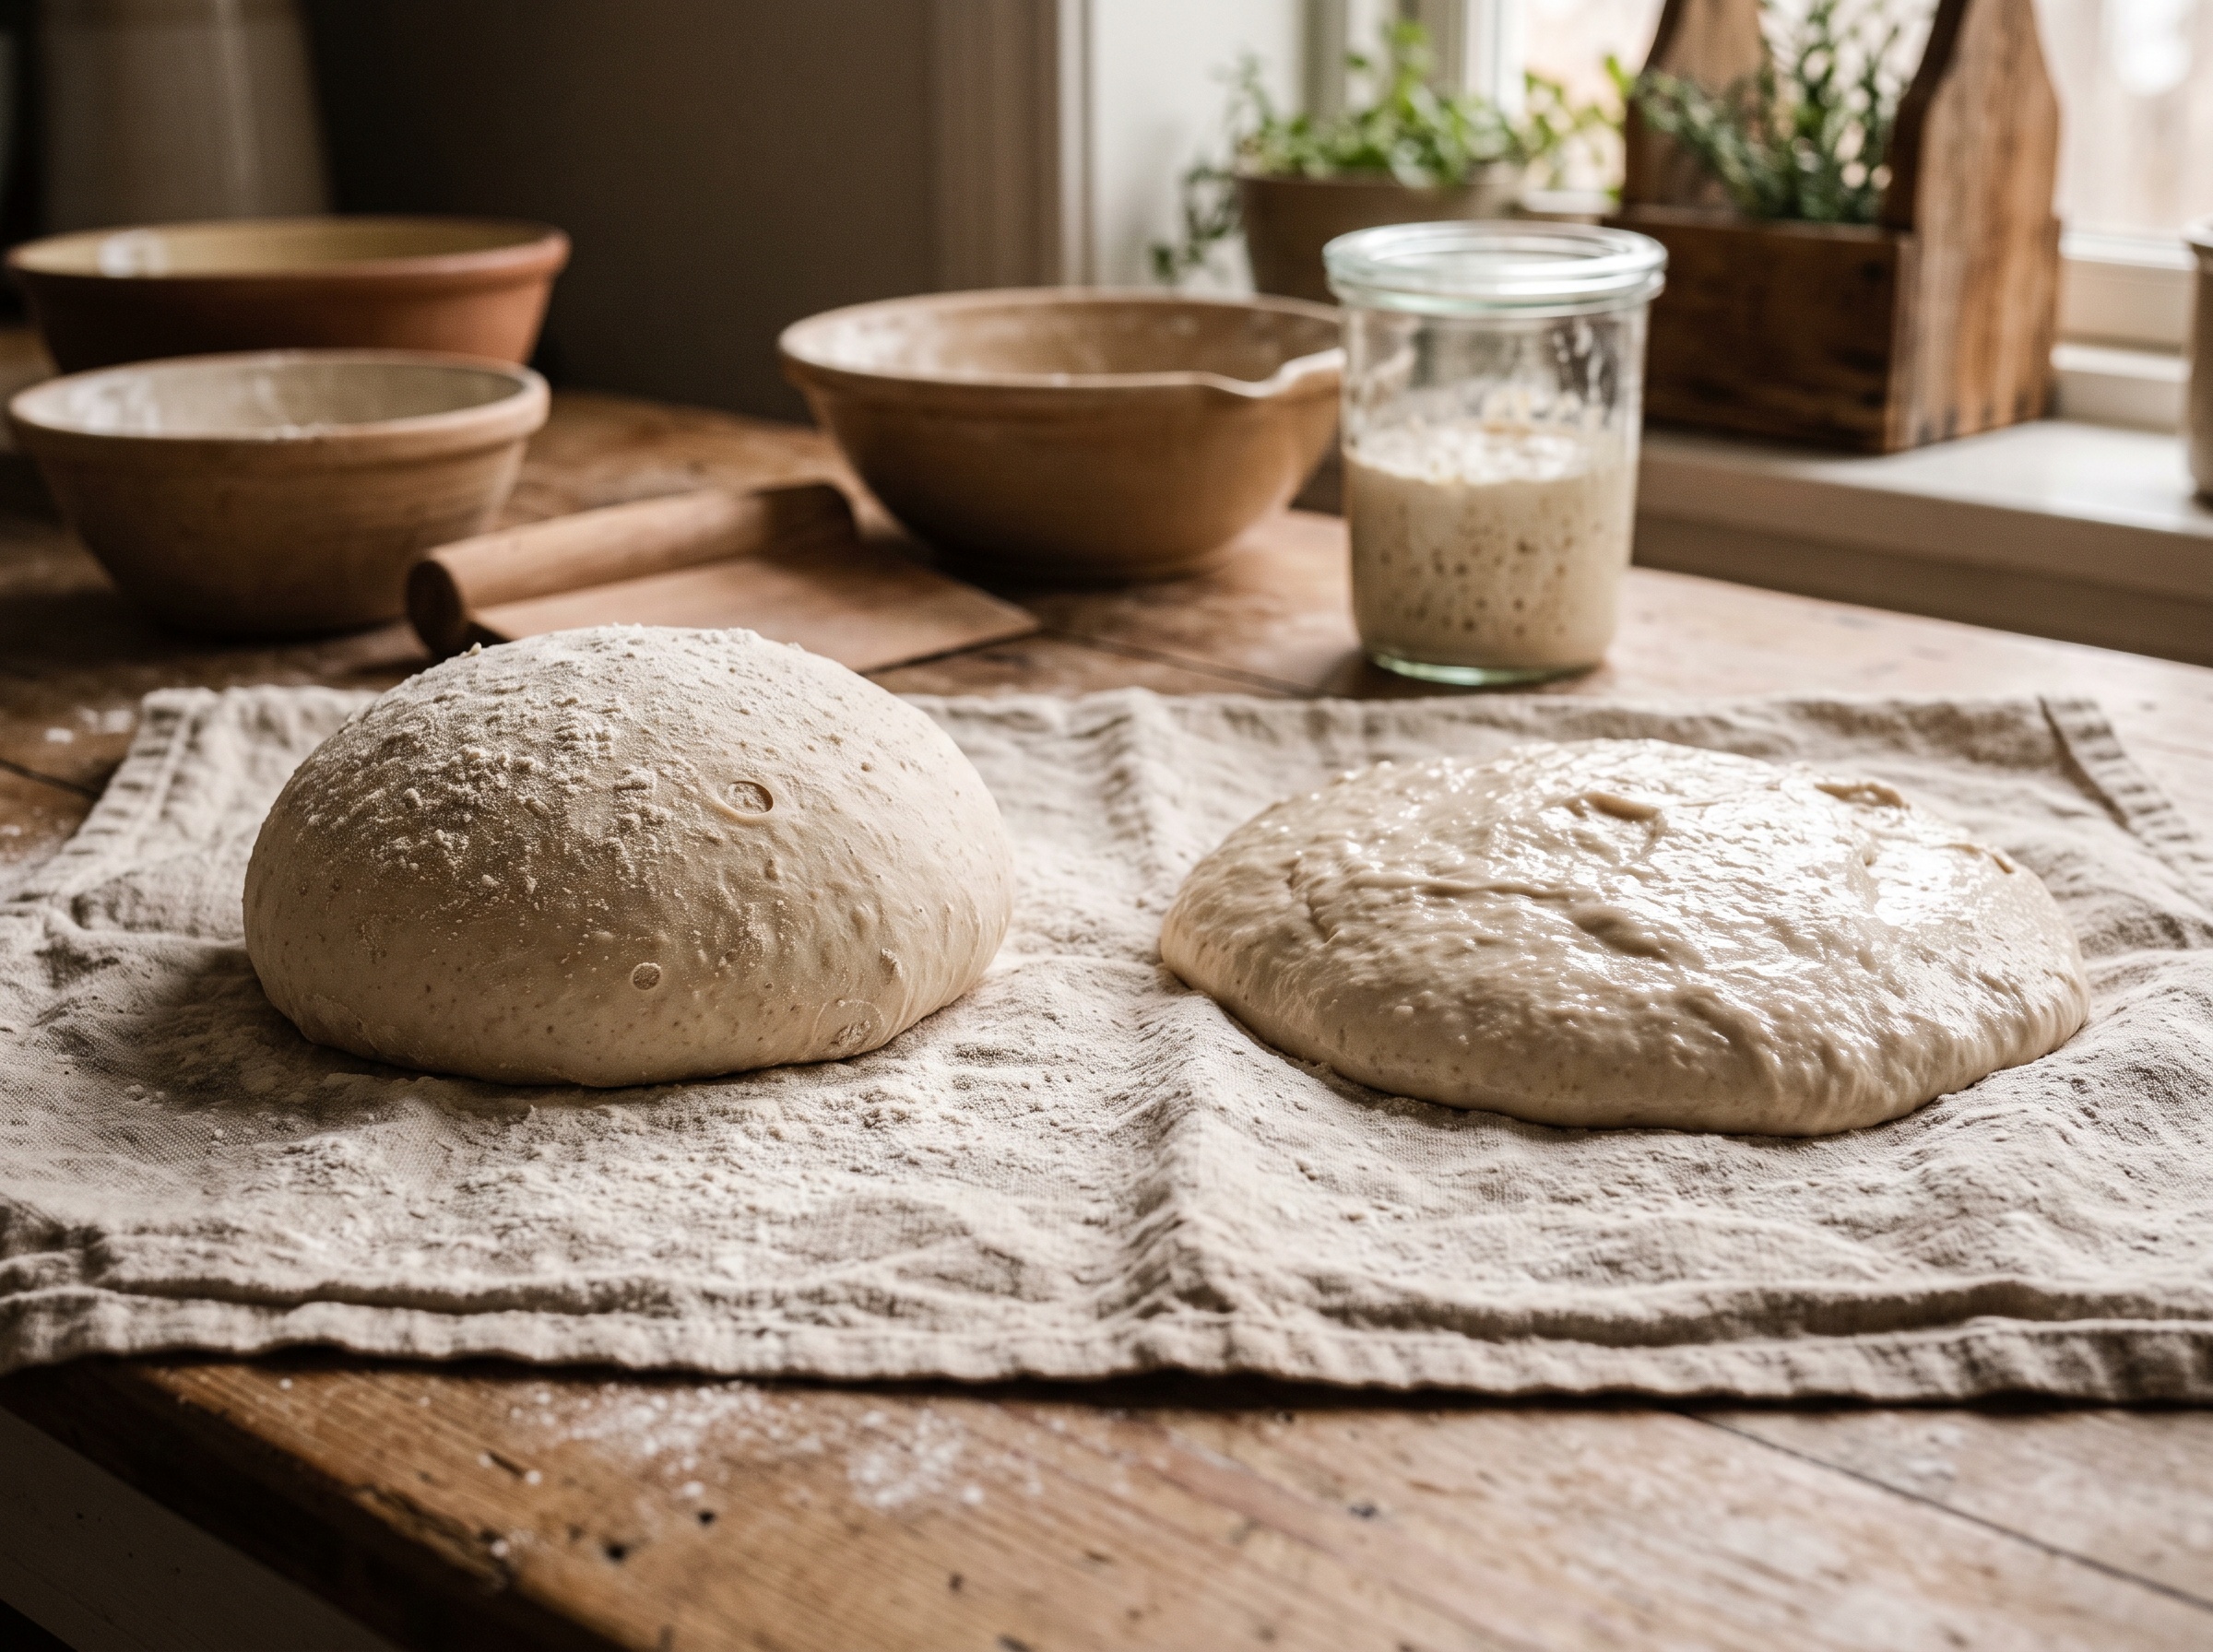
    Two sourdough dough balls side by side: a stiffer rounded one and a wetter, slacker one
    Same flour, different hydration. The wetter dough on the right spreads; the stiffer one holds its shape.

    What hydration actually does to your loaf

    Numbers are only useful if you know what they feel like, and hydration is the number that most directly changes the dough in your hands and the crumb on your plate. In plain terms, hydration is how wet the dough is — and wetness is a trade-off, not a target.

    Lower-hydration doughs, roughly in the 60-68% range, are stiffer, drier, and far easier to handle. They hold their shape, they are forgiving to shape and score, and they tend toward a tighter, more even crumb — exactly what you want for a sandwich loaf or a sturdy everyday bread. Higher-hydration doughs, up around 75-85% and beyond, are slack, sticky, and harder to manage, but that extra water is what gives you the dramatic open, irregular, airy crumb that artisan loaves are famous for. More water generally means a more open crumb and a crisper, more blistered crust — and a dough that will test your patience.

    This is why hydration is the first number experienced bakers look at: it tells them roughly how the dough will behave and what kind of loaf it is aiming for, before they read another word. There is no universally correct hydration. There is only the right hydration for the loaf you want and the flour you are using — and that last part matters more than beginners expect.

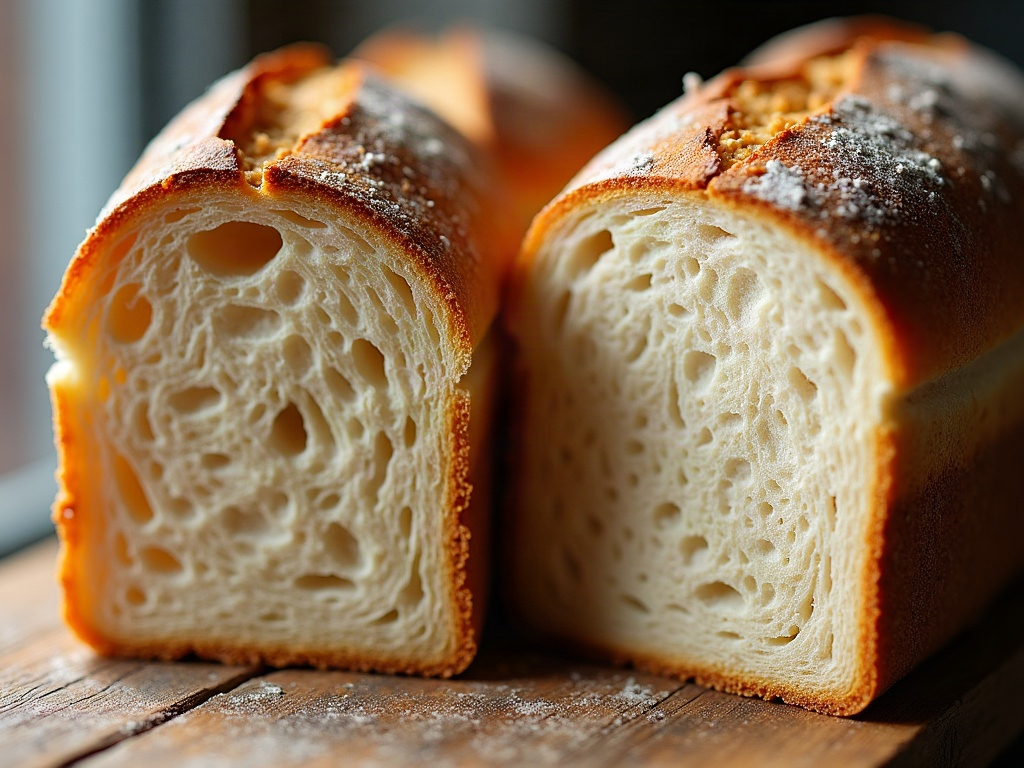
    Two sourdough crumb cross-sections: one tight and even, one open and airy
    Hydration is one of the biggest levers on crumb: drier dough tends tight and even, wetter dough tends open and irregular.

    Flour changes everything, which is why the number is a starting point

    Here is the honest caveat that keeps baker’s percentage from being a magic formula: the same hydration number behaves completely differently depending on your flour. A strong bread flour with high protein drinks up far more water than a low-protein all-purpose, and whole grains like whole wheat and rye are thirstier still. A 75% dough made with a thirsty high-protein bread flour might feel manageable, while the identical 75% with all-purpose can feel like a slurry.

    So treat a recipe’s hydration as a well-informed starting point, not a guarantee. If a dough feels far wetter or stiffer than the recipe implied, your flour is almost certainly the reason, and the fix is to adjust the water a little to match what your flour can actually absorb. This is exactly the kind of adjustment baker’s percentage makes easy: you are not scrapping the recipe, you are changing one number by a few points and noting the result. If you often find yourself fighting a slack, sticky mass, our guide to handling high-hydration dough without the mess picks up right where this leaves off.

    Putting it to work: read, then change one thing

    Here is how to actually use all of this the next time you bake. Before you start, convert the recipe into percentages so you can see what kind of loaf it really is — a quick division of water by flour tells you the hydration, and that alone sets your expectations for how the dough will handle and how open the crumb will be. Then bake it as written, and pay attention to how the dough felt and how the loaf turned out.

    If something was off, resist the urge to change five things at once. Change one number, by a modest amount, and bake again. Too tight a crumb and the dough felt dry? Nudge hydration up a few points. Dough so slack you could not shape it? Bring it down. Because you are working in percentages, you will know exactly what you altered and you can repeat your success — or undo your mistake — with confidence. That is the real gift here: it turns baking from a series of hopeful guesses into a system you can steer.

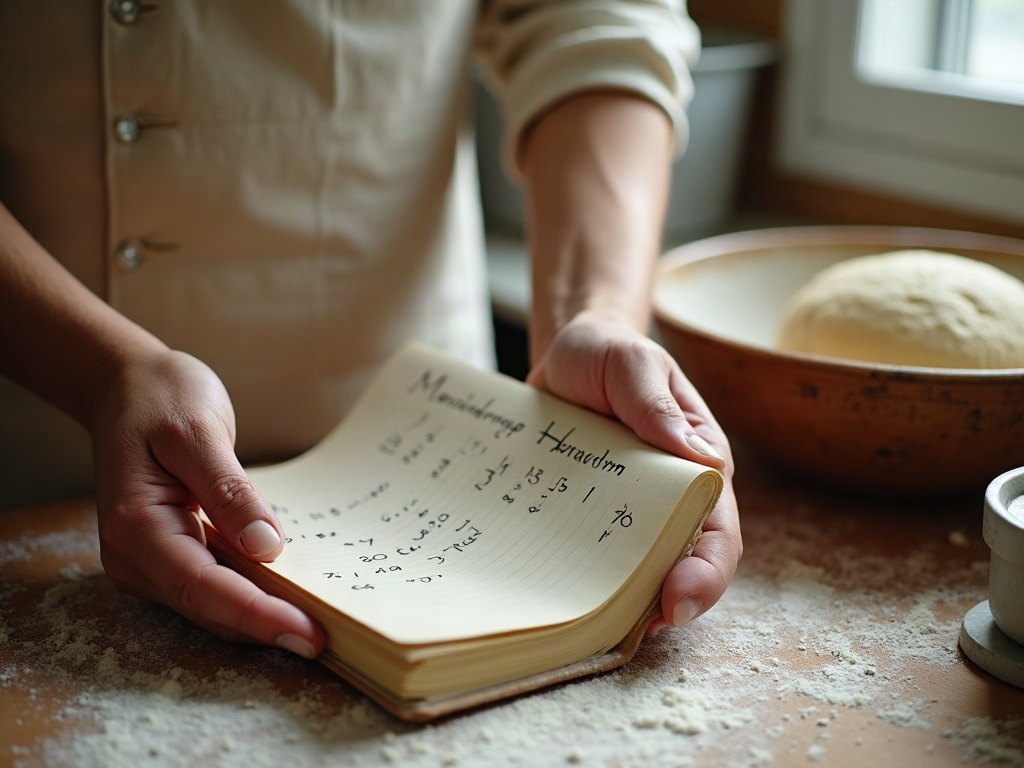
    A baker's hands with a small notebook beside a bowl of dough and a scale
    Once you think in percentages, you can write down a formula, repeat it exactly, and change one number at a time.

    Baker’s percentage is not advanced baking reserved for professionals. It is the simplest, most practical lens you can put on a recipe, and it rewards you the moment you understand it: flour is 100%, everything else is measured against it, and hydration is the number that tells you how your dough will feel and how your crumb will open. Learn to read it and you stop being at the mercy of whoever wrote the recipe — you start making deliberate, repeatable decisions about your own bread.

    If you would rather see the wet-versus-dry difference with your own eyes, we walk through doughs at different hydrations side by side over on the LoafLovers YouTube channel, and our free sourdough troubleshooting guide keeps these numbers handy for the next time a loaf does not go to plan. Drop your email and we will send it over — so the next time a recipe says “75% hydration,” you will know exactly what it is promising you, and exactly how to change it if it does not deliver.

    Related Reading

  • How to Dry Sourdough Starter for a Backup That Lasts Years

    How to Dry Sourdough Starter for a Backup That Lasts Years

    Every long-time sourdough baker has a quiet fear in the back of their mind: the starter they spent weeks coaxing to life gets wiped out in a single careless moment. A skipped week of feedings. A fridge that dies on vacation. A jar knocked off the counter. A move across the country. Mold. It happens, and it is heartbreaking when the culture you have fed and named and relied on is suddenly gone.

    Here is the good news. Learning how to dry sourdough starter gives you a backup that is almost indestructible. A dried starter is simply your living culture put into deep sleep. It takes up no room, needs no feeding, survives in a drawer for a year or more, and comes back to life with a little flour and water. It costs you nothing but ten minutes and a sheet of parchment. If you only ever learn one piece of starter insurance, make it this one.

    Why dry a starter at all?

    Drying is the most reliable way to preserve a sourdough culture, and it solves several real problems at once:

    • Insurance against disaster. If your active starter molds, gets neglected, or gets thrown out, you simply rehydrate your backup instead of starting from scratch.
    • Long breaks. Traveling for a month or taking a baking hiatus? Dry a portion, stop worrying about feedings, and pick up exactly where you left off.
    • Sharing and mailing. Dried starter is lightweight, shelf-stable, and can be tucked into an envelope. It is how most “heirloom” starters actually travel between bakers.
    • A clean reset. If your working starter drifts too sour or sluggish over time, a dried backup lets you return to the version you liked best.

    Think of it the way a photographer thinks about backing up photos. The working copy lives on your counter. The dried copy lives safely out of the way, doing nothing, until the day you desperately need it.

    When to dry it: catch the culture at its best

    The single most important rule is to dry your starter when it is healthy and active, not when it is struggling. You are freezing a snapshot in time, so you want that snapshot to be of a vigorous, well-fed culture.

    Feed your starter as usual and let it come up toward its peak — bubbly, domed, lively, smelling pleasantly tangy rather than sharp or like acetone. You want it active, but you do not need it exactly at the top of its rise. A starter that is climbing well and full of bubbles is ideal. If your starter has been neglected or smells off, feed it for a few days until it is behaving normally before you dry a backup. A weak culture dried is still a weak culture when it wakes up.

    How to dry sourdough starter, step by step

    The whole technique is just “spread it thin and let it dry out slowly.” That is genuinely all it is. Here is the process that works reliably:

    1. Line a tray with parchment. A baking sheet with a piece of parchment paper or a silicone mat is perfect. Do not use wax paper — dried starter glues itself to it and tears.
    2. Smear it thin. Spoon a few tablespoons of active starter onto the parchment and use an offset spatula or the back of a spoon to spread it into the thinnest, most even layer you can manage — ideally about the thickness of a credit card, or thinner. The thinner the smear, the faster it dries and the more completely it dries through.
    3. Let it air dry. Set the tray somewhere with good airflow, out of direct sun, at normal room temperature. Depending on humidity, it will take anywhere from several hours to two days. You are waiting until the layer is completely dry — brittle, papery, and crackly, with no soft or tacky spots anywhere. Patience matters here; any moisture left inside is where mold can start during storage.
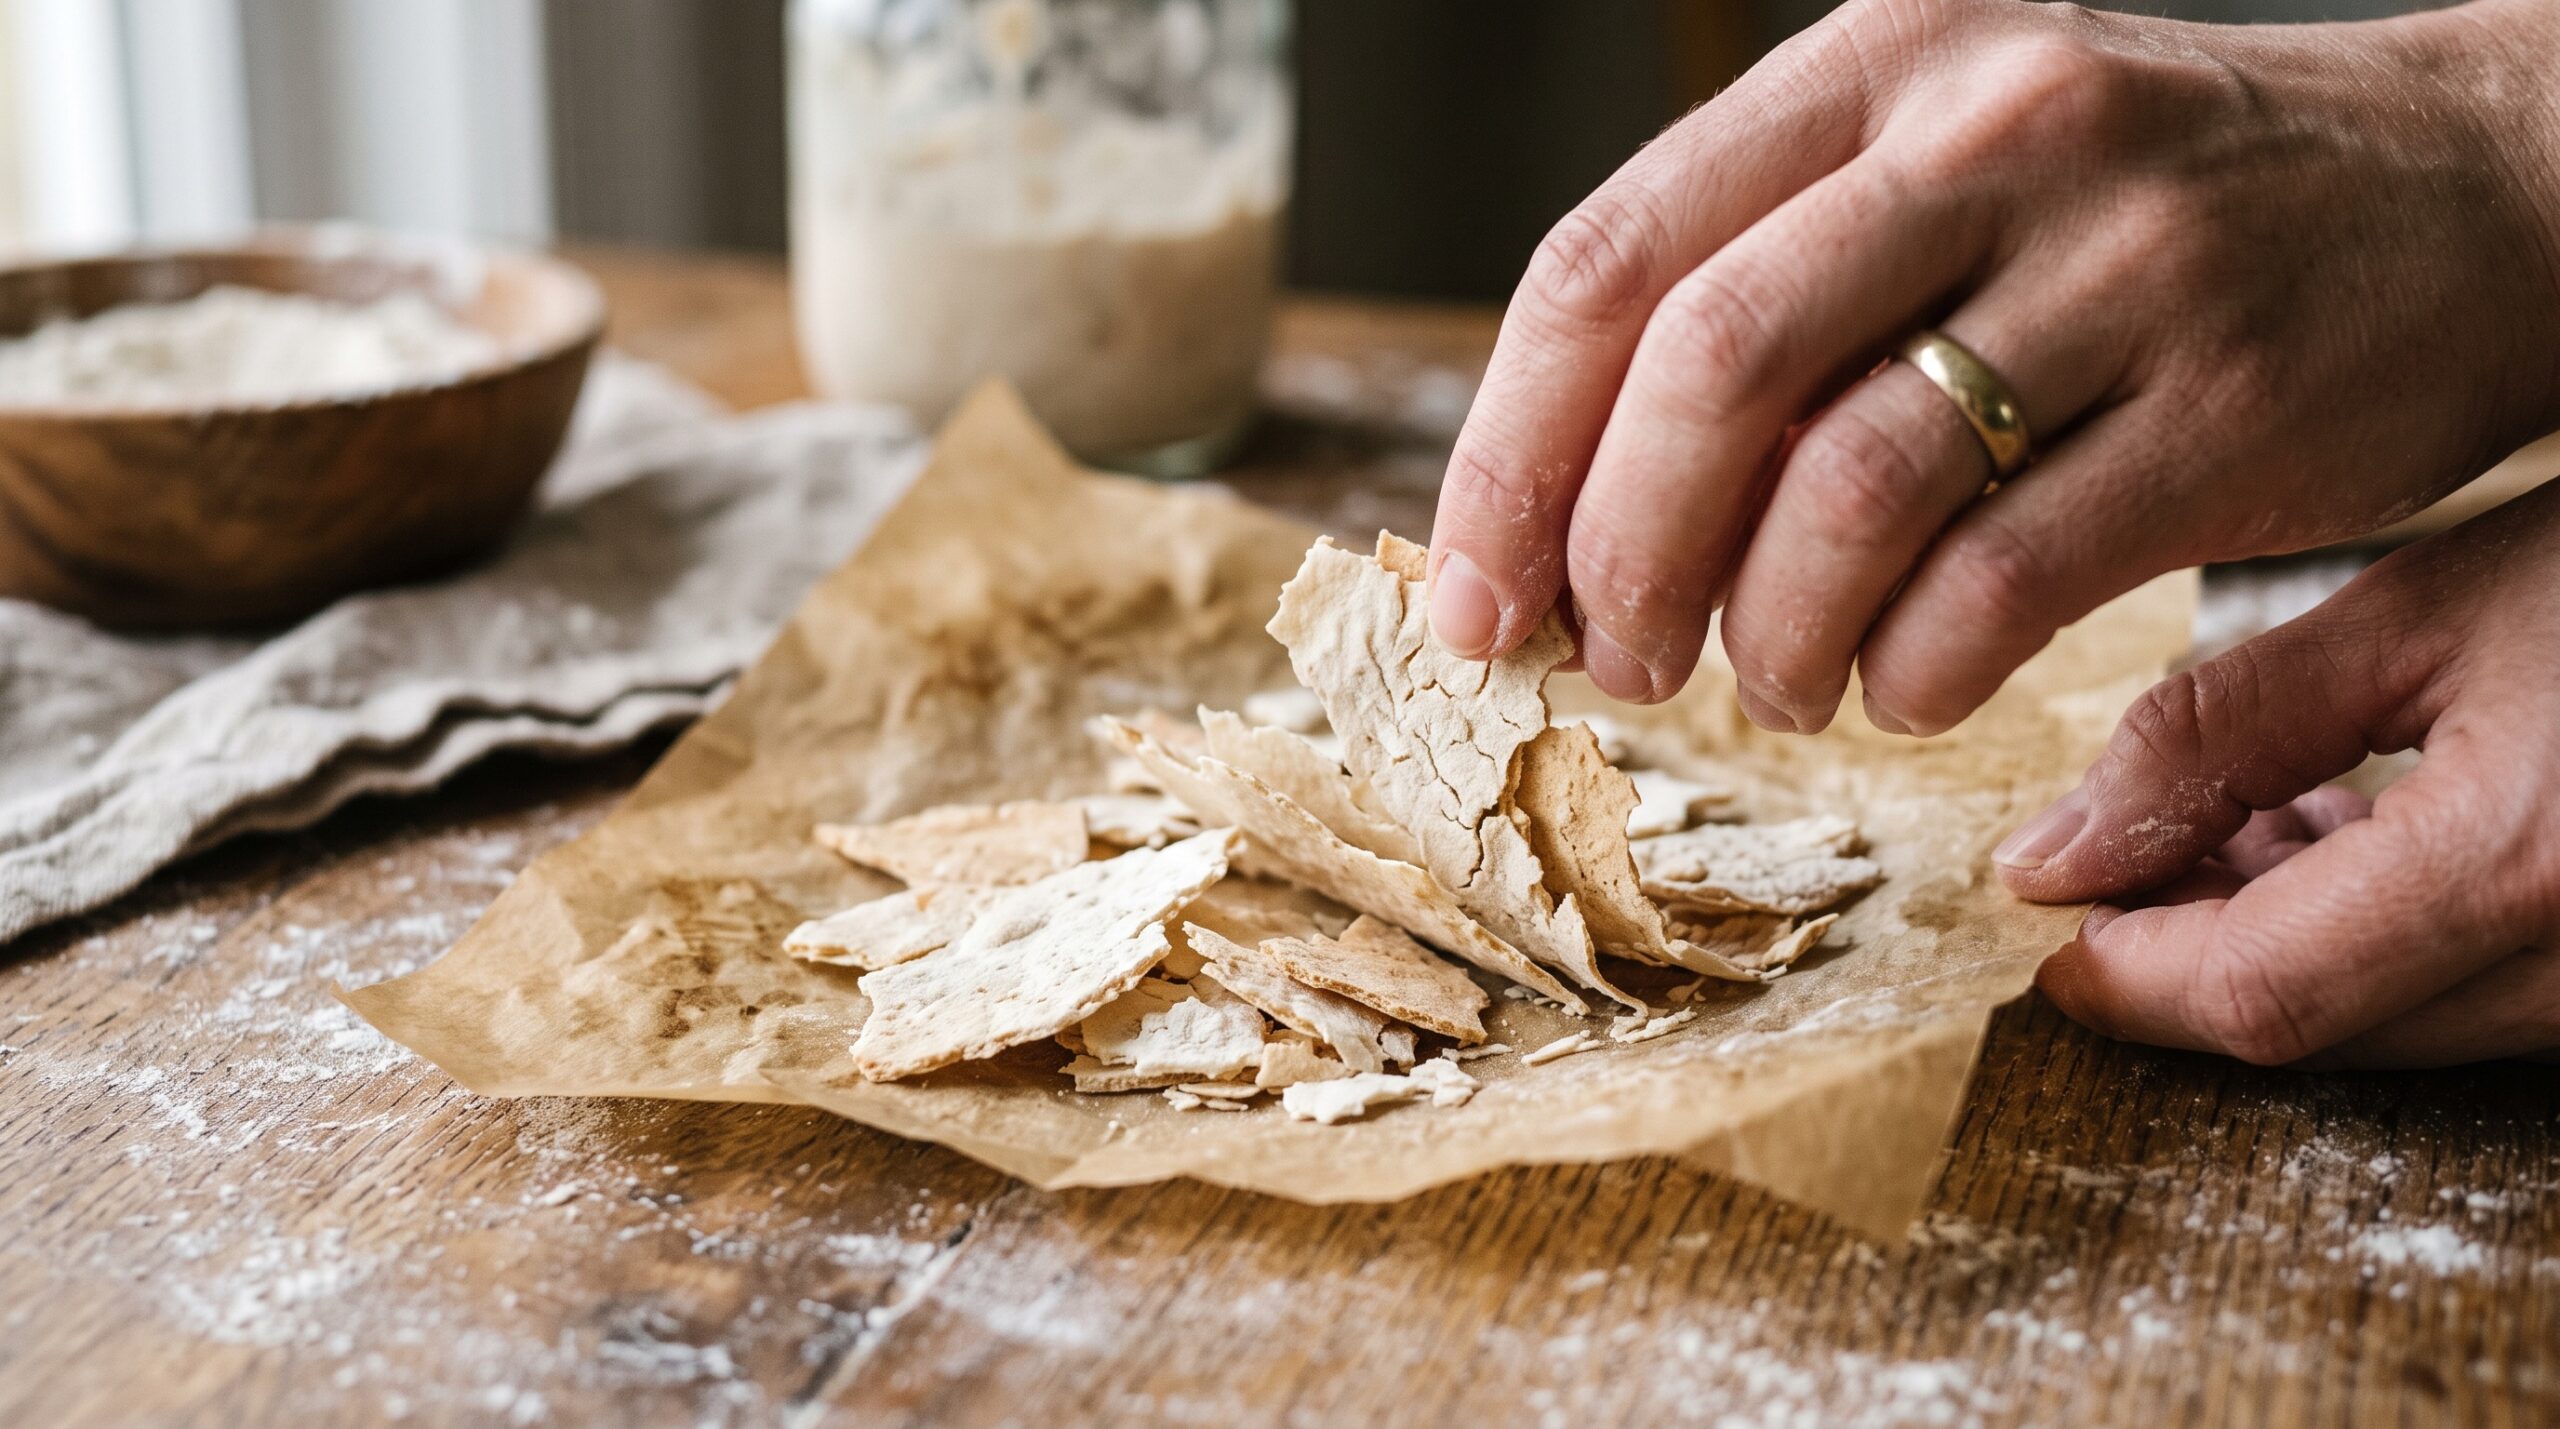
    4. Break it into flakes. Once it is bone dry, the sheet will crack and lift off the parchment in thin shards. Crumble these into flakes. If you want, run them through a clean, dry spice grinder or blender to make a fine powder, which rehydrates a little faster and stores more compactly. Flakes work perfectly well too.

    A few things to avoid. Do not try to rush it in a hot oven — temperatures much above body heat start killing the yeast and bacteria you are trying to preserve. A dehydrator set no higher than about 95°F (35°C) is fine if you have one, but honest room-temperature air drying is the safest default. And resist drying a thick glob; it looks done on the surface while staying damp underneath, and that hidden moisture is the number-one reason a backup goes moldy in the jar.

    How to store your dried backup

    Once you have dry, brittle flakes or powder, storage is easy because the enemy — moisture — is already gone. Put the flakes in a clean, completely dry airtight container: a small jar, a zip bag, or a vacuum-sealed pouch. Keep it somewhere cool, dark, and dry. A pantry drawer is fine; the fridge or freezer extends its life even further and is worth doing if you want a true long-term backup.

    Label it with the date so future-you knows how old it is. Dried starter stored this way stays reliably viable for a year or more, and many bakers have revived backups that sat for several years. For real peace of mind, make two batches and keep them in different places, so a single accident cannot take out both.

    How to bring a dried starter back to life

    Reviving is just rehydrating and then feeding, and it usually takes a few days of patience. Do not panic if it looks dead at first — waking a dried culture is slower than feeding an active one.

    1. Rehydrate. Put about a tablespoon of flakes or powder in a clean jar and add a small amount of lukewarm, non-chlorinated water — just enough to dissolve the flakes into a loose slurry. Stir, and let it sit for an hour or so until the pieces soften and break down.
    2. First feed. Stir in roughly equal weights of flour and water to make a thick paste, cover loosely, and leave it at warm room temperature. For the first day or two it may do absolutely nothing. That is normal.
    3. Keep feeding. Once a day (or every 12 hours once it stirs), discard most of it and feed with fresh flour and water, just as you would with any starter. Somewhere around day two or three you will see the first stubborn bubbles, then a slow rise, then a confident one.
    4. Confirm it is ready. When it is doubling predictably within a few hours of feeding and smelling pleasantly tangy, it is back. You can bake with it again.

    The timeline varies. A backup dried last month might wake up in two days; one that sat for two years might take four or five. Give it a week before you worry.

    Troubleshooting a stubborn revival

    Most failed revivals come down to a handful of causes, and each has a simple fix:

    • No activity after several days. Usually it is too cold. Yeast activity crawls in a cool kitchen. Move the jar somewhere warmer — around 75 to 80°F (24 to 27°C) — and keep feeding. Warmth is the lever that restarts most sluggish cultures.
    • It bubbled once, then stalled. That early burst is often leftover gas, not true fermentation. Keep up consistent daily feedings; the real yeast population takes a few cycles to rebuild.
    • It smells like acetone or has liquid on top. It is hungry, not dead. Feed it more often and it will settle down.
    • Actual fuzzy mold — pink, green, or black. This is the one case to discard and start over with a fresh backup. (Keeping two batches in two places is exactly why this is only a minor setback.)

    If a revival truly refuses after a week of warm, consistent feeding, it almost always means the starter was dried in a weak state or dried too slowly and spoiled before it finished. That is why catching it healthy and drying it thin matter so much — get those two things right and revival is nearly foolproof.

    The bottom line

    Drying a backup is the cheapest, most reliable insurance in all of sourdough. Ten minutes, a sheet of parchment, and a thin even smear buys you a culture that can sit dormant for years and come back to life on demand. Do it the next time your starter is bubbling happily — not the day it is in trouble. Future-you, staring at a moldy jar or packing for a long trip, will be deeply grateful.

    Want to see the smear-and-revive process in real time? The full walkthrough — what a good smear looks like, and what a backup looks like waking up day by day — lives on the LoafLovers YouTube channel, and our free sourdough troubleshooting guide has a printable starter-rescue checklist you can keep on the fridge.

    Related Reading

  • Why a Kitchen Scale Beats Measuring Cups for Every Sourdough Bake

    Why a Kitchen Scale Beats Measuring Cups for Every Sourdough Bake

    You followed the recipe. Same flour, same starter, same steps as last week — and yet this loaf came out dense and tight when the last one was airy, or soupy and unshapeable when the last one behaved. Before you blame your starter, your technique, or the weather, look at how you measured. If the answer is “cups,” we’ve probably found your problem.

    This isn’t baker snobbery. The single highest-leverage upgrade a struggling sourdough baker can make isn’t a banneton, a fancy flour, or a new folding technique. It’s an $15 digital scale and the habit of weighing in grams.

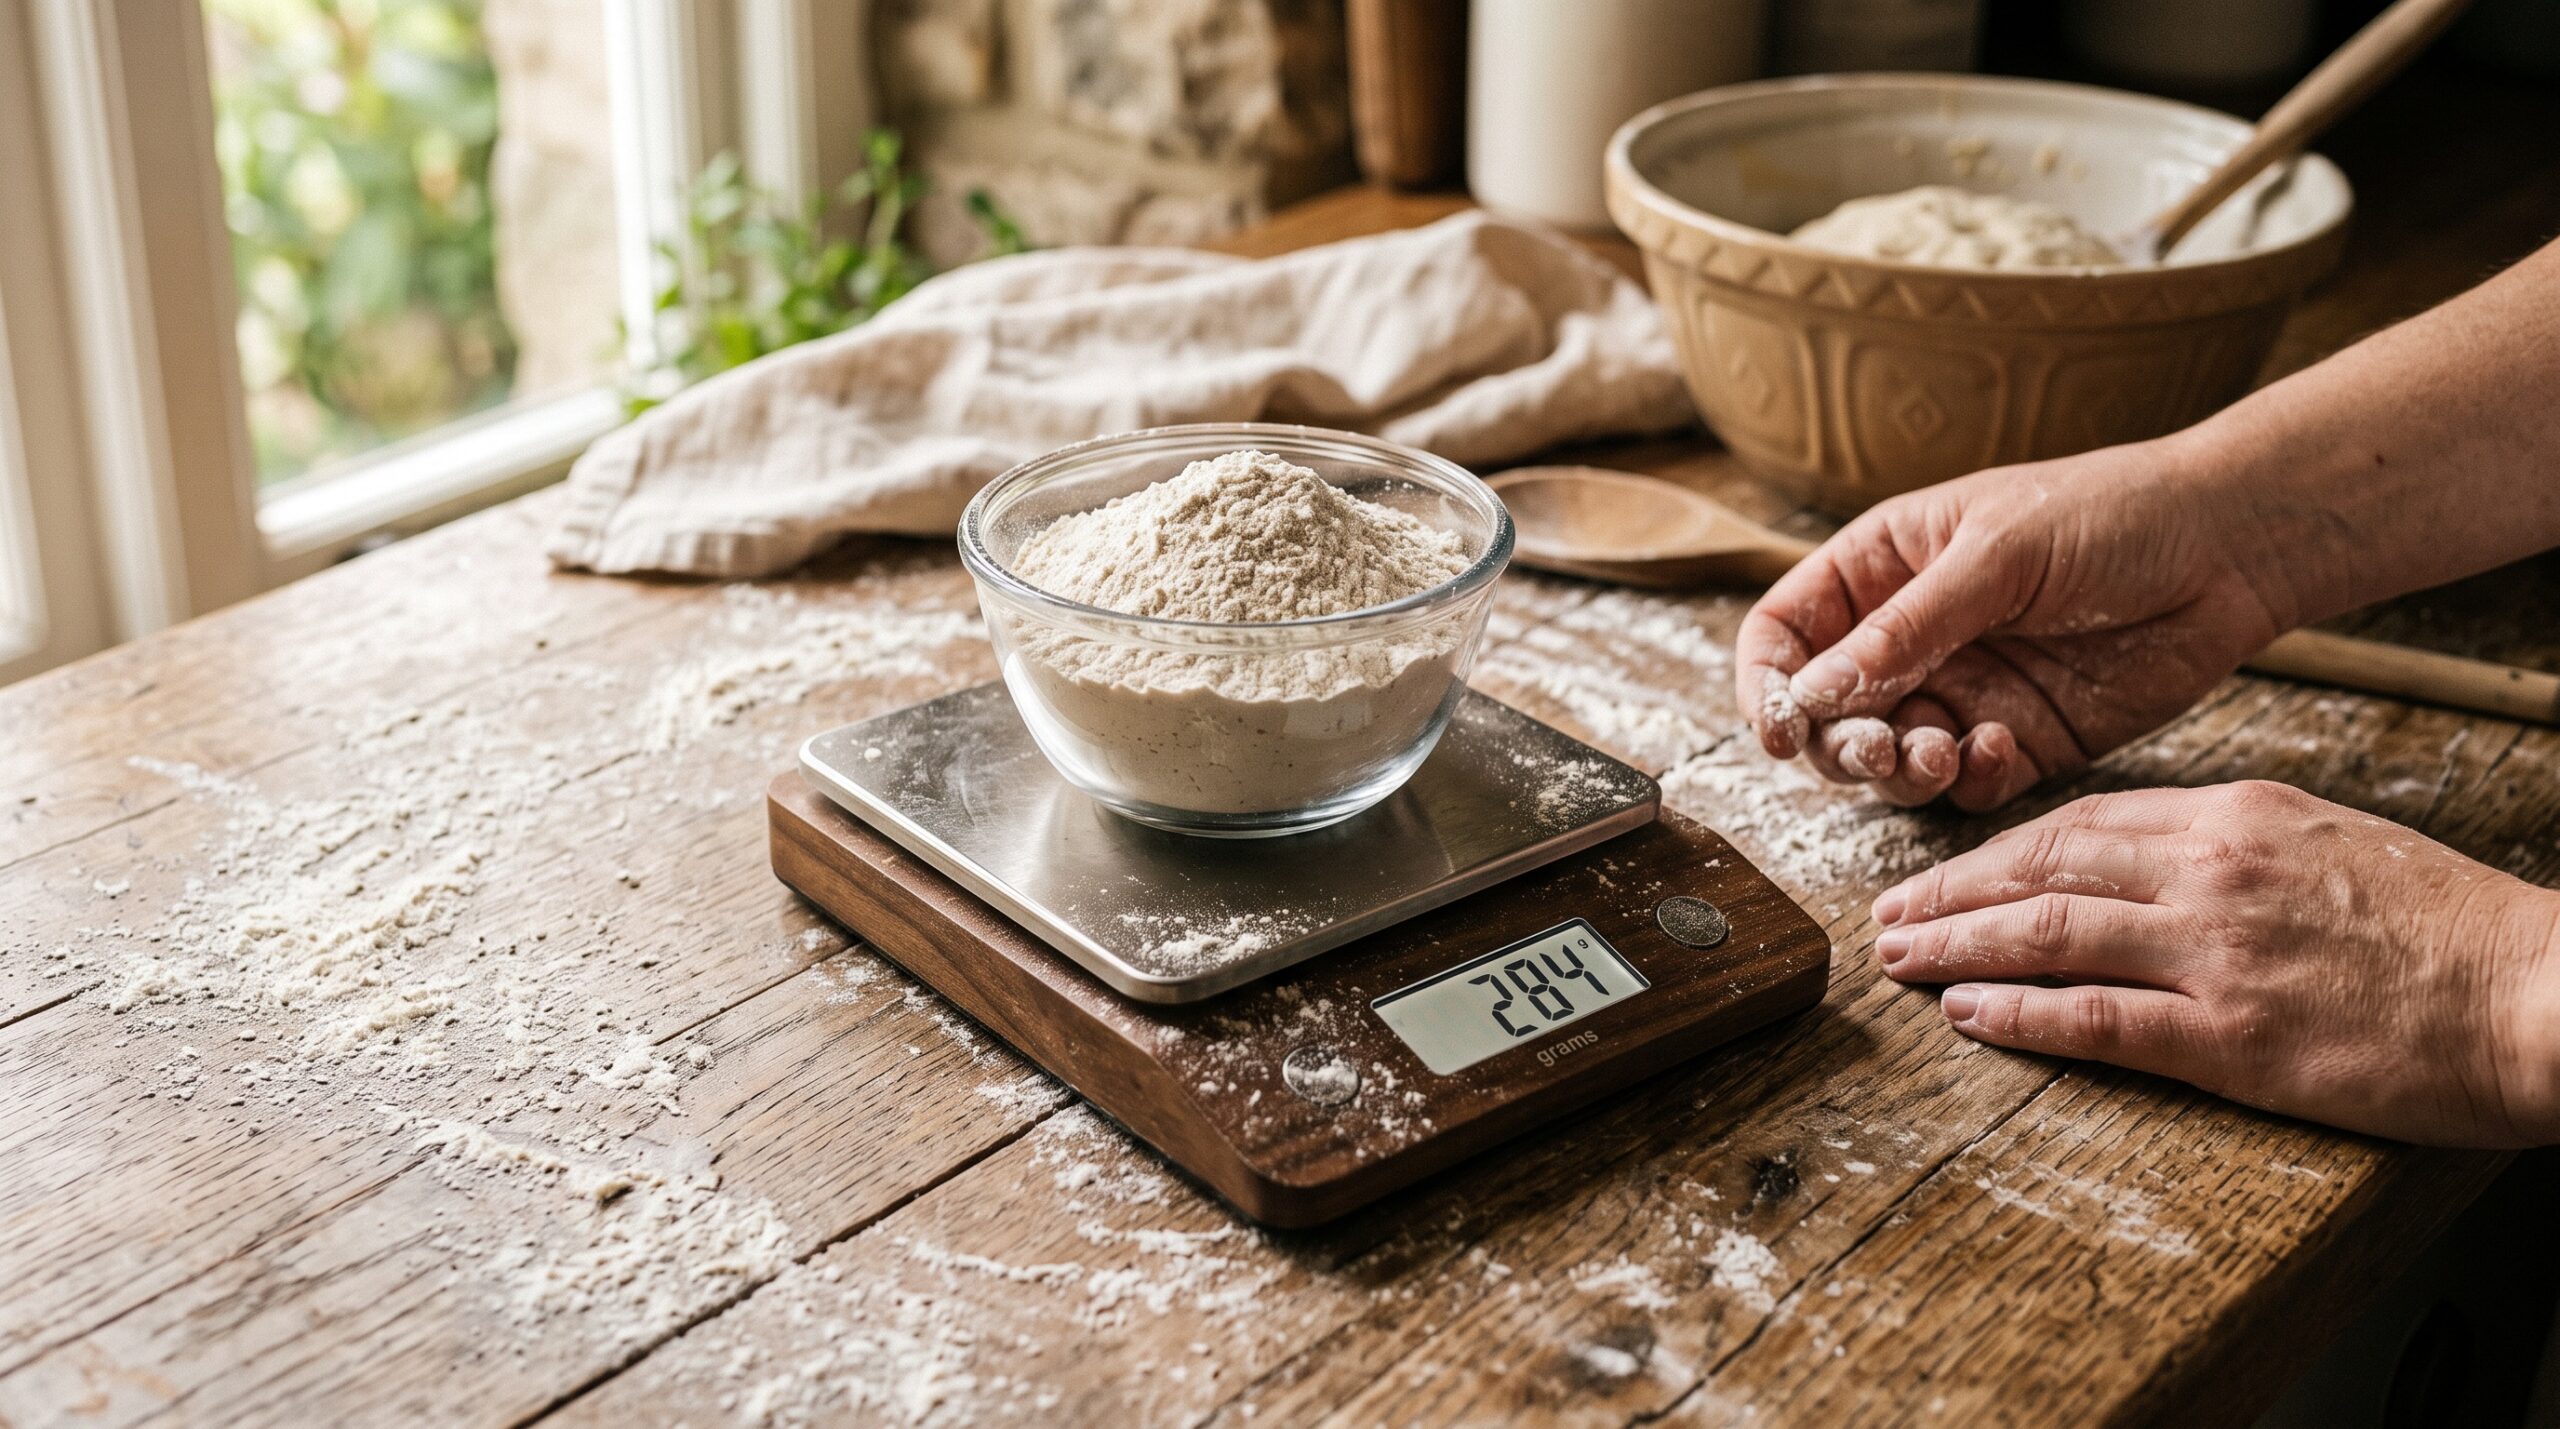
    Digital kitchen scale weighing bread flour in a glass bowl on a floured wooden counter
    One bowl, one number: weighing flour removes the biggest source of guesswork.

    A cup of flour isn’t a cup of flour

    Flour is fluffy, compressible, and wildly inconsistent by volume. Scoop it straight from the bag and you pack it down; spoon it in gently and you aerate it. Depending on how you fill the cup, “one cup” of bread flour can weigh anywhere from about 120 to 150 grams.

    Two cups of the same flour, one loosely scooped and one packed, showing different amounts
    Same cup, very different amount of flour – and your dough feels every gram of it.

    That’s a swing of up to 25 percent. In a recipe calling for three cups, you could be off by nearly a full cup of flour without doing anything “wrong.” Your water stayed the same, so your real hydration lurched. That is exactly why one bake is a stiff brick and the next is a sticky puddle — not bad luck, just a measuring tool that can’t hold still.

    Hydration is a ratio, and cups can’t do ratios

    Everything that makes sourdough behave — how slack the dough feels, how much it spreads, how open the crumb gets — comes down to the ratio of water to flour. Bakers call that hydration, and it’s a percentage: 350g water to 500g flour is 70% hydration, every single time.

    You simply cannot track that with cups, because the cup itself keeps changing weight. When you weigh, hydration becomes a dial you can actually turn. Dough too tight and dense? Nudge the water up a few percent next time. Too slack to shape? Dial it back. With cups, you’re turning a dial that isn’t connected to anything.

    One bowl, one scale, far less mess

    Weighing is also just easier once you try it. Put your mixing bowl on the scale, press tare to zero it, pour in flour to your target number. Tare again, add water. Tare again, add starter and salt. The whole dough gets built in one bowl with nothing to wash but a spoon.

    Baker adding water to a bowl on a tared kitchen scale
    Tare to zero, add the next ingredient, repeat – the whole dough in one bowl.

    No nested cups, no leveling off with a knife, no spoons crusted with starter. For sticky ingredients especially — starter clings to a measuring cup and lies to you about how much you actually added — weighing straight into the bowl is both cleaner and honest.

    It turns a recipe into something you can fix

    Here’s the part that changes everything for a frustrated baker: when your bake is written in grams, a bad loaf becomes a solvable problem instead of a mystery.

    Two sourdough loaves cut open, one dense and one with an open crumb
    Inconsistent measuring, inconsistent crumb – the loaf on the right is the repeatable one.

    If you weighed everything and the loaf came out gummy, you can look back and reason: the hydration was 78% and this flour couldn’t handle it, so next time I’ll try 72%. If you used cups, you have no idea what you actually did, so you can’t change one thing and learn from it. Weighing is what lets you troubleshoot at all. Every “why is my loaf…” fix we talk about assumes you can repeat a bake — and you can’t repeat what you never measured.

    How to switch over without the overwhelm

    You don’t need to relearn baking. Grab any inexpensive digital scale that reads in grams (1-gram increments is fine) and has a tare button. Then use a simple starting formula you can memorize:

    • 500g bread flour
    • 350g water (that’s 70% hydration)
    • 100g active starter
    • 10g salt

    That’s one standard loaf. Weigh it once, write down how the dough felt and how the crumb turned out, and adjust a single number next time. Keep a little notebook of your weights and results.

    A notebook of gram weights and percentages beside a scale, flour, and a starter jar
    Once it’s in grams, every bake becomes a recipe you can actually repeat and tweak.

    Within a few bakes you’ll stop chasing ghosts. The loaf that worked becomes a loaf you can make again on purpose — which, when you’re learning sourdough, is the whole game.

    If you want to see the weighing-and-building flow in action, the full walkthrough lives on the LoafLovers YouTube channel, and our free sourdough troubleshooting guide covers the ratios step by step. Weigh it, write it down, and let your next loaf be a repeat instead of a roll of the dice.

    Related Reading

  • Can You Bake With Cold Starter Straight From the Fridge?

    Can You Bake With Cold Starter Straight From the Fridge?

    It’s the moment every fridge-starter baker knows. You’ve decided today’s the day for a loaf, you pull the jar out—and it’s cold, a little flat, maybe with a thin layer of liquid on top. The “proper” answer is to feed it, wait for it to peak, and bake tomorrow. But you want to bake now. So can you just use it straight from the fridge?

    The honest answer: sometimes, yes—and more often than the rulebook admits. But it depends entirely on one thing, and if you get that wrong you’ll end up with a dense, sad loaf and no idea why. Let’s walk through it the way you’d actually decide at the counter.

    A cold jar of sourdough starter fresh from the fridge on a floured wooden counter
    Straight from the fridge: cold, a little settled, but far from dead. The question is where it sits in its cycle.

    The short answer

    You can bake with cold starter straight from the fridge if it was strong and reasonably recently fed when it went in, and you’re willing to give the dough extra time and warmth to make up for a slow start. What you can’t do is skip the one thing that matters: the starter has to have enough live, hungry yeast in it to raise a whole loaf. Cold doesn’t kill that. Neglect does.

    So this isn’t really a question about temperature. It’s a question about where your starter sits in its feeding cycle.

    What’s actually happening in that cold jar

    A starter in the fridge isn’t dead or even asleep in the way people imagine. It’s just running in extreme slow motion. The cold throttles the yeast and bacteria right down, so they eat slowly, ferment slowly, and can coast for one to two weeks on a single feed instead of needing one every day.

    That’s the good news: a healthy starter survives the fridge easily. The complication is where in its cycle it stopped. If you fed it, let it get going, then chilled it, it went in near the top of its strength and still has plenty of food and gas-producing power left. If it sat for three weeks with a finger of hooch on top, it has eaten through its food, gone acidic, and the yeast population is tired and sluggish. Both are “cold starter.” Only one of them will raise your bread today.

    If any of that “rises then collapses” or “won’t wake up” pattern sounds familiar, it’s worth understanding the cycle itself—we broke it down in why your starter rises then collapses, and the fridge simply stretches that same curve out over days.

    Close-up comparing a peaked bubbly starter with a flat, settled starter topped with hooch
    Peaked and domed versus flat with a little hooch on top. Same starter, very different readiness.

    When cold starter straight from the fridge WILL work

    Reach for it with confidence when most of these are true:

    • It’s a mature, established starter—months old, with a reliable track record of doubling. Robust starters shrug off the cold.
    • It was fed within the last week or so before going in, and ideally went into the fridge already active and climbing rather than dead flat.
    • It still smells pleasant—tangy, yeasty, maybe a little boozy—not sharply acetone or nail-polish harsh.
    • You’re on a long, relaxed timeline—a day where the dough can take its time, or you’re planning a long cold retard overnight anyway.

    In that situation a cold starter has all the living yeast it needs; it’s just chilly and a touch settled. Mixed into dough that then sits in a warm kitchen, it wakes right up and ferments—just on a slower clock than a fresh, peaked starter would.

    When it won’t (and you shouldn’t force it)

    Hold off, and feed first, when:

    • It’s been neglected for two, three weeks or more with thick hooch and a flat, lifeless look. The yeast is exhausted and needs a feed or two to rebuild before it can carry a loaf.
    • It smells aggressively of acetone or vinegar—a sign it’s gone very acidic and hungry. That acidity also weakens gluten, so even if it limps along, your dough can turn slack and gummy.
    • It’s young or unreliable—a starter you only built a couple of weeks ago doesn’t have the yeast reserves to bake cold and unfed. If it’s generally sluggish, our guide to a starter that isn’t rising is the better place to start than a loaf.
    • You need the loaf on a tight schedule. Cold-and-unfed is the slow route. If you’re racing a deadline, a freshly peaked starter is far more predictable.

    The failure mode here is always the same: not enough raising power, so the dough barely ferments, you bake it anyway out of hope, and you get a dense, tight, slightly gummy brick. Cold starter didn’t do that—a weak starter did.

    Cold starter being mixed straight into a bowl of shaggy sourdough dough by hand
    Using it cold means mixing it straight in — and then nudging everything else to make up for the slow start.

    How to use cold starter without feeding it first

    If your starter passed the checklist above, here’s how to actually pull it off:

    Use more of it. This is the single biggest lever. A cold, unfed starter is less lively per spoonful than a peaked one, so compensate by raising the inoculation—use a noticeably larger proportion of starter in your dough than usual. More starter means more yeast carried straight into the mix. (If percentages are new to you, how much starter to use and inoculation percentage walks through the math; for a cold start, nudge toward the higher end.)

    Don’t bother warming or peaking it. You’re deliberately skipping the feed-and-rise, so just scoop the cold starter straight into your water and flour and mix. It’ll come up to temperature inside the dough.

    Keep the dough warm. Warmth is how you buy back the speed you lost. Aim for a cozy spot—dough in the mid-to-upper 70s°F ferments noticeably faster than a cool counter. On a cold day, find the warmest corner of the kitchen.

    Watch the dough, not the clock. This is the rule that saves cold-started loaves. Every timeline you’ve read assumes a freshly peaked starter; yours is slower, so the numbers won’t apply. Ignore them. Judge bulk fermentation by what the dough is doing—a 30–50% rise, a domed, jiggly, bubbly, alive feel—however long that takes. It may run several hours longer than usual. That’s normal. Let it finish.

    Expect a gentler tang. Oddly, a straight-from-the-fridge bake can taste a little milder than you’d think, because you’re not adding the extra acidity of a long room-temp starter rise. Pleasant surprise for the mild-loaf crowd.

    A covered bowl of dough bulk fermenting in a warm spot with a thermometer alongside
    A cold, unfed starter makes a slow dough. Warmth and patience during bulk do the heavy lifting.

    The safer play, if you have a few hours

    Baking cold-and-unfed works, but it will always be a little less predictable than the alternative: give the starter one feed first. Pull the jar out, feed it, and let it come to life at room temperature until it’s bubbly and climbing—often just a few hours for a healthy starter straight from the fridge. Use it when it’s lively (the classic readiness checks still apply—see the float test and better ways to tell it’s ready).

    That single feed turns “I hope this works” into “I know this works,” and it’s the difference between gambling and baking. If your starter lives in the fridge full-time, getting the feeding rhythm right in the first place makes cold bakes far more reliable—our guide to how often to feed a fridge starter is worth a read so it’s always in good shape when you want it.

    Your quick decision guide

    • Strong, mature, fed within a week, pleasant smell, no rush? Use it cold. Up the amount, keep the dough warm, judge by the dough.
    • Neglected, hooch-heavy, harsh smell, young, or on a deadline? Feed it once and wait for it to come alive first.
    • Not sure? Feed it. The few hours you spend are cheaper than a dense loaf and a wasted day.

    Cold starter isn’t fragile and it isn’t off-limits. It just asks you to read it honestly—strength first, temperature second—and then give the dough the time and warmth to catch up. Do that, and a fridge-cold jar can turn out a loaf every bit as good as one off a freshly fed starter.

    Want to see the difference between a starter that’s ready to bake cold and one that needs a feed? We walk through the exact look, smell, and feel—jar by jar—over on the LoafLovers YouTube channel, and our free sourdough troubleshooting guide has a printable readiness checklist you can keep on the fridge. No hard sell, just the answers for the next time you’re standing there with a cold jar and a decision to make.

    Related Reading

  • How to Make a Sourdough Starter From Scratch: What Really Happens Day by Day

    How to Make a Sourdough Starter From Scratch: What Really Happens Day by Day

    Here’s the honest truth that the intimidating corner of the internet won’t tell you: making a sourdough starter from scratch is one of the easiest things in all of baking. You need flour, water, a jar, and about a week of two-minute daily visits. That’s it. There is no secret ingredient, no packet of yeast, no heirloom culture you have to beg from a stranger. The wild yeast and bacteria that make sourdough rise are already in your flour and floating in your kitchen air — your only job is to give them a comfortable home and feed them until they wake up and organize themselves.

    What actually trips people up isn’t the recipe. It’s not knowing what’s supposed to happen on each day — so when the starter does something surprising (and it will, especially around day two), beginners panic, assume they’ve failed, and quit a day or two before it would have come alive. So let’s walk through the whole thing day by day, the way it really goes, so nothing catches you off guard.

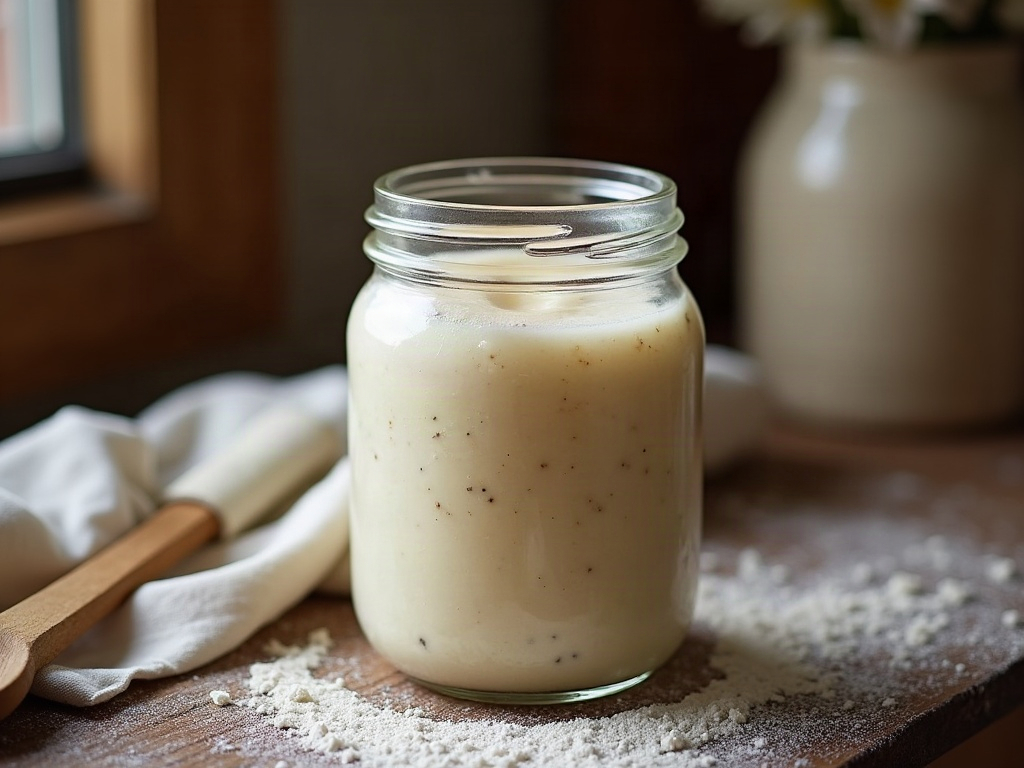
    A clear glass jar of freshly mixed flour-and-water paste on a floured wooden counter beside a wooden spoon
    Day one: just flour and water stirred to a thick paste. This is the entire starting point — no yeast, no magic ingredient.

    What you need (it’s almost nothing)

    Keep it simple:

    • Flour. Plain all-purpose works fine, but a starter wakes up fastest on whole wheat or whole rye — the bran carries more wild microbes and more of the minerals they feed on. A great approach is to begin with whole grain for the first few days, then transition to all-purpose or bread flour once things are lively.
    • Water. Room-temperature, and ideally not straight from a heavily chlorinated tap — chlorine can slow the microbes you’re trying to encourage. If your tap water is chlorinated, letting it sit out or using filtered water helps, as we cover in our guide to whether tap water is hurting your starter.
    • A clear jar (so you can see the bubbles and the rise) and something to stir with. A loose lid or cloth on top — never airtight.
    • A kitchen scale if you have one. Weighing makes feeding consistent and takes the guesswork out, but you can manage with measuring cups if you must.

    Day 1: just mix flour and water

    Combine roughly equal weights of flour and water — about 50 grams of each is plenty — and stir to a thick, smooth paste the texture of pancake batter or wet cement. Scrape down the sides, cover loosely, and leave it somewhere warm-ish (around 21–26°C / 70–78°F is ideal). Then do the hardest part of the whole process: nothing. Walk away for 24 hours. That’s the entire first day.

    Day 2: the big fake-out

    This is the day that fools everyone, so read this carefully. Often around 24 to 48 hours in, your jar erupts with bubbles and puffs up dramatically. It looks like roaring success. It usually isn’t the yeast yet. That early burst is typically from a fast-moving bacterium (leuconostoc) throwing a quick party — a false rise. It’s harmless and actually a good sign that things are alive, but it is not the stable, repeatable rise you’re building toward.

    Stir it down, and feed it: discard about half, then add fresh flour and water in roughly equal weight to what remains. The reason beginners quit here is what comes next — because tomorrow, that exciting bubbling often stops.

    Two starter jars compared: one puffed with large bubbles, one flat and dense
    Left: the day-two ‘false rise’ — big, loose bubbles from the wrong bacteria, not the yeast you want. Right: the quiet stall that follows. Both are completely normal.

    Day 3: the discouraging stall

    Day three is the valley. The jar frequently goes quiet, flat, and sluggish. It might smell sharp, cheesy, or faintly like old socks. Nothing seems to be happening and it’s easy to assume your starter died. It didn’t. What’s really happening is an invisible power struggle: the false-rise bacteria have crashed, the environment is turning acidic, and underneath it all the wild yeast and the good lactic-acid bacteria are slowly taking over. This changeover looks like failure from the outside. Push through it.

    Keep calm and keep to the rhythm. From here on, the routine is the same every day: discard most of the jar, then feed the remainder with equal parts fresh flour and water. If your kitchen is warm and things look active, move to feeding twice a day; if it’s cool and slow, once a day is fine. The daily discard isn’t waste for its own sake — it keeps the acidity from building up too far and keeps the colony young and vigorous (and no, you can’t skip it by just adding more flour; over-feeding without discarding actually dilutes the microbes you’re trying to grow).

    Hands discarding part of a bubbly starter before feeding, with a scale and water jug nearby
    The daily rhythm: discard most of the jar, then feed the rest with equal fresh flour and water. The discard is how you keep the colony young and strong.

    Days 4 to 6: the real rise builds

    Somewhere in this stretch, the starter quietly turns a corner. The smell shifts from funky and sharp to pleasantly sour, tangy, a little yogurty or beery. You’ll start seeing a real rise after each feeding — the jar climbing and filling with a web of bubbles, finer and more even than the day-two chaos. Put a rubber band around the jar at feeding level so you can actually see how far it climbs.

    The pattern you’re watching for is predictability: feed it, and within a handful of hours it rises up toward double, then slowly sinks back down. When it starts doing that on a reliable schedule, you have a working starter. Don’t be surprised if it rises then falls faster than you can keep up at first — if yours balloons and then collapses before you can use it, that’s just a timing issue to dial in, not a failure.

    Day 7 and beyond: is it actually ready?

    Most starters are bake-ready somewhere between day 7 and day 14 — the range is wide because warmth, flour, and your kitchen’s own microbes all change the pace. Don’t bake on the calendar; bake on the behavior. Your starter is ready when it reliably passes these three tests:

    • It roughly doubles within about 4 to 8 hours of a feeding, consistently, several days running.
    • It’s full of bubbles throughout — a light, airy, domed structure at peak, not a flat sludge with a few holes.
    • It smells pleasantly sour, tangy and alive — not like harsh nail-polish acetone or rot.

    A classic final confirmation is the float test: drop a small spoonful of starter at its peak into water, and if it floats, it’s airy enough to raise bread. It’s a handy quick check, though not infallible — we dig into its quirks and better alternatives in our piece on whether the float test really works.

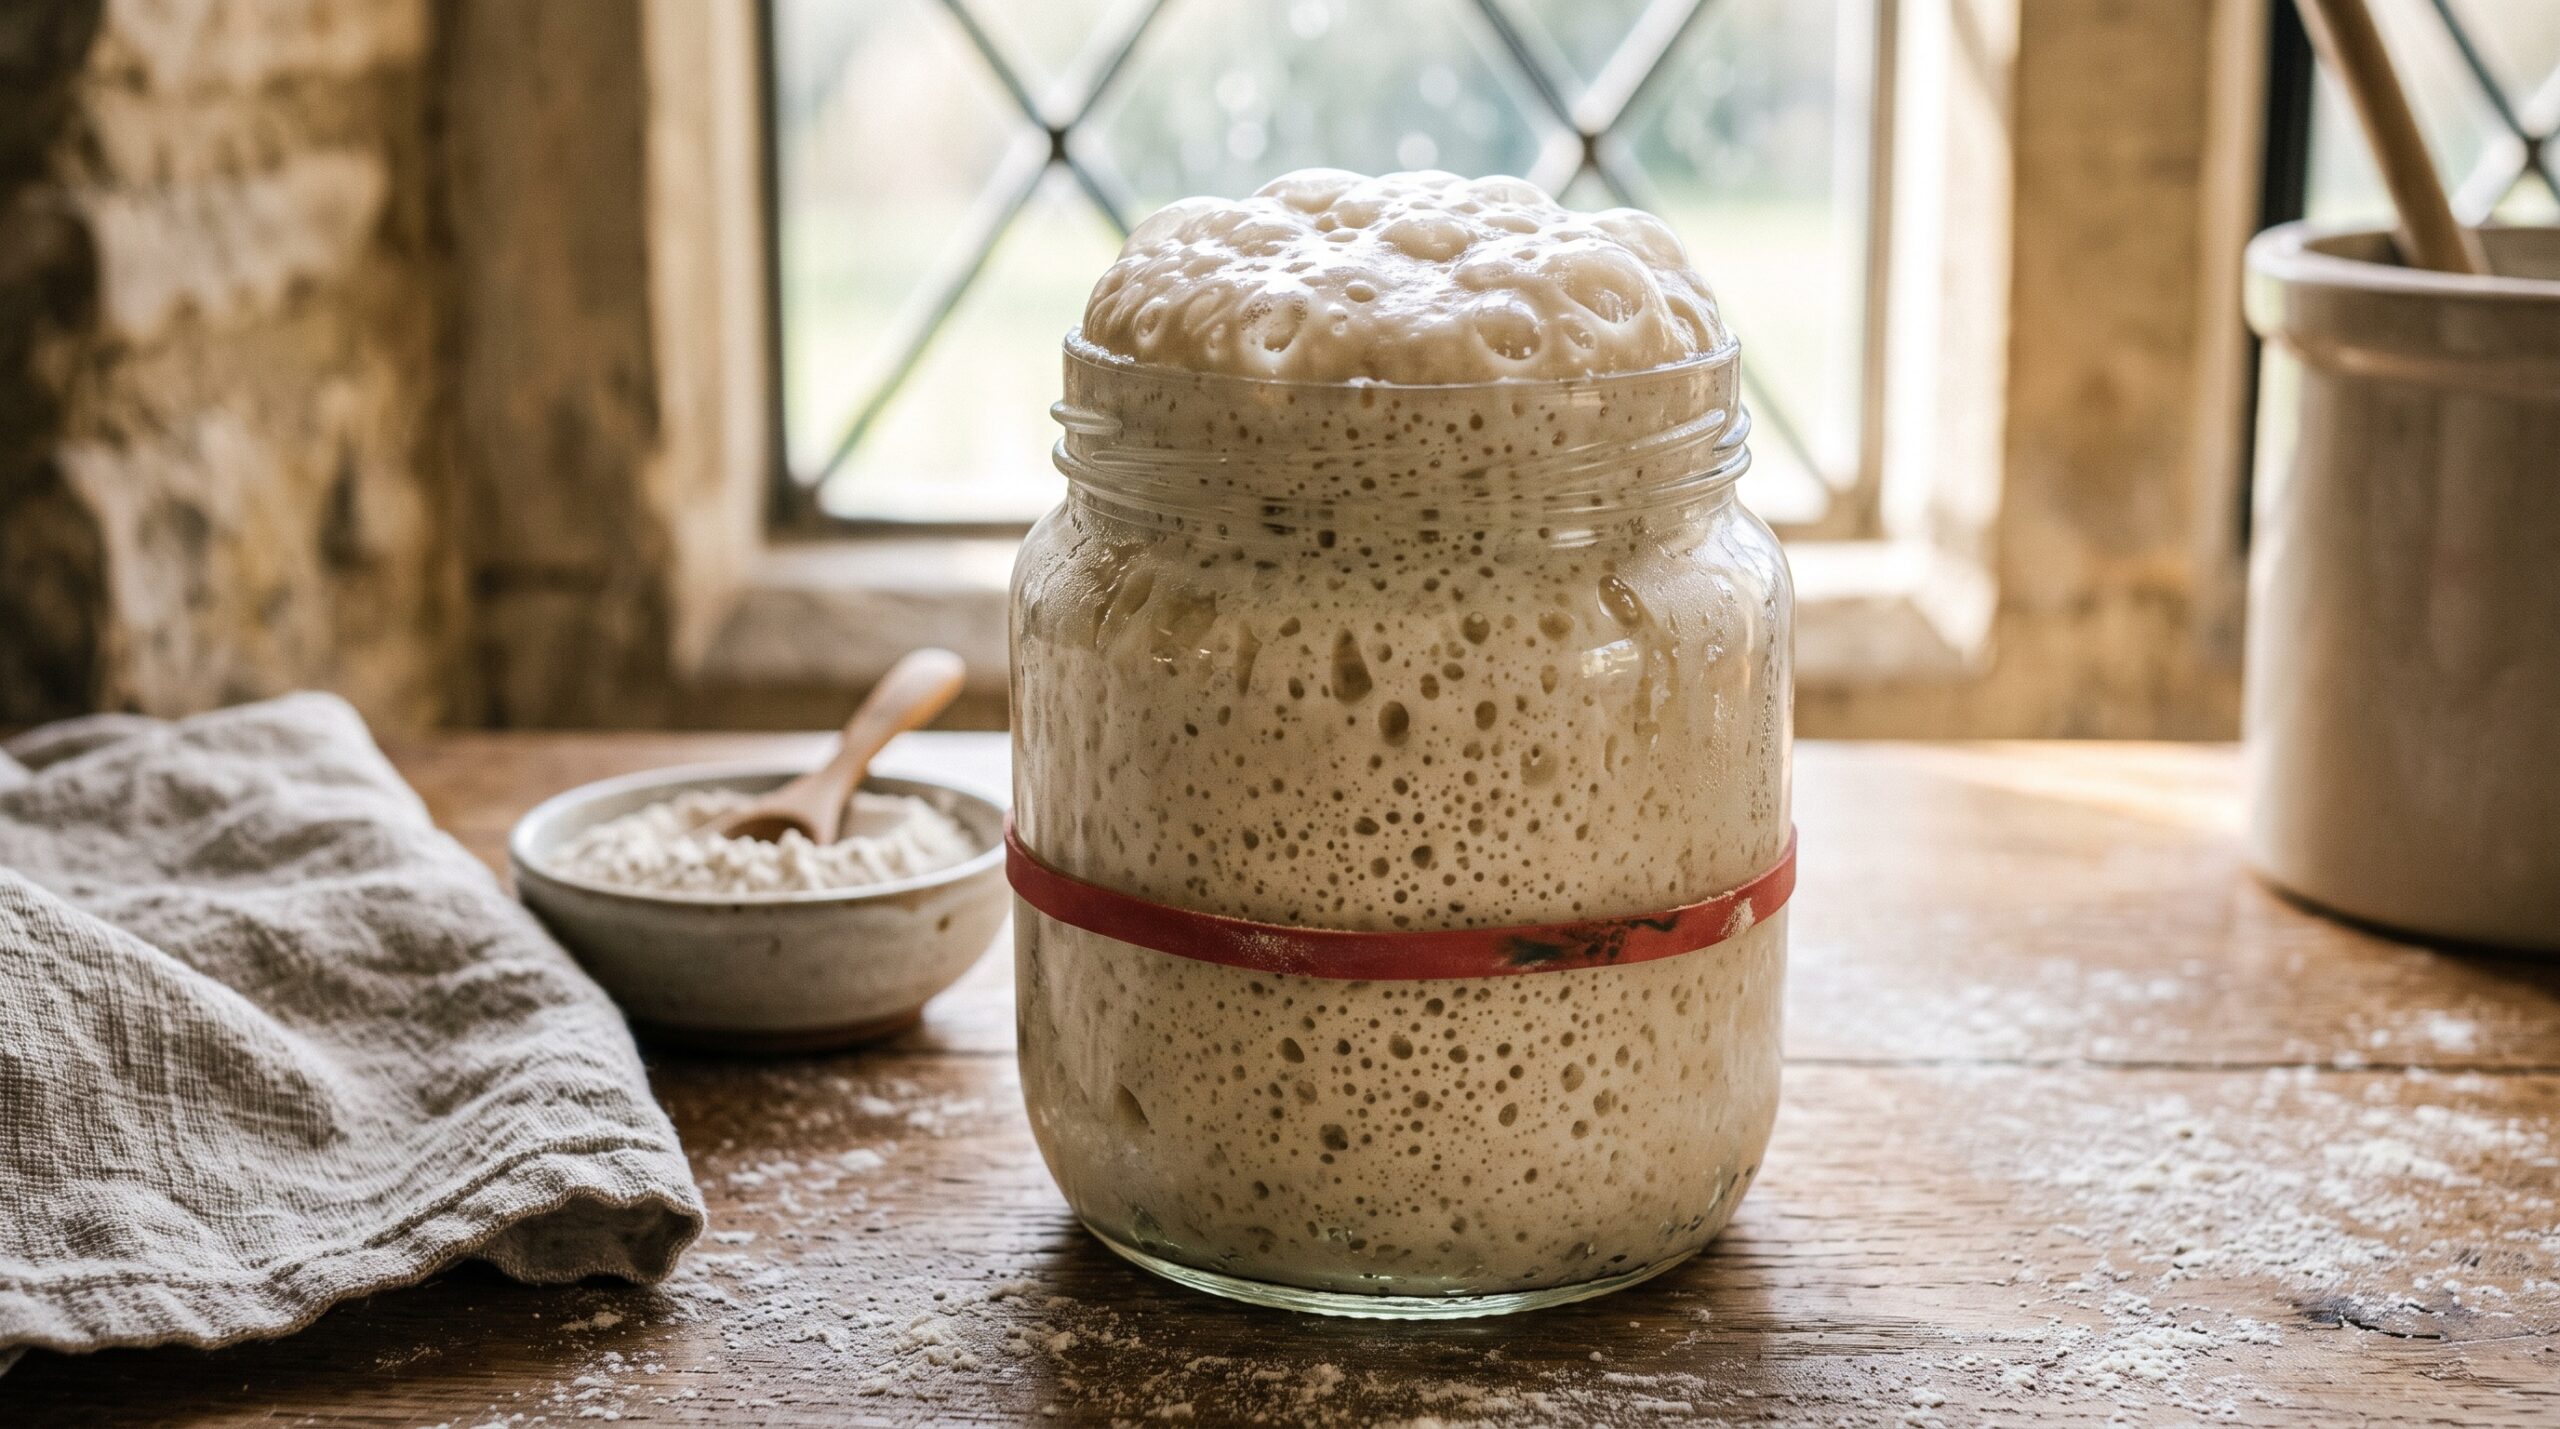
    A mature starter risen to double its height with fine even bubbles, a rubber band marking the start level
    A ready starter: it predictably doubles within a handful of hours after feeding, dome-topped and full of fine, even bubbles. The rubber band makes the rise impossible to miss.

    When it genuinely stalls (and what to do)

    Sometimes a starter gets stuck — days go by with no real rise, even after the day-three valley should have passed. Before you start over, work through the usual culprits:

    • It’s too cold. This is the number one reason. Wild yeast is sluggish below about 20°C/68°F. Find the warmest spot in your home — on top of the fridge, in the oven with just the light on, near a warm appliance.
    • The flour’s too refined. If plain white isn’t getting going, switch to whole wheat or rye for a few feedings to inject more microbes and food.
    • The water’s working against you. Heavily chlorinated water slows things down — switch to filtered or left-out water.
    • You’re feeding too much or too little. Stick to equal-weight feedings with a proper discard and give it a consistent daily rhythm.

    If you’d like a fuller diagnostic walk-through for a stubborn jar, our guide to a starter that won’t rise covers each cause in depth.

    You made life from flour and water

    Once your starter is strong and doubling on cue, maintaining it is almost no work — a healthy starter is remarkably hard to kill. You can keep baking from it daily, or park it in the fridge and feed it just once a week when you’re not baking (more on that in how often to feed a fridge starter). It’ll outlast the jar, honestly — people keep the same starter alive for decades.

    But that’s the maintenance phase. The part you just did — coaxing a living, breathing culture out of nothing but flour, water, and patience — is the small quiet miracle at the heart of every sourdough loaf. The only real skill is holding your nerve through the day-three valley and learning to read the jar instead of the clock.

    If watching it happen would help — the day-two false rise, the stall, the first real climb all look very different in motion than they do described — the full visual walkthrough lives on the LoafLovers YouTube channel, and our free sourdough troubleshooting guide keeps all the starter fixes in one place. Grab it, start a jar today, and in about a week you’ll be baking with something you grew yourself.

    A spoonful of active starter floating in a bowl of water beside a healthy risen jar
    The float test: a spoonful of a ready, airy starter floats. Once your jar doubles reliably and passes this, it’s time to bake.

    Related Reading

  • How to Convert Any Bread Recipe to Sourdough (Without Guessing)

    How to Convert Any Bread Recipe to Sourdough (Without Guessing)

    You already have a bread recipe you love. Maybe it’s your grandmother’s sandwich loaf, the focaccia you make every Friday, or a cinnamon roll dough that never fails. The only problem? It leans on a packet of commercial yeast, and your sourdough starter is sitting right there, bubbling away, wanting a job.

    Good news: you can almost always rebuild a yeasted recipe on your starter. You don’t need a new recipe or a chemistry degree – you need one swap and two numbers. Here’s exactly how to do it without the guesswork that leaves you with a brick.

    The one swap that does the heavy lifting

    At its core, converting a recipe means replacing the commercial yeast with a measured amount of active sourdough starter. The starter is just flour and water carrying wild yeast and bacteria, so when you add it, you’re not only swapping the leavening – you’re adding extra flour and water to the dough. That’s the part most people miss, and it’s why conversions go wrong.

    A reliable starting point: for a standard loaf (roughly 500g of flour), use 100g of active, recently fed starter and remove the yeast entirely. That 100g is made of about 50g flour and 50g water, so you’ll adjust the rest of the recipe to account for it. More on that in a second.

    If your recipe is bigger or smaller, scale the starter to about 20% of the flour weight. It’s a forgiving range – 15% gives a slower, tangier rise; 25% speeds things up a little. You’re not aiming for perfection on the first bake, just a sensible target.

    Why you have to weigh, not measure in cups

    Here’s the honest truth: cup measurements will fight you on a conversion. Starter is a wet, living thing, and when you add 100g of it, you’re adding real water that changes how the dough feels. If you’re working in cups, that water is invisible – you can’t subtract it, so the dough ends up wetter than you expected and you panic-add flour.

    Pull out a kitchen scale and switch the recipe to grams once. It takes ten minutes and it turns conversion from a gamble into arithmetic. Every number below assumes you’re weighing.

    Number one: balance the flour and water

    Since your 100g of starter brought along 50g of flour and 50g of water, subtract those amounts from the recipe so the dough stays the same consistency as the original.

    Say your recipe calls for 500g flour and 325g water. After adding 100g starter, you’d use:

    • Flour: 500g − 50g = 450g
    • Water: 325g − 50g = 275g
    • Starter: 100g
    • Salt: keep it the same (usually ~2% of flour, so ~10g here)

    That keeps the total flour and water right where the recipe wanted them. If your starter is a stiffer one, the flour/water split inside it changes, but 50/50 is correct for the standard liquid starter most home bakers keep. Don’t overthink this – being within 20-30g is plenty close for a happy loaf.

    Number two: throw out the timeline

    This is the part that trips up even experienced yeast bakers. Commercial yeast is a sprinter; your starter is a long-distance walker. A recipe that said “rise 1 hour until doubled” might now take 4 to 8 hours at room temperature, sometimes longer in a cool kitchen.

    So stop baking by the clock and start baking by the dough. Watch for these instead:

    • Bulk rise: the dough should grow by about 50-75% and look puffy and alive, with a few bubbles on the surface – not necessarily fully doubled.
    • Final proof: after shaping, give it a gentle poke. A slow, partial spring-back means it’s ready; an instant bounce means give it more time.

    Enriched doughs (butter, eggs, sugar – think brioche or cinnamon rolls) rise slower still, because fat and sugar slow the wild yeast down. Be patient, or help it along with a warm spot around 25-26°C.

    Handling the dough: fewer muscles, more folds

    Many yeast recipes ask for 8-10 minutes of vigorous kneading. With the long sourdough fermentation, you can relax that. A short mix to bring it together, then a few rounds of stretch-and-fold spaced 30-45 minutes apart during the early bulk rise, will build all the strength you need. The extended fermentation does a lot of the gluten development for you.

    For softer sandwich and enriched doughs, a few minutes of gentle kneading plus the long rise gives the best of both worlds – structure without a workout.

    The fridge is your scheduling superpower

    Because sourdough is slow, you can bend it around your life. Mix in the evening, let it bulk rise overnight if your kitchen is cool, or do the opposite: shape the loaf, then park it in the fridge for 8-24 hours before baking. That cold retard deepens flavor and means you can bake fresh in the morning without being up at dawn feeding a dough.

    This is where converting a recipe actually makes your baking easier, not harder – you trade a rigid two-hour yeast window for a flexible overnight rhythm.

    What to expect from the finished loaf

    Your converted bake will be a close cousin of the original, with a few honest differences: a gentle tang, a slightly more open or rustic crumb, and better keeping quality (sourdough stales more slowly). A sandwich loaf will still be soft; a focaccia will still be airy; cinnamon rolls will still be pillowy – just with more character and a longer, friendlier timeline.

    If your first attempt comes out a touch dense, you almost certainly under-proofed it – the dough needed more time, not more yeast. Next time, let the bulk rise go longer and watch the dough, not the clock.

    Your first conversion, step by step

    1. Convert the recipe to grams and note the total flour and water.
    2. Remove the commercial yeast.
    3. Add active starter at ~20% of the flour weight (100g for a 500g-flour loaf).
    4. Subtract the starter’s flour and water (half each) from the recipe.
    5. Keep the salt the same.
    6. Mix, do a few stretch-and-folds, and bulk rise by feel (50-75% bigger).
    7. Shape, final proof or cold-retard, then bake as the original recipe directs.

    That’s the whole method. One swap, two numbers, and a willingness to let the dough set its own pace.

    Want to see a conversion done in real time – from recipe card to finished crumb – plus the dough cues that are hard to describe in words? The full walkthrough lives on the LoafLovers YouTube channel, and our free sourdough troubleshooting guide covers the fixes for when a bake doesn’t go to plan. Grab it, and bake the recipe you love on the starter you’ve grown.

    Related Reading

  • How Often Should You Feed a Sourdough Starter You Keep in the Fridge?

    How Often Should You Feed a Sourdough Starter You Keep in the Fridge?

    You open the fridge, reach past the leftovers, and there it is: your sourdough starter, looking nothing like the bubbly, living thing you put away. It’s flat. Dense. There’s a greyish liquid sitting on top, and it smells sharp — a bit like old beer or nail polish. Your stomach drops. You’ve killed it. You left it too long, you forgot about it, and now it’s dead.

    Take a breath, because almost certainly none of that is true. A starter you keep in the fridge is supposed to look flat and unimpressive. Cold storage doesn’t kill your starter; it puts it to sleep. The real question — the one that quietly stresses out every home baker — is how often you actually have to feed the thing to keep it healthy. The honest answer is probably far less often than you think.

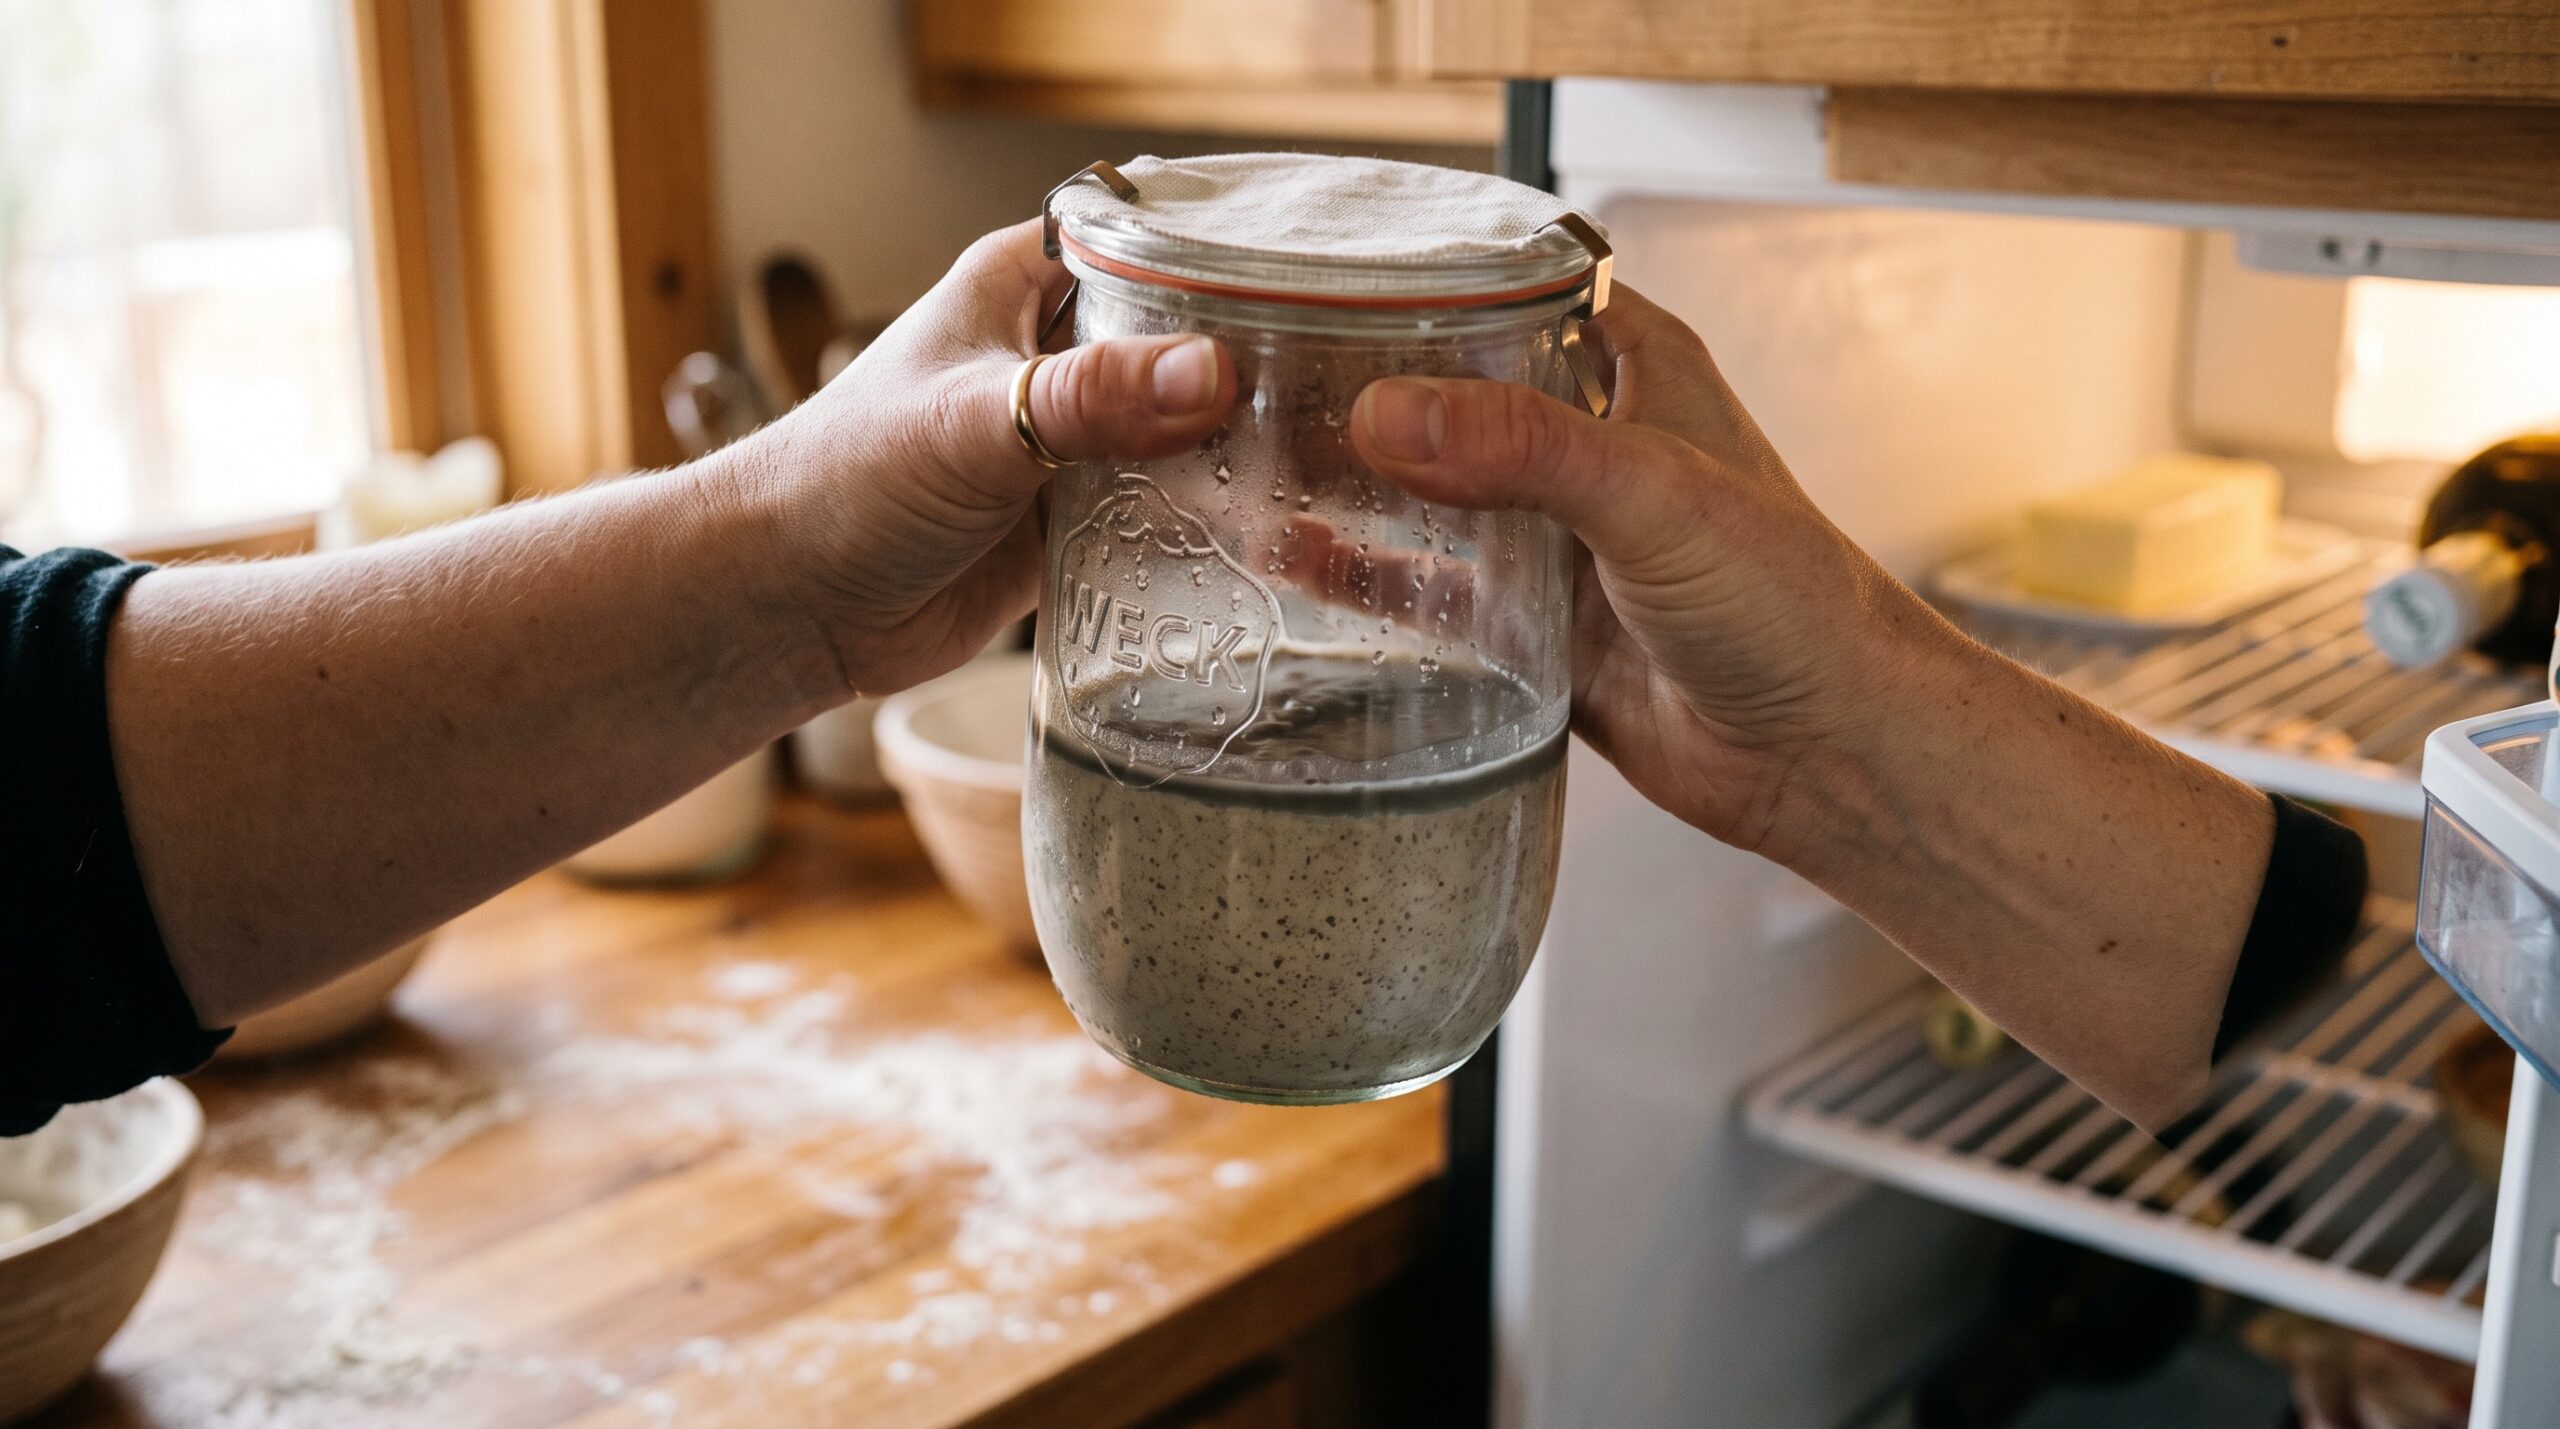
    A hand lifting a jar of flat sourdough starter with grey liquid on top out of the fridge
    Straight from the fridge: flat, dense, a shimmer of grey liquid on top. This is normal, not death.

    What the fridge actually does to your starter

    Your starter is a colony of wild yeast and bacteria, and like any living culture, its activity is driven by temperature. On the counter at room temperature, those microbes are wide awake: eating the flour you feed them, multiplying, and producing the gas that makes the starter rise and fall over a matter of hours. That’s why a counter-kept starter demands feeding once or even twice a day — it burns through its food fast.

    Move it into the fridge and everything downshifts. At around 4°C (39°F), the yeast and bacteria slow to a crawl. They don’t stop entirely — the culture keeps ticking over very slowly — but instead of consuming its food in hours, it now stretches that same meal across days or weeks. The flat appearance isn’t decline; it’s hibernation. The starter is dormant, conserving energy, waiting for warmth and fresh flour to wake it back up.

    Two things do keep happening slowly in the cold, and both are harmless. The bacteria continue making acids, so a fridge starter gets more sour and more acidic over time. And as the culture digests its food and runs low, a layer of liquid — that greyish booze on top, called hooch — can separate out. Neither is a problem. If you want the full breakdown of what that liquid means, we’ve covered hooch on your starter and exactly what to do about it, but the short version is: it’s just a thirsty starter asking to be fed.

    The honest answer: how often to feed a fridge starter

    For a starter you keep in the fridge and bake with regularly, once a week is the comfortable, sustainable rhythm. That single weekly feed keeps the culture well-nourished, keeps the acidity in a healthy range, and means it’s rarely more than a feed or two away from being bake-ready. If you bake most weekends, a Sunday-night feed-and-chill routine is honestly all the maintenance most home bakers ever need.

    But — and this is the part that relieves a lot of anxiety — a healthy, established starter is far tougher than that. It can comfortably go two to three weeks in the fridge without a feed and bounce right back. It’ll be hungrier, more acidic, and will take an extra feed or two to hit full strength, but it is not dead. Many bakers have forgotten a starter for a month or more and revived it without trouble. The fridge buys you an enormous amount of forgiveness.

    So the practical schedule looks like this:

    • Baking weekly: feed once a week, store in the fridge between bakes. Easiest and most reliable.
    • Baking occasionally: feed every one to two weeks, or simply feed it when you take it out to bake and again when you put it away.
    • Not baking for a while: a feed every two to three weeks keeps it in great shape; even a monthly feed will usually keep it alive.

    Notice what matters here: it’s not a rigid clock. A fridge starter is governed by how hungry it is, not by a missed appointment. Which means you need to be able to read it.

    Side by side jars: a flat dormant fridge starter next to the same starter risen and bubbly after feeding
    Same starter, two states: hungry and cold on the left, fed and climbing on the right.

    How to tell your fridge starter is hungry, not dead

    This is the skill that frees you from the calendar. Before you panic about a neglected jar, run through the signs — the overwhelming majority of “dead” fridge starters are simply very hungry.

    Hooch on top. A layer of grey or amber liquid means the culture has eaten through its food and is thirsty. Stir it back in for a more sour result, or pour it off for a milder one, then feed. This is the number-one sign of hunger, not death.

    A sharp, boozy, or acetone-like smell. Vinegary, alcoholic, or nail-polish-remover notes all point to an acidic, underfed starter — again, hunger. A healthy fed starter smells pleasantly tangy and yeasty, a bit like plain yogurt. If yours has drifted into solvent territory after weeks in the cold, that’s normal and fixable. (If it has genuinely been neglected for a long time, our guide to reviving a neglected starter even when it smells like nail polish walks through the full rescue.)

    What actual spoilage looks like. The only real warning sign is mould — fuzzy spots of pink, orange, black, or blue-green growth, often raised and dry-looking rather than the flat liquid of hooch. Or a smell that is genuinely rotten or foul rather than sharp and sour. If you see fuzzy mould, don’t try to save it; start fresh. But this is rare in a regularly used starter, and hooch and a sharp smell are not mould.

    A hand stirring grey hooch liquid back into a jar of sourdough starter with a spoon
    A little hooch? Just stir it back in or pour it off — then feed. It’s hunger, not spoilage.

    Your five-minute weekly maintenance routine

    Here’s the whole ritual, start to finish. It’s genuinely quick once it’s a habit:

    1. Take the jar out of the fridge. No need to let it warm up first for a maintenance feed.
    2. Stir in or pour off any hooch. Your call on sourness.
    3. Discard most of it, keeping only a small amount — a tablespoon or two (roughly 20–50g). Keeping less starter means you use less flour to feed it. If the constant discarding bothers you, you don’t have to waste it; we’ve got a jar’s worth of ideas for what to do with sourdough discard instead of throwing it away.
    4. Feed by weight at a 1:1:1 ratio — equal parts starter, fresh flour, and water (for example 25g starter, 25g flour, 25g water). Stir until smooth.
    5. Back in the fridge. You can chill it straight away, or leave it on the counter for an hour or two to get the fermentation going first if it’s been dormant a long while. Either works for simple maintenance.

    That’s it. Five minutes, once a week, and your starter stays happy indefinitely. And resist the urge to over-correct a hungry starter with a giant feed every time — bigger isn’t always better, as we explain in whether you can over-feed a starter.

    A scale, jar, flour, water and spoon laid out for a weekly fridge starter feeding
    The whole weekly ritual: discard most of it, feed by weight, and it’s back in the fridge in five minutes.

    Waking it up before you bake

    Maintenance feeding keeps your starter alive. But a starter pulled straight from the fridge is cold, sluggish, and not strong enough to leaven a loaf well on its own. Before you bake, you need to wake it up — and this is where the “how often” question meets the “how do I actually use it” question.

    Start the day before you want to bake. Take the jar out, discard down to a small amount, and feed it at room temperature. Give it 4 to 12 hours in the warmth until it’s bubbly and has risen. For a starter that’s been in the fridge a couple of weeks or more, give it two or even three feeds at room temperature, spaced 8–12 hours apart, before you expect full strength. Each feed makes it livelier than the last.

    You’ll know it’s ready to bake when it reliably doubles within 4–6 hours of feeding, is domed and full of bubbles, and smells tangy rather than harshly sour. A spoonful that floats in water is a rough bonus signal. A single feed is often enough if you bake weekly; a longer-neglected starter just needs a little more coaxing. If yours still seems slow and flat after a couple of feeds at room temperature, our rundown of why a starter won’t rise and how to fix it covers the usual culprits.

    A jar of fed sourdough starter risen to a bubbly domed peak with a band marking its rise
    Woken up and at its peak after a feed or two at room temperature — now it’s ready to bake with.

    Going longer: vacations, months away, and when to worry

    Life happens. If you’re away for a few weeks, feed your starter right before you leave, put it in the fridge, and it will almost certainly be fine when you return — hungry and hooch-topped, but alive. For longer breaks of a month or more, you have options: give it one extra-generous feed before leaving (a higher ratio like 1:3:3 gives it more food to live on), or dry some of it out into flakes as backup insurance, which keeps for months in a cupboard and rehydrates easily.

    The thing worth internalising is that the fridge makes starters remarkably resilient, and genuine death is rare. Short of actual fuzzy mould or a truly rotten smell, assume your starter is sleeping, not gone — feed it a few times and give it a chance to prove you right. Nine times out of ten, it will.

    So: once a week if you bake often, every couple of weeks if you don’t, and don’t lose sleep over a missed feed. Your starter is tougher than the anxiety it inspires.

    Want to see what a healthy fridge starter looks like when it wakes up — and the exact feed-and-chill rhythm on video? Our LoafLovers YouTube channel walks through starter maintenance step by step, and you can grab our free sourdough troubleshooting guide for a quick symptom-to-fix cheat sheet to keep by your jar. No hard sell — just the fixes, whenever you need them.

    Related Reading

  • Why Your Starter Rises Then Collapses Before You Can Bake With It

    Why Your Starter Rises Then Collapses Before You Can Bake With It

    You’ve done everything right. You fed your starter, it bubbled up, it doubled, maybe even tripled — a gorgeous domed, living thing. You went to make a coffee, answer an email, deal with the kids. You come back an hour later and it’s… deflated. Sunk in the middle, wrinkled on top, a thin slick of greyish liquid pooling where the dome used to be. It looks exhausted, and you feel a quiet little stab of failure.

    Here’s the first thing to understand, because it changes everything: your starter is not broken. A starter that rises and then falls is a healthy starter doing exactly what it’s supposed to do. The problem isn’t the starter. It’s the timing. You’re showing up to the party after it’s over.

    Let’s walk through why it collapses, how to read the climb, and the handful of adjustments that will let you catch it at the top — reliably, around your actual life.

    The Symptom: A Rise, Then a Sad Little Sink

    A glass jar of sourdough starter risen to a domed, bubbly peak with a band marking the start line
    Peak: domed, webbed with bubbles, and climbing — this is the window you want.

    A well-fed starter goes through a predictable arc. After feeding it’s slack and quiet. Then the yeast and bacteria wake up, start eating the fresh flour, and produce gas. The starter fills with bubbles and climbs — this is the rise. It reaches a high point where it’s full of gas, domed on top, webbed with bubbles, and climbing no further. That’s the peak, and it’s the moment of maximum leavening power.

    A jar of sourdough starter that has risen and collapsed, sunken with a thin layer of liquid on top
    Collapsed: sunken center, slack bubbles, a shimmer of hooch. You missed the top by an hour or two.

    Then, if you leave it, the party winds down. The yeast runs low on fresh food, the gluten structure holding all those bubbles weakens and can’t hold the gas anymore, and the whole thing collapses back down. The surface wrinkles and sinks. Often a layer of liquid — hooch — appears, which is just the starter telling you it’s hungry again. A collapsed starter hasn’t died; it has simply passed its peak and started to come back down the hill.

    The trouble is that if you build your dough with a collapsed, post-peak starter, you’re using it at its weakest. It’ll still work, but you’ll typically get a slower, flatter, denser loaf — because you harnessed the engine after it had already started coughing.

    The Real Cause: You’re Missing a Window That’s Moving Faster Than You Think

    Almost always, a “collapsing starter” is really a timing problem. The peak is a window, not a permanent state — and depending on your conditions, that window can be surprisingly short. Three things decide how fast it comes and goes.

    1. Temperature — the biggest lever by far

    Fermentation is ruled by heat. A starter in a warm kitchen — say 26-28°C / 78-82°F — can rocket to its peak in four or five hours and then collapse quickly after. The same starter in a cool 19°C / 66°F room might take eight to ten hours and sit near its peak far more forgivingly. If your starter seems to peak and crash while your back is turned, a warm kitchen is usually the culprit. Summer sabotages more starters than any other single thing.

    2. Feeding ratio — how much food you give it

    A kitchen scale, flour, water and a jar laid out for feeding a sourdough starter by weight
    A bigger feeding ratio by weight buys you a longer, gentler climb to the peak.

    If you feed a small amount of flour and water relative to the starter you keep (a 1:1:1 feed — equal parts starter, flour, water by weight), there isn’t much food, so it’s devoured fast and peaks quickly. Feed a bigger ratio — 1:3:3, or 1:5:5 — and you’ve handed the microbes a much larger meal. It takes them longer to work through it, so the climb is slower and the peak is both later and more stable. This single change is the most reliable fix for “it collapses before I can use it.”

    3. Starter strength and maturity

    A very vigorous, mature starter moves fast. A younger one may rise more gently. Neither is wrong, but a fast, powerful starter in a warm room is the classic recipe for a peak you keep missing.

    The Fix: Catch It at the Top, On Purpose

    You don’t need a new starter. You need to steer the climb so the peak lands when you’re actually ready. Here’s how, in order of impact.

    Mark the jar and watch the climb — don’t watch the clock. Snap a rubber band or draw a line at the starter’s level right after feeding. Now you can see exactly how high it’s risen at a glance. Peak isn’t a time of day; it’s a visual state: domed, bubbly throughout, and no longer climbing. When it stops going up but hasn’t yet sunk, that’s your moment. For most healthy starters, use it when it’s roughly doubled and the top has just gone from rounded-and-rising to rounded-and-still.

    Feed a bigger ratio to slow it down. If a 1:1:1 feed peaks in four hours and you can’t be there, switch to 1:3:3 or 1:5:5. You’ll stretch the climb out to something you can plan around, and the starter will hold near its peak longer. This is the fix most people are missing.

    Use temperature as a throttle. Want it to peak slower so you can catch it after work? Feed it and leave it somewhere cooler. Want to speed it up for a same-day bake? Put it somewhere warm. You can literally dial your peak time up and down by choosing where the jar sits.

    Time the feed to your schedule, working backwards. This is the mindset shift that fixes everything. Instead of feeding whenever you remember and hoping the peak is convenient, decide when you want to mix your dough and feed backwards from there. If your starter peaks in about six hours at room temperature, feed it six hours before you want to bake. A classic move: feed before bed with a larger ratio in a cool spot so it peaks in the morning, right when you want it.

    If you keep just missing it, use it on the way up. A starter that’s risen most of the way and is still climbing is perfectly usable and very strong. You don’t have to hit the exact summit — just avoid the collapse on the far side. Early is safe; late is weak.

    A Word on the Float Test

    A spoonful of sourdough starter floating in a glass of water during a float test
    The float test is a rough signal, not gospel — watching the jar beats dunking a spoon.

    You’ve probably been told to drop a spoonful of starter in water: if it floats, it’s ready. It’s a handy rough signal — a starter full of gas will float — but it’s not gospel. A collapsing, past-peak starter can still float on trapped bubbles, and a thick, stiff starter can sink even when it’s lively. Treat the float test as a tiebreaker, not the main event. Your eyes on the marked jar will tell you far more than a floating blob ever will.

    The Takeaway

    A starter that rises and then collapses isn’t failing you — it’s thriving and then getting hungry, exactly as it should. The whole game is catching it at the peak: mark the jar, watch the rise rather than the clock, feed a bigger ratio to slow things down, use temperature to steer the timing, and feed backwards from when you actually want to bake. Do that and the collapse becomes irrelevant, because you’ll already have used your starter at its strongest.

    If you’d like to see exactly what a peaking starter looks like versus a collapsed one — the dome, the bubble structure, the moment it tips over — that live, side-by-side comparison is one of the clearest things to watch rather than read, and we walk through it on the LoafLovers YouTube channel. And if timing is your recurring nemesis, grab our free sourdough troubleshooting guide; it includes a simple peak-timing cheat sheet you can tape to the fridge. Your next loaf doesn’t need a better starter. It just needs you to show up at the top of the hill.

    Related Reading

  • Can You Over-Feed a Sourdough Starter? Feeding Ratios, Myths, and the Real Fix

    Can You Over-Feed a Sourdough Starter? Feeding Ratios, Myths, and the Real Fix

    You just fed your starter its morning meal, then walked past the jar an hour later and thought: did I give it too much? Maybe you doubled the flour to be safe, or fed it twice in a panic when it looked flat. Now you are wondering whether you have drowned the poor thing.

    Good news: over-feeding a sourdough starter is one of the most over-worried problems in home baking. The thing bakers call over-feeding is almost always a different, very fixable issue. Let’s untangle what is actually happening in that jar.

    Active bubbly sourdough starter in a glass jar on a floured wooden counter
    A healthy starter is domed and bubbly a few hours after feeding — not drowning in fresh flour and water.

    The short answer: you can’t really over-feed it

    A sourdough starter is a colony of wild yeast and bacteria living in flour and water. When you feed it, you are handing it fresh sugars and starches to eat. You cannot give a colony “too much” food any more than you can over-fill a buffet — the microbes simply eat what they can reach and ignore the rest.

    What people mean by “over-feeding” is really over-dilution: adding so much fresh flour and water relative to the existing starter that you shrink the active population down to a tiny fraction of the jar. The colony is still healthy — there is just less of it per spoonful, so it takes longer to wake up and rise. That looks like a sluggish, disappointing starter, and it gets blamed on “too much food.”

    Feeding is about ratios, not amounts

    The number that matters is the feeding ratio — written as starter : flour : water. A 1:1:1 feed means equal parts of each by weight (say 50g starter, 50g flour, 50g water). A 1:5:5 feed means one part starter to five parts each of flour and water (20g starter, 100g flour, 100g water).

    Here is the key idea: the bigger the flour-and-water numbers relative to the starter, the more diluted the colony, and the longer it takes to peak. So:

    • 1:1:1 — lightly diluted, peaks fast (often 3–6 hours in a warm kitchen). Great when you bake often.
    • 1:3:3 — a middle-ground feed that buys you more hours before it collapses.
    • 1:5:5 or higher — heavily diluted, slow to peak, but stays strong for longer and builds a milder flavor. Useful for overnight feeds or hot kitchens.

    None of these is “too much food.” They are just different clocks. Pick the ratio that matches when you actually want the starter ready.

    Hands feeding a sourdough starter with fresh flour and water
    Feeding is about ratios, not generosity — the flour-to-water-to-starter balance is what matters.

    The real problems people mistake for over-feeding

    Nine times out of ten, the panic comes down to one of these:

    1. Feeding too often. If you feed again before the starter has peaked and started to fall, you keep resetting the clock. The colony never gets the chance to build up numbers, so it always looks weak. This is the single most common cause of a “lazy” starter. Feed on the starter’s schedule — when it has risen and just begun to deflate — not on yours.

    2. Diluting too hard, too often. Big feeds (1:5:5 and up) every few hours never let the population catch up. If your starter is sluggish, try smaller, more concentrated feeds (1:1:1 or 1:2:2) for a couple of days to rebuild strength.

    3. Confusing a full jar with a fed colony. A jar packed to the rim looks “well fed,” but volume is not vigor. A tablespoon of active starter refreshed 1:5:5 is far healthier than a huge jar you top up without ever discarding.

    Under-fed vs over-diluted: how to tell them apart

    Both look sluggish, but the cure is opposite, so read the signs before you act.

    Under-fed (starving) tends to show: a sharp acetone or nail-polish smell, a layer of grey liquid (hooch) on top, and a starter that rises fast then collapses quickly because it burned through its food. Fix: feed sooner and more often, or use a slightly bigger ratio so there is more food to last between feeds.

    Over-diluted tends to show: a mild, almost flat smell, very slow or barely-there rise, and lots of clean fresh flour flavor. Fix: smaller, more concentrated feeds (1:1:1) once or twice a day until it is doming reliably again.

    Comparison of a sluggish flat sourdough starter next to an active domed one
    Left: over-diluted and sluggish. Right: a smaller feed given time to build strength.

    How to choose a ratio that fits your life

    Stop feeding by habit and feed by when you want to bake. Work backward:

    • Baking this afternoon? Give a 1:1:1 or 1:2:2 feed in the morning — it will peak in a few hours.
    • Baking tomorrow morning? Give a 1:5:5 feed before bed so it peaks around dawn instead of at 2 a.m.
    • Not baking for a week? Feed once, let it peak, then park it in the fridge. Cold slows everything down so you can go 5–7 days between feeds.

    Warm kitchens speed everything up, so lean toward bigger dilutions in summer; cold kitchens slow things down, so smaller feeds keep pace in winter.

    Rescuing a sluggish, over-diluted starter

    If you have been giving huge feeds and your starter is limping, here is a three-day reset:

    1. Discard down to a small amount — keep just a tablespoon or two.
    2. Feed 1:1:1 with a warm spot (around 24–26°C / 75–79°F if you can manage it).
    3. Wait for the peak — the point where it has roughly doubled and the domed top just starts to flatten — then feed again 1:1:1. Repeat once or twice a day.

    Put a rubber band at the fill line so you can actually see the rise instead of guessing. Within two to three days most starters bounce back to a reliable, predictable dome.

    Sourdough starter risen to a rubber band mark showing how much it grew
    A rubber band at the fill line turns ‘is it alive?’ into a number you can actually read.

    Quick reference

    • Can you over-feed? No — you can only over-dilute or feed too often.
    • Sluggish and mild-smelling? Over-diluted — use smaller 1:1:1 feeds.
    • Sluggish, sharp/acetone smell, hooch? Under-fed — feed sooner or slightly bigger.
    • Feed on the starter’s clock (at peak-and-just-falling), not the wall clock.
    • Match the ratio to your bake time — small feed for a fast bake, big feed for an overnight one.

    Once you think in ratios instead of amounts, the whole “am I feeding it wrong?” anxiety mostly disappears. Your starter is tougher than it looks — it just wants the right rhythm.

    Want to see exactly what a healthy peak, an over-diluted feed, and a starving starter look like side by side? The full walkthrough lives on the LoafLovers YouTube channel, and our free sourdough troubleshooting guide has the feeding-ratio cheat sheet you can pin to the fridge — grab it and never second-guess a feed again.

    Related Reading